
Note: This article contains affiliate links. If you click on these links and make a purchase, we may earn a small commission at no extra cost to you. This helps support our research and content. Read our full affiliate disclosure here.
If you work with negatives or slides and use a Mac, choosing the right film scanner for Mac matters for preserving detail and making editing painless. A good scanner delivers accurate color, strong resolution, and a workflow that plugs into macOS image apps and batch processes. This guide covers seven shortlisted film scanners that suit Mac users, based on how well they reproduce detail, handle dust and scratches, and integrate with Mac software. Below you will find the top picks and the evaluation criteria we used to assess them, plus practical advice on choosing and using a film scanner with macOS.
Top Picks at a Glance
| Best Overall The best all-around choice for most situations | Plustek OpticFilm 8200i SE |  |
| Best Quality Built to a higher standard if you want something more solid | Epson Perfection V850 Pro |  |
| Best Value The sweet spot between price and what you get | Magnasonic FS71 24MP Film Scanner |  |
| Best Budget The cheapest option that still gets the job done reliably | BEONEGLOBAL ClearScan MINI |  |
| Top Rated A top-rated pick with lots of positive feedback | Epson Perfection V550 |  |
| Most Popular A crowd favorite that many people choose with confidence | KODAK SCANZA Film Scanner |  |
| Best Seller A high-volume bestseller chosen again and again | KODAK Slide N Scan |  |
Plustek OpticFilm 8200i SE

| Scanner Type | Photo |
|---|---|
| Connection Type | USB |
| Resolution | 7200 dpi |
| Color Depth | 48 bits |
| Media Type | Negatives, Photo, Slide |
The Plustek OpticFilm 8200i SE is a desktop 35mm negative and slide scanner aimed at photographers who want high-resolution archival scans. It scans at up to 7200 dpi with a 48-bit color depth and includes an infrared channel for detecting dust and scratches so many defects can be removed automatically during scanning. The scanner bundles Plustek QuickScan and SilverFast SE Plus software and supports multi-exposure capture for improved dynamic range, which helps retain shadow and highlight detail in older or high-contrast negatives. Connection is via USB and drivers are available for macOS as well as Windows, making it suitable for a Mac-based workflow when paired with the bundled software. Practical limitations are its single-film carriage workflow and the need for some learning with SilverFast to get the best results; it is not a fast sheet-fed scanner for bulk consumer snapshots but rather a quality-focused unit for careful, frame-by-frame scanning.
Best for: Photographers and hobbyists who prioritize image quality and archival detail when digitizing 35mm negatives and slides and who are willing to work frame-by-frame to get the best scans.
Less Ideal for: Users who need high-throughput batch scanning or a plug-and-play solution for hundreds of casual snapshots without investing time in scanning software.
- Very high optical resolution up to 7200 dpi for detailed 35mm scans
- Built-in infrared dust and scratch detection (iSRD) reduces retouching
- 48-bit color depth and multi-exposure support for better dynamic range
- Bundles SilverFast SE Plus and QuickScan software for advanced image control
- Mac and Windows driver support for integration into Mac workflows
- Single-frame scanning is relatively slow compared with batch-capable scanners
- Getting optimal results requires time to learn SilverFast software and settings
Verdict: Choose the 8200i SE if you need a Mac-compatible, high-resolution 35mm scanner that focuses on image quality and defect removal rather than speed.
Epson Perfection V850 Pro

| Scanner Type | Photo |
|---|---|
| Connection Type | USB |
| Resolution | 9600 |
| Color Depth | 48 bits |
| Optical Sensor Technology | CCD |
The Epson Perfection V850 Pro is built for photographers and archivists who need high-quality scans of prints, negatives, and slides. It uses a dual-lens CCD system with up to 6400 dpi optical resolution for film and a 9600 dpi specification for flatbed scanning, combined with a 4.0 Dmax to preserve shadow detail and smooth tonal gradations. ReadyScan LED lighting and included film holders let you batch-scan 35mm, medium and large-format film without warm-up time, and Digital ICE technology reduces dust and surface scratches during capture. The scanner connects over Hi-Speed USB 2.0 and supports both Windows and macOS, and the bundled hardware and scanning controls give precise color depth (48-bit) and restoration options. Trade-offs are its substantial desktop footprint and weight compared with consumer compact scanners, and professional workflows may require time to learn the scanning software and to handle optional accessories such as the fluid mount separately. For anyone prioritizing maximum film detail and robust image restoration, the V850 Pro delivers the performance expected in a studio environment.
Best for: Photographers and archivists who demand maximum film detail and advanced image restoration for studio-quality digital archives on macOS or Windows.
Less Ideal for: Casual users who need a compact, lightweight scanner for occasional snaps or those who prioritize portability over maximum image fidelity.
- High optical resolution for film scanning (6400 dpi) that captures fine detail
- 4.0 Dmax tonal range preserves deep shadow detail and smooth gradations
- Dual-lens CCD system and ReadyScan LED allow fast, high-quality scans without warm-up
- Digital ICE image restoration removes many dust and scratch defects during scanning
- Includes film holders for 35mm, medium and large-format batch scanning
- Large and heavy desktop unit that requires dedicated workspace
- Hi-Speed USB 2.0 connectivity is slower than modern USB 3.0 alternatives
Verdict: Choose the V850 Pro when you need studio-grade film and photo scans with top-tier resolution and image-restoration tools.
Magnasonic FS71 24MP Film Scanner
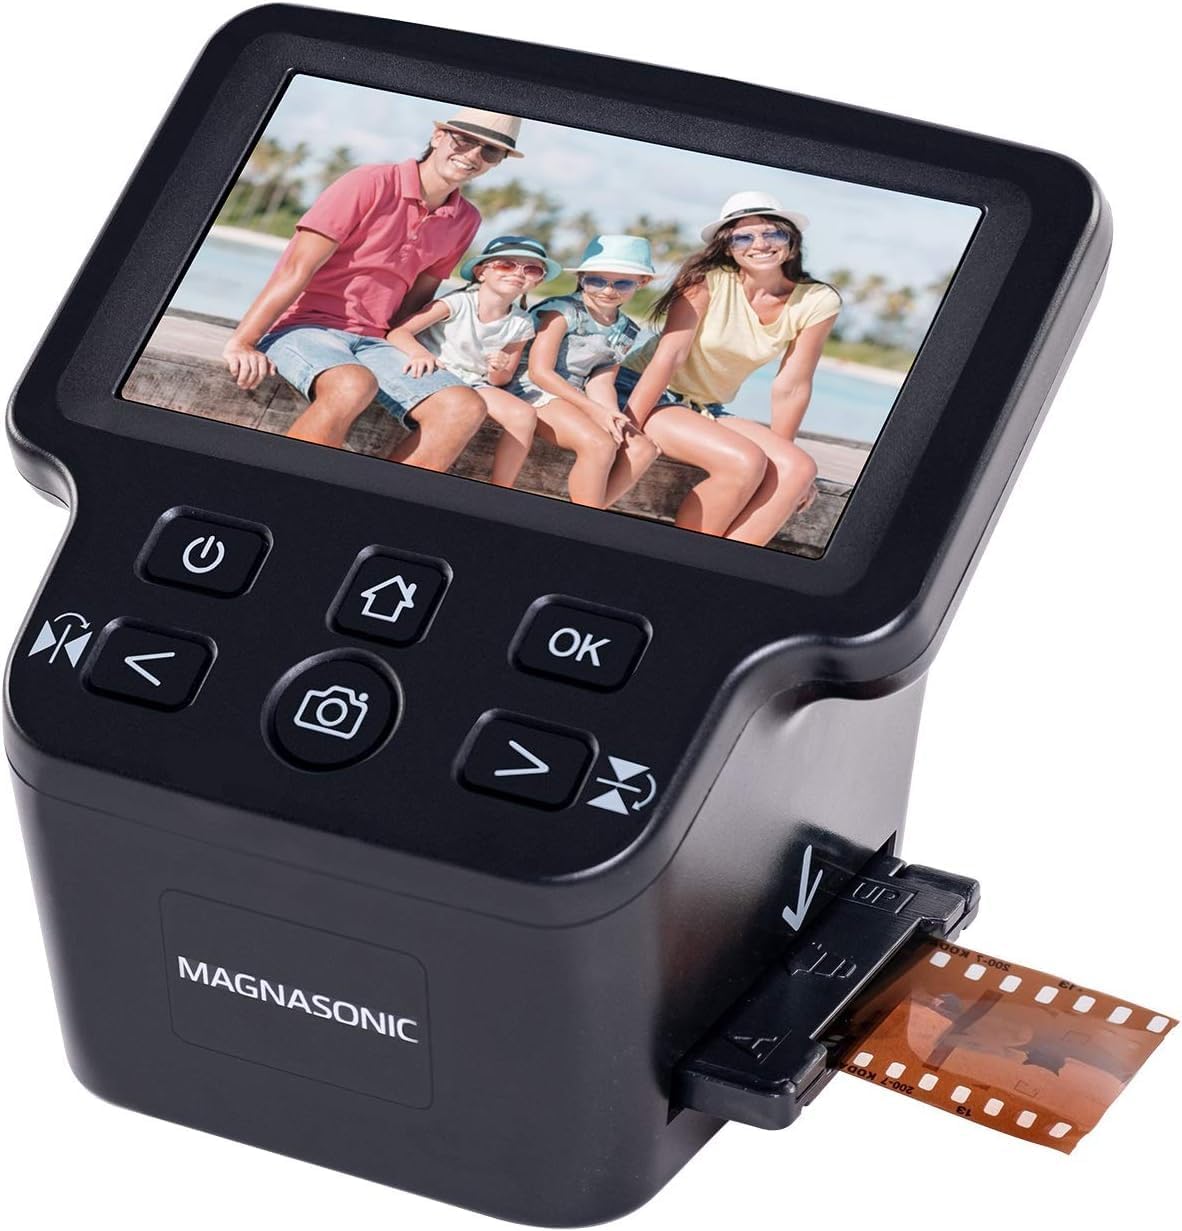
| Resolution | 24MP (interpolated) / 16MP sensor |
|---|---|
| Display | 5" TFT LCD |
| Film Types | 35mm, 126, 110, Super 8; 135/126/110 slides |
| Connection Type | HDMI, USB |
| External Memory Card | SD up to 128GB |
The Magnasonic FS71 is an entry-level all-in-one film and slide scanner designed to digitize 35mm, 126, 110, and Super 8 film plus 135/126/110 slides without a computer. It captures images at an interpolated 24MP (native 16MP) and delivers scans in roughly 3–5 seconds each using the included film and slide inserts. You can preview and adjust brightness and basic RGB color on the large 5" TFT LCD, mirror or flip frames, and save finished JPEGs directly to an SD card (up to 128GB) or transfer files via USB. An HDMI output lets you display scans on a TV for group viewing. Practical benefits are speed and convenience: simple controls, quick single-pass scanning, and no required editing software make it well suited for bulk conversion of family archives. Limitations include reliance on interpolation for the 24MP claim, fixed focus optics, and basic color control compared with dedicated flatbed scanners or software-driven workflows, so serious restorers may prefer a computer-based solution for fine-tuned corrections.
Best for: Buyers who want a straightforward, time-efficient way to digitize boxes of small-format film and slides without fuss or a heavy editing workflow, especially if they prioritize speed and simplicity.
Less Ideal for: Users seeking professional-grade restoration, maximum native resolution, or advanced color and dust/scratch removal should look at computer-driven scanners and software instead.
- Supports multiple film types including 35mm, 126, 110 and Super 8 for broad format coverage
- Fast single-pass scans (about 3–5 seconds) for quick conversion of large collections
- Large 5" LCD plus HDMI output enables on-device previewing and TV slideshow viewing
- Save directly to SD card up to 128GB or transfer via USB without needing a PC
- Image resolution relies on interpolation from a 16MP sensor rather than native 24MP capture
- Fixed-focus lens and limited onboard editing mean less control than computer-based scanning workflows
Verdict: If you need a fast, no-computer way to convert mixed small-format film and slides into viewable JPEGs, the FS71 gets the job done with minimal effort.
BEONEGLOBAL ClearScan MINI

| Scanner Type | Film |
|---|---|
| Connection Type | USB |
| Resolution | 16 Megapixels |
| Color Depth | 24 bits |
| Media Type | SD Card |
The ClearScan MINI is a small, standalone film scanner designed to digitize 35mm and 126/135 slides and negatives quickly and with minimal fuss. It uses a 1/3" CMOS sensor and produces up to 16MP interpolated JPEG images that you can save directly to an SD card in seconds or transfer to a computer over USB. The front-facing controls and 2.31" LCD make one-touch scanning and basic edits like brightness, color adjustment, rotation, and flipping easy without a computer. Its compact, lightweight design and included film holder, brush, and cables make it convenient for occasional batch scanning at a budget price. Important limitations are the reliance on JPEG output only, no built-in large memory, and basic interpolation rather than native high-resolution output, so advanced users seeking professional-grade capture or RAW files will find it short on controls and fidelity. For casual users wanting an affordable way to preserve and share family slides and negatives, it balances speed and simplicity well.
Best for: Mac users on a tight budget who want a simple, no-fuss way to convert old 35mm and 126/135 slides or negatives into shareable digital photos.
Less Ideal for: Photographers or archivists who need RAW output, high dynamic range, or advanced color control for professional restoration work should consider higher-end scanners.
- Fast, one-touch scanning that saves directly to an SD card for quick batch digitizing
- Compact, lightweight design that is easy to set up and store
- Built-in editing controls on the unit for basic color, brightness, rotate and flip without a computer
- Outputs only JPEG files with no RAW option or advanced capture controls
- Interpolation is used to reach 16MP rather than native sensor resolution
- No large built-in memory; requires an SD card (not included) for storage
Verdict: If you want an inexpensive, compact scanner that quickly turns 35mm and 126/135 film into ready-to-share JPEGs with minimal setup, the ClearScan MINI is a practical pick.
Epson Perfection V550

| Scanner Type | Photo, Text, Document, Film |
|---|---|
| Connection Type | USB |
| Resolution | 6400 dpi |
| Color Depth | 48 bpp |
| Light Source Type | LED |
The Epson Perfection V550 is a flatbed scanner aimed at photographers and hobbyists who need high-resolution scans of photos, slides and negatives as well as routine document capture. It provides up to 6400 dpi optical resolution with a built-in transparency unit for 35mm film and slides, and ReadyScan LED illumination for fast scans without warmup. Digital ICE and Easy Photo Fix help reduce dust, scratches and color fade on old film, while auto edge detection separates multiple photos placed on the platen. The scanner connects via USB and includes ABBYY FineReader Sprint OCR to convert scans into editable text. In practice the V550 produces detailed, color-rich scans and is useful for batch scanning small film strips or multiple prints at once, though working at the highest resolutions can be slow and creates large files. Setup and software are straightforward on Windows, but Mac users may need to download some utilities. If you want reliable, archival-quality scans from film or prints without a steep learning curve, this is a practical choice.
Best for: Buyers who prioritize dependable, consistent film and photo scans for archiving or hobby projects and want built-in restoration tools to simplify cleanup.
Less Ideal for: Users who need a portable or ultra-fast production scanner for large-volume professional work or who must scan medium/large format film regularly.
- High 6400 dpi optical resolution for detailed enlargements
- Built-in transparency unit for scanning 35mm slides, negatives and film
- Digital ICE and Easy Photo Fix reduce dust, scratches and faded colors
- ReadyScan LED provides fast scans with no warmup
- Includes ABBYY FineReader Sprint OCR for editable text conversion
- Highest-resolution scans are slow and produce very large files
- Some software components require downloads for Mac
- Bulk scanning larger film formats beyond 35mm is not supported
Verdict: Choose the V550 if you want a reliable flatbed that delivers high-resolution film and photo scans with built-in restoration tools for home archiving.
KODAK SCANZA Film Scanner

| Connection Type | HDMI, USB |
|---|---|
| Resolution | 14MP (interpolated to 22MP) |
| Color Depth | 24 bpp |
| Media Type | Negatives, Slide |
The KODAK SCANZA is a purpose-built film-to-JPEG scanner aimed at quickly converting a range of film formats into viewable digital images. It uses a 14MP sensor with optional interpolation to 22MP, a tilt-adjustable 3.5-inch LCD for previewing and basic editing, and numbered adapter trays to guide fast feeding of 35mm, 126, 110, Super 8 and 8mm film. Scans save directly to an SD card (up to 128GB) and you can also connect to a Mac or PC over USB or view output on a TV via HDMI. Practical benefits include simple one-touch capture, on-device gallery and RGB/resolution adjustments, plus included cables and a cleaning brush. Limitations are that it is a camera-style film scanner rather than a flatbed, so highly critical archival scans will not match professional drum or high-end flatbed results, and Super 8 is converted to still frames rather than video. The unit also auto-powers-off after 10 minutes of inactivity which can interrupt long batch sessions without attention.
Best for: Buyers who want an easy, standalone way to digitize family negatives and slides at home and value straightforward setup, clear on-device previews, and broad format support.
Less Ideal for: Photographers or archivists seeking museum-quality archival scans, high dynamic range, or native Super 8 video capture should look at higher-end flatbed or telecine options.
- Supports multiple film formats including 35mm, 126, 110, Super 8 and 8mm
- Saves scans directly to SD card and offers USB plus HDMI output for easy transfer or TV preview
- 3.5-inch tilt LCD with basic editing and gallery makes on-device review and adjustments simple
- Includes adapters, cables and a cleaning brush for out-of-box scanning
- Not a flatbed scanner so image quality and dynamic range fall short of professional archival scanners
- Super 8 is captured as still images, not motion video
Verdict: If you need a simple, all-in-one unit to quickly convert a variety of film formats into usable JPEGs with on-device preview and easy outputs, the SCANZA is a practical home-focused choice.
KODAK Slide N Scan
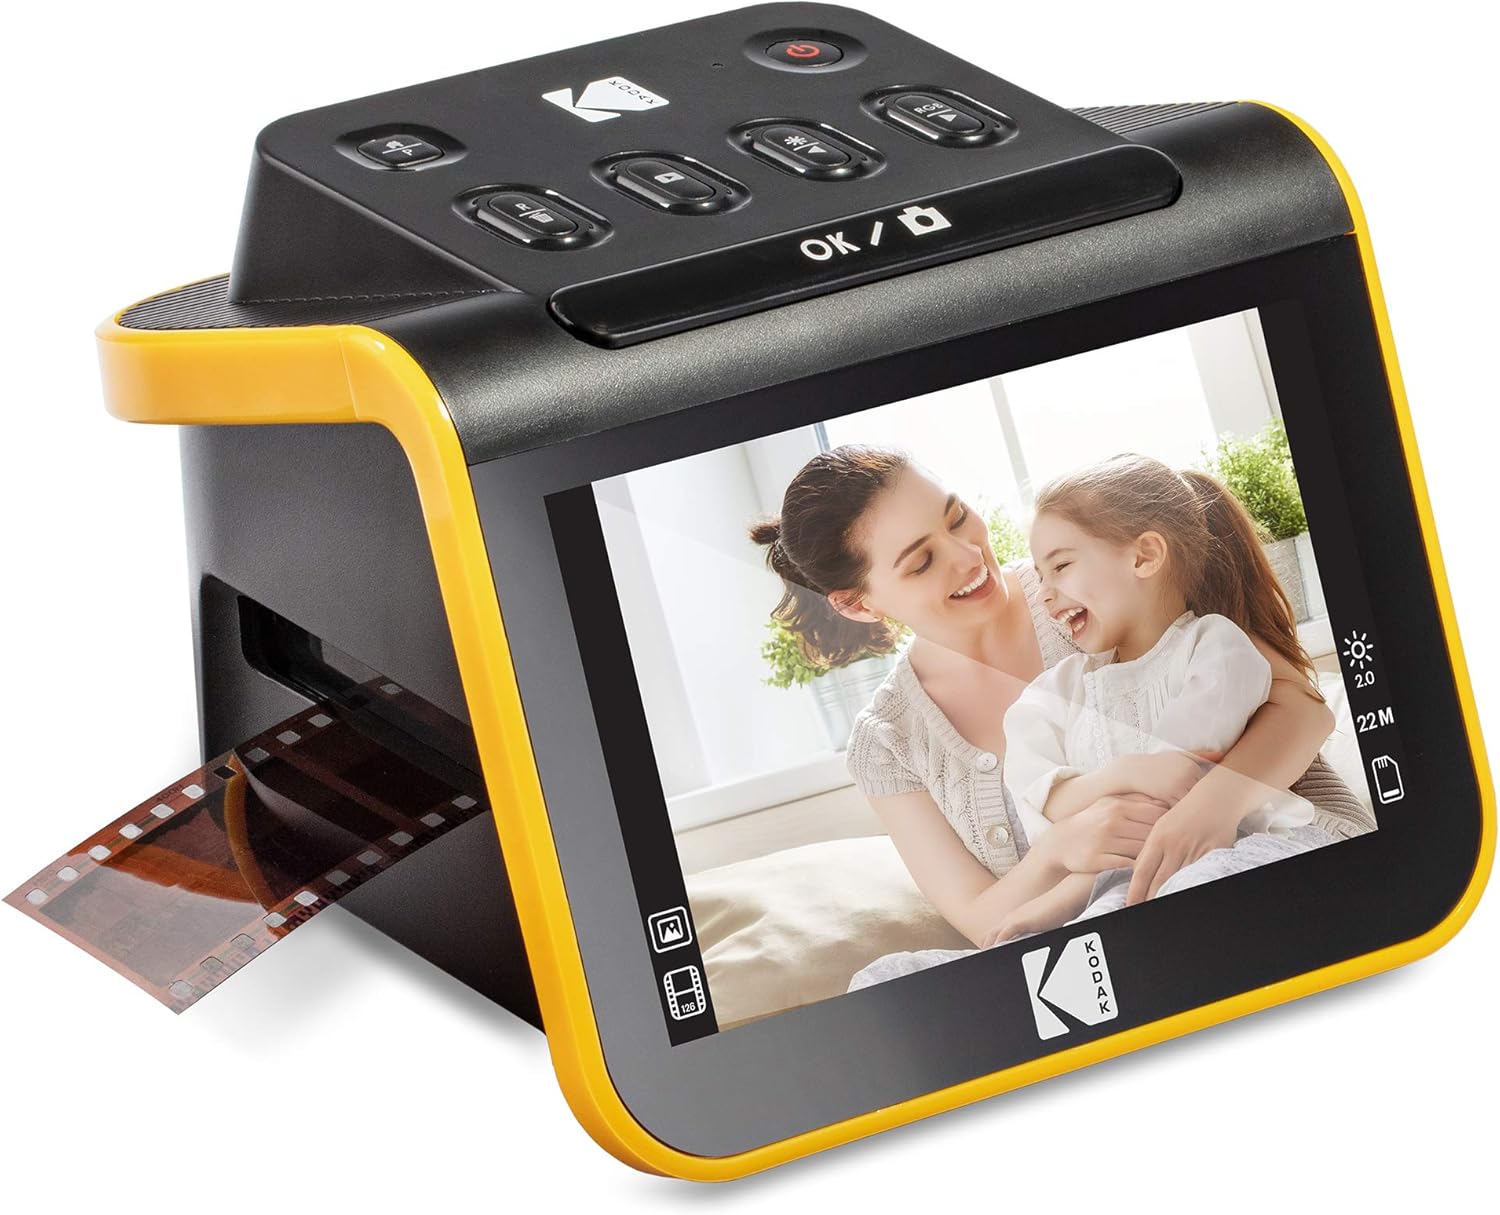
| Resolution | 13MP/22MP (interpolated) |
|---|---|
| Image sensor | 13-megapixel CMOS |
| Connection Type | HDMI, USB |
| Media Type | Negatives, Slide |
| SD support | SD/SDHC up to 32GB |
The KODAK Slide N Scan is a plug-and-play film and slide scanner aimed at making legacy negatives and slides easy to digitize without a computer. You load strips or slides into the quick-feed tray or use the included adapters, preview images on the large 5" LCD, then scan to an SD/SDHC card in either 13MP or interpolated 22MP resolution. The unit offers simple onboard editing like color/brightness adjustments and date stamping, and it can connect to a Mac or PC over USB-C or display to a TV over HDMI for reviewing scans. Practical benefits include the continuous-loading tray for faster batch work, the clear preview screen for quick quality checks, and straightforward operation that does not require special software. Important limitations are the reliance on an SD card (not included) for standalone operation, interpolation for the 22MP mode rather than native higher-res capture, and basic editing controls that are no substitute for desktop photo software. For cautious buyers wanting a simple, self-contained way to preserve slides and common film formats, it delivers reliable, easy results.
Best for: Buyers who want a low-fuss, reliable way to convert family slides and common negatives to digital files without wrestling with complex software, and who prioritize straightforward operation and previewing over advanced capture controls.
Less Ideal for: Photographers seeking maximum native resolution, professional color grading, or workflow integration that depends on advanced desktop scanning software should look at higher-end scanner options.
- Large 5" LCD preview makes checking scans immediate and easy
- Quick-feeding tray and adapters support continuous scanning of slides and multiple film formats
- Saves JPG files directly to SD/SDHC card for simple, camera-like workflow
- USB-C and HDMI outputs allow direct connection to a Mac or TV for transfer and review
- 22MP mode is achieved via interpolation rather than native sensor resolution
- Requires an SD card to operate as a standalone device and one is not included
- Onboard editing is basic compared with desktop photo software
Verdict: A simple, self-contained scanner that makes digitizing 35mm/110/126 negatives and 50mm slides quick and accessible for Mac users who want an easy, no-software workflow.
Choosing the Right Film Scanner for Mac: Key Factors to Consider
Optical Resolution and Sensor Type
Higher optical resolution lets you capture fine grain and preserve detail for large prints or aggressive cropping. Look at the scanner's stated optical resolution and the underlying sensor technology because interpolated numbers can be misleading.
A true optical sensor with a dedicated film scanning optical path will outperform aggressive software upscaling when you need to extract maximum detail from 35mm and medium-format originals. If you plan to make large enlargements or perform heavy retouching, prioritize scanners with higher native resolution and proven resolving power.
Color Depth and Dynamic Range
Color depth, usually expressed in bits per channel, determines how many subtle tonal gradations the scanner records. Higher bit depth helps preserve shadow and highlight transition and gives more headroom for color grading on your Mac.
Dynamic range matters when scanning high-contrast negatives. A scanner with better dynamic range captures more detail in both shadows and highlights, reducing the need for extreme adjustments later. For film work intended for print or archival storage, favor devices that offer 48-bit or comparable high-bit scanning modes.
macOS Compatibility and Software Workflow
A scanner that integrates cleanly with macOS saves time and avoids driver headaches. Check for native macOS drivers, support for current macOS versions, and scanning software that exports to common formats or works with macOS image editors.
Workflow features like batch scanning, tethered capture, and straightforward color management profiles are important for efficiency. Scanners that produce files easily imported into your Mac editing pipeline will reduce friction and speed up large digitization projects.
Film Format Support and Holders
Different projects use different film sizes. Confirm that the scanner supports the formats you use most often, whether 35mm strips, mounted slides, or medium-format sheets. Quality film holders keep film flat and properly aligned, which impacts sharpness and consistency.
Interchangeable holders, or well-designed multi-format trays, make batch work smoother and reduce the risk of uneven scans. If you expect to scan both slides and negatives regularly, choose a scanner with the appropriate included or optional holders.
Dust Removal and Image Restoration Features
Film scanning often requires removing dust, scratches, and other defects. Built-in infrared dust detection or automated scratch removal reduces manual retouching time and delivers cleaner scans straight from the scanner.
Software-based restoration tools can help, but hardware-assisted dust detection tends to be more effective for heavy shooting conditions. Factor in how much post-scan cleanup you are willing to do and whether the scanner's restoration tools match that expectation.
Throughput and Ergonomics
Throughput matters if you have many rolls to digitize. Consider how fast the scanner completes a single frame or a batch and whether the device supports unattended batch runs. Simpler loading, intuitive controls, and reliable film guides all increase effective throughput.
Ergonomics also includes how files are delivered to your Mac. Scanners that save directly to a connected computer, allow preset profiles, or offer simple one-button batch starts will make longer projects far less tedious.
Preparing Film for Scanning
Proper preparation reduces scanning time and improves results. Use a blower brush and lint-free gloves to remove loose dust before placing film in holders. Allow film to reach room temperature after storage to minimize static cling.
Handle negatives by the edges and keep mounts and holders clean. For older or fragile film, consider using archival cleaning solutions and work in a low-dust environment to avoid introducing scratches during handling.
- Clean hands or wear nitrile gloves to avoid fingerprints
- Use a gentle air blower rather than canned air to remove dust
- Inspect holders for debris before loading film
Optimizing Scanner Settings for Mac Workflows
Match resolution and bit depth to the intended use. For web or small prints, moderate resolution and 24-bit color may be sufficient. For archival or large prints, scan at higher optical resolutions and 48-bit color where available.
Save master files in a non-destructive format that your macOS editing tools handle well. Consider a two-file workflow: a high-resolution archival file and a smaller, edited derivative for sharing.
- Use the scanner's native driver settings when possible for color accuracy
- Enable dust removal if you prefer less manual retouching
- Batch similar exposures together to apply consistent corrections
Color Management and Profiling
Consistent color starts with a calibrated monitor and a color-managed workflow on your Mac. Use ICC profiles and ensure the scanning software supports profile embedding. Calibrate your display and check scans under neutral lighting when making color decisions.
If you scan negatives, expect to invert and adjust color during conversion. Some scanners or software provide film-specific profiles or curve presets that can speed initial corrections. Treat those as starting points and fine-tune based on your film stock and creative intent.
- Calibrate your Mac display regularly
- Embed ICC profiles in archival files
- Create custom presets for commonly used film stocks
Storage and File Organization
Establish a consistent naming and folder structure before you start a large scan job to avoid confusion. Include date, film type, and frame number in file metadata when possible. Maintain both a working folder and an archival repository.
Back up scanned masters using at least one offsite or cloud copy in addition to a local archive. Proper metadata and backups preserve provenance and save time when searching for specific frames later.
- Use standardized filenames and include key metadata
- Keep a separate folder for edited derivatives
- Regularly verify backups and replace failing media
Common Problems and Quick Fixes
Light leaks, uneven exposure, and focus issues can show up in scans. Recheck film holders for flatness, and rescan at higher optical resolution if detail appears soft. For color casts, try creating custom white balance presets or using film-specific correction curves.
If dust or scratches persist, use the scanner's infrared dust map if available, then finish with local retouching in your Mac image editor for stubborn defects. For heavy color fading, consider incremental adjustments across multiple passes rather than extreme single-step corrections.
- Rescan with improved holders if frames appear soft
- Use incremental adjustments rather than extreme color shifts
- Apply localized retouching for small persistent defects
How We Chose the Best Film Scanner for Mac
We selected candidates by prioritizing factors that matter to photographers who digitize negatives and slides on macOS. Core evaluation criteria included optical resolution and scanner sensor design to judge how much detail a scanner can capture, and color accuracy and bit depth for faithful tonal reproduction and post-processing latitude. We also assessed macOS compatibility and software workflow, looking for reliable drivers, easy batch import into common Mac apps, and support for color correction or raw scanning where available. Additional filters included physical film format support to ensure the scanners handle the common negative and slide sizes photographers still use, and dust and scratch mitigation features such as infrared dust removal or strong optical warranties. We gave weight to build quality and input/output ergonomics because frequent scanning benefits from robust film holders and straightforward controls. Exclusions: devices that lack native Mac support, units intended only for casual phone-style scanning, or specialized industrial scanners outside typical photographer budgets were not considered. The result is a focused selection of scanners that balance image fidelity, practical macOS workflows, and durable hardware suitable for ongoing digitization projects.
Our full evaluation process is outlined in our review methodology.
FAQ
Do I need special software on my Mac to scan film?
It depends. Many scanners include macOS-compatible drivers and scanning apps, but advanced color control and batch workflow may require third-party image software. Check that the scanner supports current macOS versions and can export files your editing apps accept.
What resolution should I scan 35mm negatives at for printing?
For moderate print sizes, a high optical resolution in the range commonly recommended for 35mm will suffice. If you expect to enlarge significantly or crop, choose a higher native optical resolution to retain detail for larger prints.
How much does dust removal help versus manual retouching?
Hardware-assisted dust removal reduces the time spent on manual cleanup for many scans, especially with infrared-based systems. However, very fine scratches or severe blemishes may still require manual retouching for perfect results.
Can I scan medium-format film with the same scanner I use for 35mm?
Only if the scanner explicitly supports multiple formats and includes appropriate holders. Verify that the scanner supports your film sizes before purchasing and that the holders keep film flat and aligned for consistent results.
Is it better to scan at higher bit depth even if I do minimal editing?
Higher bit depth preserves more tonal information and is helpful if you plan any color correction or grading later. If you do minimal edits and need smaller files, moderate bit depth can be acceptable, but archival masters should use higher bit depth when possible.
Final Verdict
When choosing a film scanner for Mac, prioritize optical resolution and color depth if image fidelity is your main goal, and macOS software compatibility if workflow speed matters. Balance dust removal and holder quality against throughput needs to match how much time you will spend scanning and retouching. Ultimately, pick the scanner that aligns with your primary use case: high-resolution archival scans for long-term storage, or fast, reliable batch scanning for active projects. Focus on devices that fit into your Mac editing workflow to minimize friction and give you consistent, editing-ready files.