
Note: This article contains affiliate links. If you click on these links and make a purchase, we may earn a small commission at no extra cost to you. This helps support our research and content. Read our full affiliate disclosure here.
If you have boxes of film negatives or slides and want good scans without overspending, choosing the right film scanner on a budget matters. The right unit saves time, preserves detail, and makes archiving or sharing old images easy. This guide covers seven shortlisted scanners that balance image quality, speed, and ease of use to suit hobbyists and students. Below you will find concise evaluations that focus on resolution, color accuracy, workflow, and day-to-day usability so you can pick a model that fits your scanning goals without extra complexity.
Top Picks at a Glance
| Best Overall The best all-around choice for most situations | BEONE GLOBAL ClearScan P7 |  |
| Best Quality Built to a higher standard if you want something more solid | Magnasonic FS71 24MP Film Scanner |  |
| Best Value The sweet spot between price and what you get | DigitPro C190 Film & Slide Scanner |  |
| Best Budget The cheapest option that still gets the job done reliably | KLIM K2 Mobile Film Scanner |  |
| Top Rated A top-rated pick with lots of positive feedback | KODAK Slide N Scan |  |
| Most Popular A crowd favorite that many people choose with confidence | KODAK SCANZA Film Scanner |  |
| Best Seller A high-volume bestseller chosen again and again | Wolverine Titan Film to Digital Converter |  |
BEONE GLOBAL ClearScan P7

| Scanner Type | Film |
|---|---|
| Connection Type | USB |
| Resolution | 3600 dpi |
| Color Depth | 24 bits_per_pixel |
| Media Type | SD Card, USB |
The ClearScan P7 is a plug-and-play film scanner aimed at quickly converting old negatives and slides into JPEGs without a computer. It uses a 1/2.3" CMOS sensor with interpolation up to 24MP and a bright 7" touchscreen for previewing, basic cropping, and one-touch color enhancement before saving to an included SD card or USB drive. Setup is straightforward: mount the film or slide, preview on the large screen, then scan with the front buttons or touchscreen controls. Practical benefits include the wide film support (35mm, 110, 126, Super 8/8mm), on-device editing so you can batch through collections without a PC, and the included SD card so you can start scanning right away. Limitations are that image quality ultimately depends on the original film condition and that advanced restoration tasks like dust and scratch removal or RAW capture are not part of the on-device workflow, so expect to do heavier edits later on a computer if you need finer correction. For budget-minded users who want fast, easy digitizing, it covers the essentials well.
Best for: Buyers who want a straightforward, standalone scanner to quickly digitize boxes of old negatives and slides without needing scanning software or a computer, valuing speed and ease of use.
Less Ideal for: Photographers seeking laboratory-grade scans, RAW output, or built-in advanced restoration should look at higher-end dedicated film scanners and software-focused workflows instead.
- Large 7-inch LCD for easy preview and on-device edits
- Supports a wide range of film formats including 35mm, 110, 126 and Super 8/8mm
- Up to 24MP capture from a 1/2.3" CMOS sensor for detailed scans
- Saves directly to SD card or USB so no computer is required
- Includes an SD card so you can begin scanning out of the box
- Does not offer advanced dust, scratch or RAW restoration on-device
- Final image quality depends on original film condition and may require PC-based editing
Verdict: A user-friendly, budget-minded standalone film scanner that makes fast, no-PC digitizing of multiple film formats simple and immediate.
Magnasonic FS71 24MP Film Scanner
| Scanner Type | Film, Photo |
|---|---|
| Connection Type | HDMI, USB |
| Resolution | 24MP |
| Color Depth | 24 bits_per_pixel |
| External Memory Card | Up To 128GB SD Card |
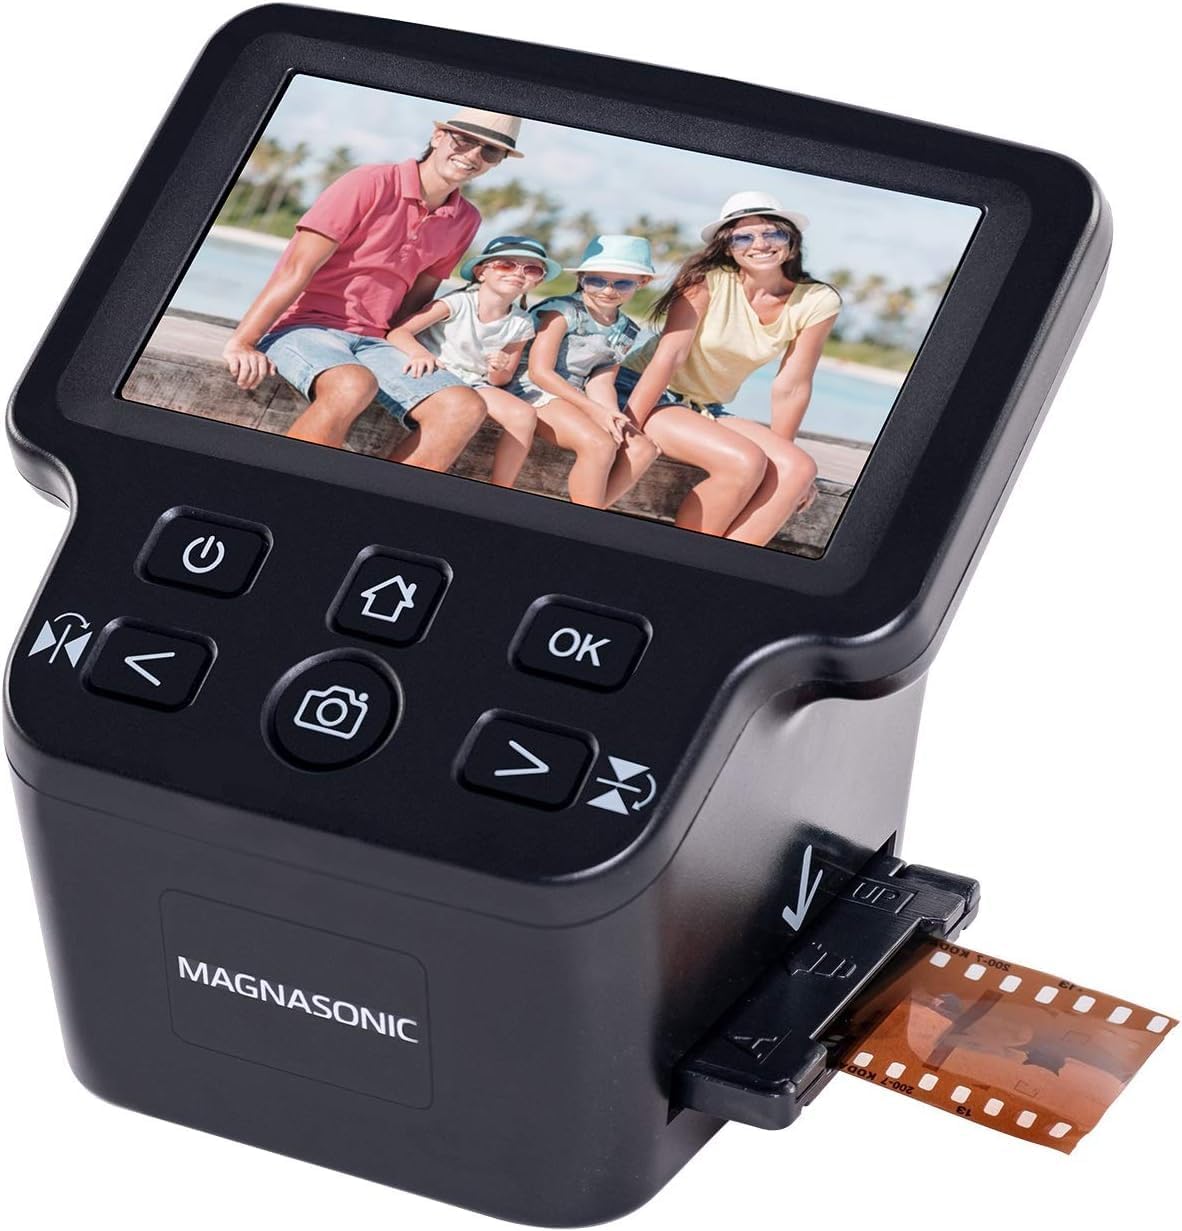
The Magnasonic FS71 is an entry-level all-in-one film scanner built to digitize 35mm, 110, 126 and Super 8 film plus 135/126/110 slides without a computer. It captures interpolated 24MP JPEGs using a fixed-focus 16MP sensor and scans each frame in roughly 3 to 5 seconds, saving files to an SD card or outputting via USB or HDMI. The on-device 5" color TFT lets you preview, adjust exposure and RGB, flip or mirror images, and run quick edits before saving, which speeds up batch work. Included film adapters and fast single-pass scanning make it practical for processing a lot of frames quickly, and HDMI playback or slideshow mode is convenient for sharing with family. Image quality is good for web and prints at modest sizes, but the scanner relies on interpolation for the 24MP claim and uses a fixed-focus optical path, so it will not match high-end flatbed or drum scanners for fine-grain detail or dynamic range. Still, for a budget buyer who values speed and ease over archival-grade fidelity, the FS71 delivers a usable, efficient workflow.
Best for: Buyers who need a fast, no-fuss way to convert family slides and negatives into shareable digital files and prioritize throughput and simple on-device editing over archival-grade scans.
Less Ideal for: Photographers or archivists seeking the highest possible resolution, dynamic range, or precise color fidelity for restoration and museum-quality archives should look at higher-end dedicated film scanners.
- Supports multiple film formats including 35mm, 110, 126 and Super 8 for versatile digitizing
- Fast single-pass scans (about 3–5 seconds per frame) for efficient batch conversion
- Onboard 5" color display with exposure and RGB adjustment lets you scan and edit without a computer
- HDMI and USB outputs plus SD card support up to 128GB for straightforward file transfer and large storage
- Uses interpolation to reach 24MP so fine-grain detail and dynamic range are limited compared with higher-end scanners
- Fixed-focus optics restrict how much sharpness can be recovered from heavily deteriorated or very fine-grain film
Verdict: If you want fast, easy batch conversion of old slides and negatives on a budget, the FS71 gives dependable, shareable results without a computer.
DigitPro C190 Film & Slide Scanner

| Scanner Type | negatives and slides |
|---|---|
| Connection Type | HDMI |
| Resolution | 1080P |
| Color Depth | 24 bits |
| Media Type | USB |
The DigitPro C190 is a budget-friendly, standalone film and slide scanner aimed at quickly converting old negatives and slides into JPEGs without a computer. It uses a one-touch workflow and a 5-inch color LCD for instant preview and basic edits like brightness and color balance, and saves files to built-in 128MB memory or an SD/SDHC card (not included). The unit accepts 35mm/135, 110, 126 film and 50mm slides and ships with holders, a cleaning brush, and HDMI/USB cables so you can view results on a TV or transfer to a PC. It advertises up to 22MP output from a 14MP sensor and offers simple controls that make batch feeding faster than handling single frames manually. Expect practical results for family archives and casual digitizing, though advanced color correction or professional-grade scans will be limited by the device optics and sensor. For shoppers prioritizing speed, ease of use, and standalone operation on a tight budget, this scanner delivers solid value.
Best for: Buyers who need a straightforward, low-cost way to digitize family slides and negatives quickly without using a computer and who value ease of use over professional scan quality.
Less Ideal for: Photographers or archivists who need high-resolution, color-accurate scans for restoration or large-format reproduction should choose a higher-end dedicated film scanner.
- Standalone operation with 5-inch LCD and one-touch scanning so no PC or software is required
- Includes film holders for 135/110/126 and 50mm slides plus HDMI and USB cables for easy viewing and transfer
- Built-in 128MB memory plus SD/SDHC card support lets you save scans directly to removable storage
- Simple brightness and RGB adjustment on the device speeds correction of faded or discolored originals
- Sensor and optics are geared toward casual conversions, so scans lack the fine detail and color fidelity of higher-end dedicated film scanners
Verdict: A practical, easy-to-use standalone scanner that makes fast, no-PC digitizing of family slides and negatives affordable.
KLIM K2 Mobile Film Scanner
| Scanner Type | Photo |
|---|---|
| Connection Type | Smartphone app |
| Resolution | 600-1200 dpi |
| Media Type | negative, diapositif |
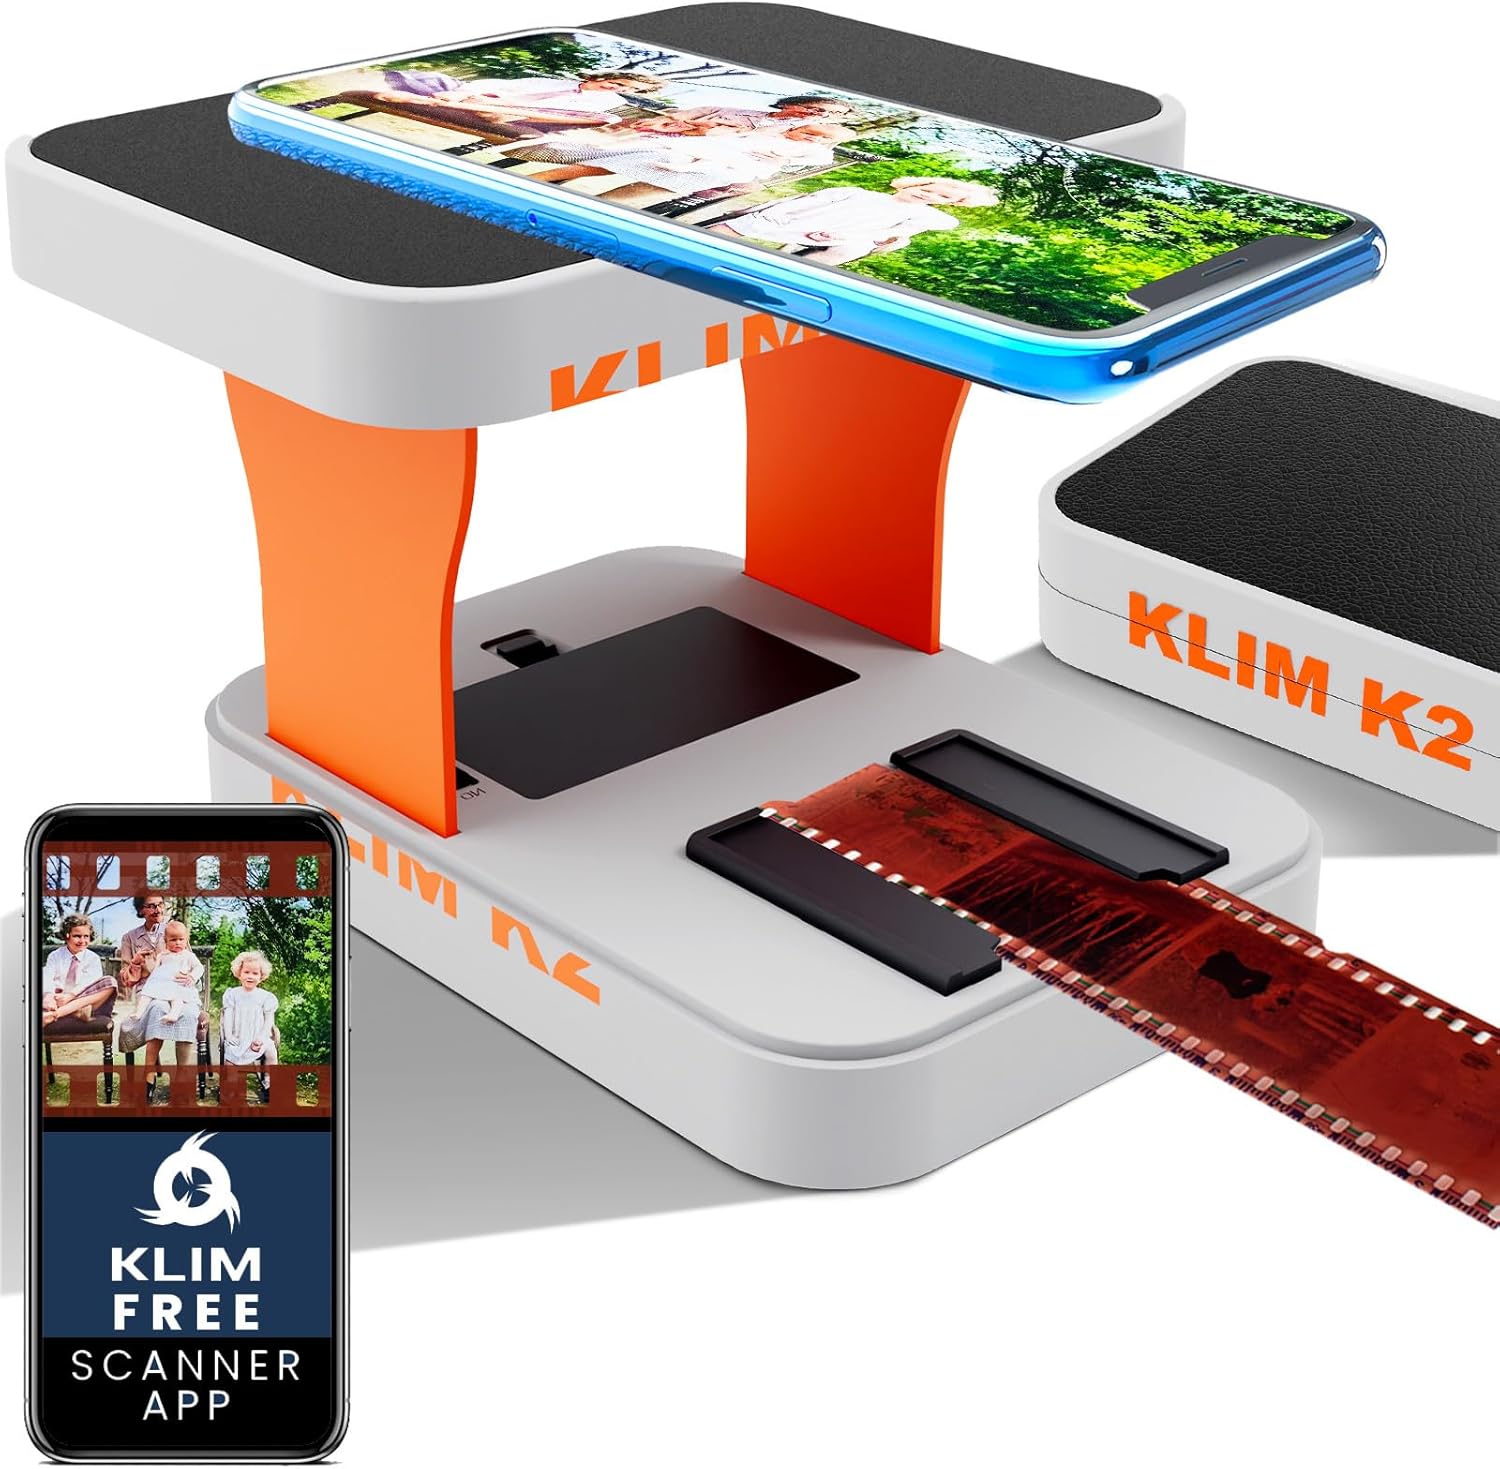
The KLIM K2 is a simple, budget-focused mobile film scanner that digitizes 35mm negatives, slides, and color or black-and-white positives by placing your phone over the device and using the free companion app. Setup is straightforward: unfold the scanner, insert a strip or slide on the light plate, position your phone (a magnetic plate and shorter brackets are included for larger phones), and capture an image through the app which offers basic editing tools. The scanner lists 600 to 1200 dpi resolution, which produces usable results for sharing and modest prints but will not match higher-end dedicated scanners for color accuracy or fine grain detail. Included accessories such as batteries, a cleaning cloth, and a magnetic plate make it ready to use out of the box. Its strengths are affordability and ease of use for bulk digitizing of family negatives and slides; limitations are reliance on your phone camera for final image quality and modest optical performance compared with pricier desktop film scanners.
Best for: Buyers looking to digitize family negatives and slides on a tight budget who prioritize simplicity and a quick, phone-based workflow over professional-level image fidelity.
Less Ideal for: Photographers or archivists who need high-precision scans, consistent color accuracy, or large-format scanning should choose a dedicated desktop film scanner instead.
- Works with standard 35mm negatives and slides including color and black-and-white
- Includes free companion smartphone app with basic scan and edit tools
- Comes with batteries, cleaning cloth, magnetic plate, and shorter brackets for larger phones
- Compact and easy to set up for quick batch digitizing
- Image quality depends heavily on phone camera and lighting, limiting fine detail and color fidelity
- Maximum 1200 dpi is modest compared with higher-end dedicated scanners
Verdict: If you want an affordable, easy-to-use way to turn 35mm negatives and slides into shareable digital files using your phone, the KLIM K2 delivers the best value for casual home use.
KODAK Slide N Scan
| Scanner Type | Film |
|---|---|
| Connection Type | HDMI, USB |
| Resolution | 22 Megapixels |
| Color Depth | 24 bits |
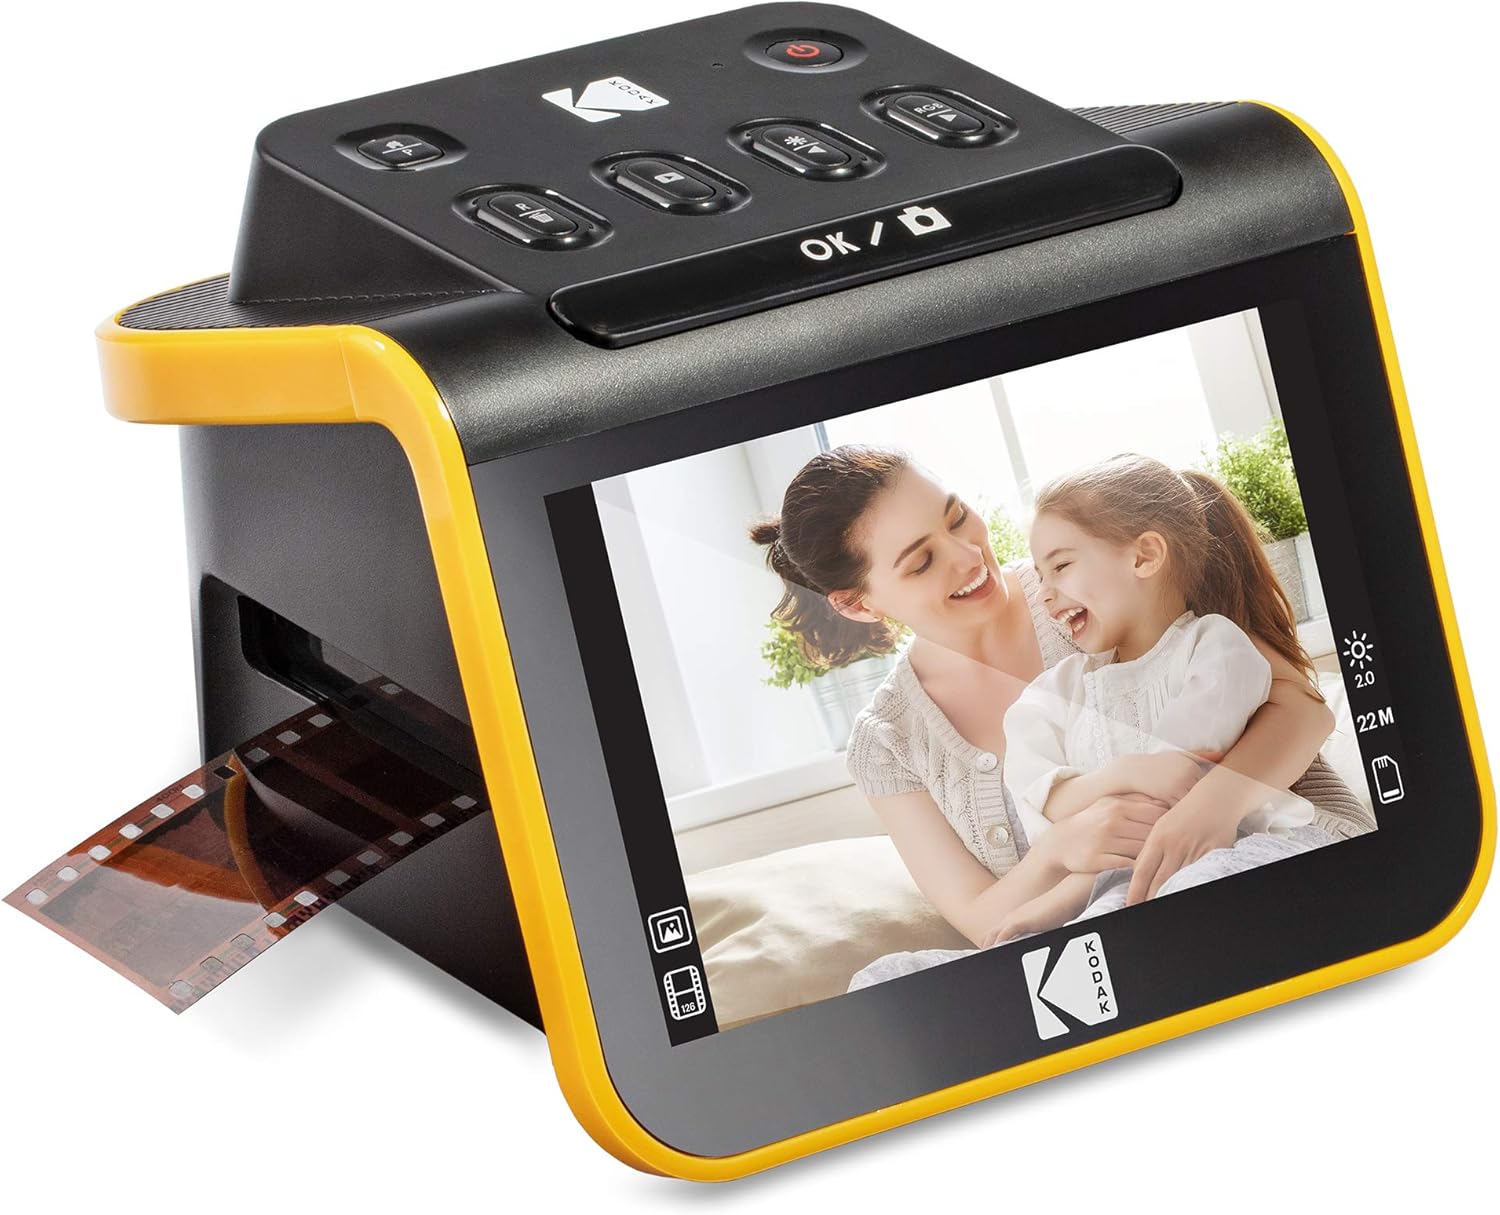
The KODAK Slide N Scan is a simple plug-and-play film scanner aimed at turning old slides and negatives into digital JPEGs without fuss. You load strips or slides into the quick-feeding tray, choose film type on the 5-inch LCD, and scan directly to an SD/SDHC card or connect to a computer via USB; an HDMI output also lets you preview images on a TV. The unit captures images at 13MP natively with an option to interpolate up to 22MP, and onboard controls let you adjust basic color, brightness, and date stamps before saving. Its included adapters cover 135, 110 and 126 formats and the continuous-feed insert speeds batch scanning compared with single-slide feeders. Expect straightforward operation and good results for family archives and casual digitizing, though the 22MP mode is interpolated rather than true optical resolution and advanced color correction is limited compared with dedicated flatbed scanners and software workflows. For buyers wanting fast, reliable scans with minimal setup, this is a practical budget choice.
Best for: Buyers who want a dependable, no-friction way to digitize family slides and negatives quickly without learning complex software or workflows.
Less Ideal for: Photographers who need true high-resolution optical scans, extensive color grading, or RAW capture for archival-quality restoration should consider higher-end flatbed or film-dedicated scanners.
- Easy-load continuous feeding for faster batch scanning
- Large 5-inch LCD for previewing and basic on-device edits
- Includes adapters for 135, 110 and 126 films plus slide holder
- Saves scans directly to SD/SDHC card and offers HDMI output
- 22MP mode is achieved via interpolation rather than higher optical resolution
- Limited advanced color correction compared with desktop scanners and software
Verdict: A user-friendly, reliable scanner for quickly converting family slides and negatives to usable JPEGs with minimal setup.
KODAK SCANZA Film Scanner

| Media Type | Negatives, Slide |
|---|---|
| Connection Type | HDMI, USB |
| Image Sensor | 14MP (interpolated to 22MP) |
| Screen Size | 3.5" TFT LCD |
| SD Card Support | Up to 128GB (SD card not included) |
The KODAK SCANZA is a desktop film-to-JPEG scanner aimed at turning batches of developed negatives and slides into digital photos quickly. It uses a built-in 14MP sensor with optional interpolation to 22MP, a tilt-able 3.5-inch LCD for framing and basic edits, and numbered trays/adapters to accept 35mm, 126, 110, Super 8 and 8mm formats. Scanning is largely button-driven: insert the film in the appropriate adapter, preview on the screen, then capture and save directly to an SD card or export over USB; you can also display results on a TV via HDMI. The bundled adapters and a cleaning brush make setup and maintenance straightforward, and the device is designed for speed and convenience rather than studio-grade output. Expect good-looking results for family photos and social sharing, but do not expect flatbed-level dynamic range or archival-quality scans; the unit captures snapshots of frames rather than contact or drum scans. The SCANZA is a practical, easy-to-use option if you want fast, low-friction digitization of many older films without professional scanning complexity.
Best for: Buyers who want a straightforward, mostly standalone way to convert lots of developed negatives and slides into usable digital photos quickly and with minimal setup, prioritizing speed and ease over lab-grade fidelity.
Less Ideal for: Users seeking archival-quality scans, maximum dynamic range, or professional-level detail for restoration or print enlargement should consider higher-end flatbed or dedicated drum scanners.
- Supports multiple film formats including 35mm, 126, 110, Super 8 and 8mm for broad compatibility
- Built-in 3.5-inch tilt LCD for previewing, basic edits and easy operation without a PC
- Saves directly to SD card and offers USB and HDMI output for flexible workflows
- Comes with numbered adapters, trays and a cleaning brush to simplify loading and maintenance
- Image capture is a single-frame snapshot method so it cannot match flatbed or professional scanners for archival detail
- Automatic interpolation to 22MP can improve file size but will not add true optical detail
Verdict: Choose the SCANZA when you want fast, easy conversion of many old negatives and slides into shareable JPEGs without the complexity of pro scanners.
Wolverine Titan Film to Digital Converter

| Scanner Type | Film |
|---|---|
| Connection Type | HDMI, USB |
| Resolution | 20 Megapixels |
| Light Source Type | LED |
| Color Depth | 24 bits |
The Wolverine Titan is a simple, standalone film-to-digital converter designed to turn slides and negatives into JPEG images without a PC. It accepts 35mm, 127, 126, 110 and APS formats and uses a CMOS sensor and LED light source to produce 20-megapixel images that save to internal memory or an optional SD/SDHC card. A large 4.3" color screen lets you preview images and an HDMI output can display results on a TV, while fast-loading adapters make batch scanning quicker. The unit runs from AC or USB power and is intended for straightforward, occasional to moderate digitizing projects rather than high-volume professional work. Image quality is good for sharing and archival reference, but it lacks advanced software controls and the sensor is not the same as dedicated film scanners that offer higher dynamic range or RAW capture. For everyday users who want quick, easy conversions of family slides and negatives, the Titan is a practical, low-fuss choice; power users seeking maximum image fidelity should look at higher-end alternatives.
Best for: Buyers who want a low-effort way to digitize family slides and negatives for preservation and sharing without needing a computer or complex software.
Less Ideal for: Photographers who need the highest image fidelity, RAW output, or extensive color and dust-removal controls should consider higher-end film scanners instead.
- Standalone operation without a computer required
- Fast-loading adapters for quick batch scanning of slides and negatives
- Built-in 4.3" color screen and HDMI output for easy preview and TV viewing
- Supports multiple film formats (35mm, 127, 126, 110 and APS) and saves to SD card
- Does not offer RAW capture or advanced image-editing software controls
- Sensor and dynamic range are below professional dedicated scanners
Verdict: An easy, all-in-one solution for quickly converting a variety of film formats into usable 20MP JPEGs with minimal setup or technical skill.
Choosing the Right Film Scanner on a Budget: Key Factors to Consider
Optical Resolution and Scanning Method
Optical resolution defines how much native detail the scanner extracts from film. Higher native resolution is especially important if you plan to crop, print, or restore images later. Beware of inflated interpolated values; they do not add true image information.
The scanning method matters too. Dedicated film scanners that use a direct film path and appropriate light source generally produce cleaner, sharper scans than generic flatbeds without film holders. Consider the maximum dpi the scanner achieves optically, and match that to your intended output size and post-processing plans.
Color Fidelity and Bit Depth
Color accuracy influences how faithfully skin tones, film grain, and subtle color casts are captured. Bit depth determines the tonal gradation the scanner records; higher bit depth gives more headroom for color correction and shadow recovery.
For color negatives, look for scanners with good color management tools or included software that supports color profile adjustments. Even on a budget, a unit that scans at 24-bit or higher and provides raw or high-quality TIFF output will make restoration work easier.
Speed, Batch Scanning, and Workflow
Scan speed is a practical concern when you are digitizing many rolls. Faster per-frame times reduce the total project duration and help avoid burnout on long archiving tasks. Batch scanning features such as multi-frame holders, automatic frame detection, or software-driven stitching can dramatically speed the job.
Also consider how the scanner integrates with your workflow. Does it save directly to a computer or to removable storage? Can it produce standardized filenames and metadata? A model that streamlines repeat jobs will save time even if its per-scan raw speed is moderate.
Ease of Use and Software Features
Good bundled software can be as important as hardware for hobbyist users. Intuitive drivers, useful preview controls, dust and scratch removal tools, and simple color-correction presets reduce the learning curve and time spent post-processing.
Check whether the scanner supports common file formats like TIFF and JPEG, and whether it can output higher-bit files for editing. Some units also offer plugin support or are compatible with third-party scanning applications, which adds flexibility as your skills grow.
Film Handling, Holders, and Dust Control
How the scanner handles delicate film impacts final image quality. Look for secure, precision film holders that keep frames flat and correctly aligned. Poorly designed holders can introduce curvature, misalignment, or light leaks that degrade scans.
Dust and scratch mitigation features, such as infrared dust detection or tools that work with restoration software, are valuable. Even a basic anti-static cleaning routine becomes more effective when the hardware minimizes contact and provides stable, repeatable framing.
Connectivity and File Management
Connectivity affects how easily scans move into your editing environment. USB connectivity with solid transfer speeds is the baseline. Some scanners offer memory-card or direct-drive options for standalone use, which can be handy if you want to scan without keeping a computer constantly connected.
Also consider whether the scanner's software lets you choose resolution, file format, and destination folders reliably. Automated workflows that batch-name files or embed basic metadata speed up cataloging and downstream organization.
Preparing Film for Best Results
Cleaning and preparing film before scanning is the single best way to improve final image quality. Use a gentle antistatic brush or blower to remove loose dust and handle negatives by the edges to avoid fingerprints.
If the scanner supports infrared dust detection, take an extra preview pass to let software identify problem spots. For stubborn marks, a quick wet-clean with appropriate film-safe solutions can pay dividends, but always follow safe handling practices to avoid damage.
- Work in a clean, low-dust environment and avoid direct sunlight.
- Label and organize frames so you can track processing and corrections.
- Allow film to acclimate to room temperature for a few minutes before scanning to minimize condensation.
Tips for Color Negatives Versus Slides
Color negatives typically require inversion and color correction during scanning. Many scanners include negative profiles or automatic inversion routines that simplify this process, but manual fine-tuning often yields the best results.
Slides are already positive images and often need less color manipulation but can reveal dust and scratches more readily. Use the highest practical bit depth for slides to preserve subtle tonal gradations, especially in shadow and highlight areas.
- For negatives, preview and adjust the inversion curve rather than relying solely on auto settings.
- For slides, focus on precise dust removal and correct exposure to retain highlight detail.
Balancing Resolution with Storage Needs
Higher optical resolution produces larger files that require more storage and longer transfer times. Decide whether you need archival-quality TIFFs or smaller JPEGs for screen sharing. A common approach is to keep a high-resolution master file and create smaller derivatives for everyday use.
Consider your storage workflow before scanning large batches. External drives or a simple folder structure can keep files organized. Also think about naming conventions and metadata so you can locate specific frames later.
- Create presets for common resolutions and file formats to speed repetitive tasks.
- Estimate your average file size at target resolutions to plan storage needs.
When to Consider Upgrades
If you consistently need very large prints, extensive retouching, or must scan medium- or large-format film, budget scanners will reach their limits. Upgrading to a higher-end unit makes sense when detail loss or color constraints become noticeable in finished work.
Also consider upgrades if your workflow changes to require faster batch throughput or advanced color-management features. For casual digitization of family photos, however, a modest unit often provides a far better value.
- Evaluate the type of output you want. If you only need web-resolution images, stay with budget options.
- Watch for signs like persistent banding, poor shadow detail, or unreliable color reproduction as triggers to upgrade.
Basic Post-scan Workflow Recommendations
Establish a simple post-scan routine to maximize the value of each scan. Start by standardizing file names and folders, then apply dust removal and basic color correction. Archive original scans before heavy editing so you can revert to raw data if needed.
Batch processing tools in image editors or the scanner's bundled software can apply consistent corrections across many frames, saving time while maintaining a coherent look across a roll of film.
- Keep an untouched master copy and separate edited versions.
- Use nondestructive editing layers or adjustment files when possible.
How We Chose the Best Film Scanner on a Budget
We prioritized practical attributes that matter when scanning analog film affordably. First, optical resolution and color fidelity were primary filters because they determine how much detail and tonal accuracy a scanner can extract from negatives and slides. Second, we measured throughput considerations such as scan speed, batch-handling features, and ease of loading film holders since time investment matters for large archives. Third, software and workflow were evaluated for usable image control, file-format options, and compatibility with common editing tools. Fourth, build quality and film handling were assessed to reduce the risk of scratches, dust introduction, or alignment problems during scanning. Finally, connectivity and file output options were reviewed to ensure scanned files are easy to transfer and edit. We excluded flatbed-only setups without dedicated film holders and high-end professional drum or medium-format systems that exceed the intended budget scope. The resulting list focuses on compact, consumer-oriented film scanners that strike a useful compromise between image fidelity and affordability.
Our full evaluation process is outlined in our review methodology.
FAQ
Can a budget film scanner produce prints large enough for wall framing?
Often you can make good small to medium prints from budget scans, especially from fine-grain film. For large wall prints, native optical resolution and sharpness limit how far you can enlarge without noticing softness or grain. It usually depends on the film type and how much post-processing you apply.
Do budget scanners remove dust and scratches automatically?
Some budget models include basic dust-removal or infrared-assisted features, but their effectiveness varies. Manual cleaning and software touch-ups are usually still necessary for the best-looking scans.
Is it better to scan negatives or have them professionally scanned?
Scanning at home can be cost-effective and flexible for moderate volumes, while professional services may offer higher-end equipment and consistent color work. Your choice depends on desired quality, the number of frames, and how much time you want to invest.
What file format should I save scans in?
Save a high-quality archival master in TIFF format when possible, then export JPEGs for sharing. TIFF retains more detail and supports higher bit depths for editing.
How often should I clean the scanner and film holders?
Clean film holders and the scanning area regularly, especially before large batches. A quick brush or blower before each scanning session and a deeper clean weekly or after heavy use helps reduce dust-related defects.
Final Verdict
Prioritize optical resolution, color handling, and a workable scanning workflow when choosing a film scanner on a budget. Accepting modest tradeoffs in throughput or advanced features can still yield excellent results for archiving, sharing, and modest printing. Focus on scanners that provide reliable film handling, usable software, and the output formats you need, and you will get consistent, useful scans without overspending.