
Note: This article contains affiliate links. If you click on these links and make a purchase, we may earn a small commission at no extra cost to you. This helps support our research and content. Read our full affiliate disclosure here.
When you need physical models that convey design intent and fine detail, the right 3D printer for architects makes the difference between a convincing presentation and a time-consuming compromise. You want a machine that delivers consistent dimensional accuracy, clean surface finish, and material choices that suit concept models, study models, and functional prototypes. This guide shortlists the top 3D printers for architects across common studio needs, from high-resolution detail to reliable throughput. We evaluated machines for print accuracy, build volume, material versatility, and workflow ergonomics to help you pick the best fit. Read on for the key considerations and practical guidance before the product reviews.
Top Picks at a Glance
| Best Overall The best all-around choice for most situations | LONGER LK5 Pro 3D Printer |  |
| Best Quality Built to a higher standard if you want something more solid | Creality K2 Pro Combo |  |
| Best Value The sweet spot between price and what you get | Anycubic Kobra X |  |
| Best Budget The cheapest option that still gets the job done reliably | ELEGOO Neptune 3 Pro |  |
| Top Rated A top-rated pick with lots of positive feedback | Creality Ender 3 V3 SE |  |
| Most Popular A crowd favorite that many people choose with confidence | FLASHFORGE Adventurer 5M |  |
| Best Seller A high-volume bestseller chosen again and again | FLASHFORGE Adventurer 5M Pro |  |
LONGER LK5 Pro 3D Printer

| Build volume | 300×300×400mm |
|---|---|
| Pre-assembled | 90% pre-assembled |
| Driver | TMC2208 silent drivers |
| Display | 4.3‑inch full‑color touch screen |
| Bed surface | Lattice glass plate |
The LONGER LK5 Pro is a large-format FDM printer aimed at makers who want bigger prints without a steep setup curve. It ships about 90% preassembled and uses a reinforced triangular frame with diagonal rods to cut vibration and stabilize taller prints, making it useful for architectural models and taller concept pieces. Practical features include a 4.3‑inch full‑color touch screen for easier control, a lattice glass bed that helps part removal and flatter first layers, and a filament runout sensor plus resume‑after‑power‑loss to protect long prints. The upgraded dual blower accelerates cooling for better bridging and finer surface detail, and the motherboard runs quiet with TMC2208 drivers and open source firmware for users who want to tune prints or add a BLTouch probe. Expect a bit of assembly and calibration on first use and the single‑extruder FDM approach limits ultra‑fine surface finish compared with resin systems, but for scaled architectural parts this printer balances volume, practical controls, and upgradeability well.
Best for: Architects and model makers who need a large, stable FDM printer for full‑scale concept pieces and prefer a mostly preassembled machine they can tweak over time.
Less Ideal for: Users who need ultra‑high detail or fine jewelry/prototyping quality where resin printers are more appropriate, or those who require multi‑material printing out of the box.
- Large 300×300×400mm build volume suitable for sizable architectural models
- Mostly preassembled frame with reinforced diagonal rods for improved stability
- Filament runout sensor and resume-after-power-loss protect long prints
- 4.3‑inch full‑color touch screen simplifies control and status monitoring
- Quiet TMC2208 drivers and open firmware allow tuning and aftermarket upgrades
- Single extruder limits multi‑material or soluble-support printing options
- Requires initial setup and calibration to achieve best dimensional accuracy
Verdict: A large, quiet, and mostly preassembled FDM printer that gives architects the build volume and practical features needed for sizable, tweakable scale models.
Creality K2 Pro Combo

| Build Volume | 300×300×300 mm |
|---|---|
| Max Printing Speed | ≤600 mm/s |
| Acceleration | ≤20000 mm/s² |
| Chamber Heating | Up to 60 °C |
| Nozzle | Hardened steel, up to 300 °C |
The Creality K2 Pro Combo targets users who need fast, reliable large-format prints and multicolor capability. It offers a 300×300×300 mm build volume and a direct-drive extruder with a hardened steel nozzle that handles abrasive and engineering filaments, while chamber heating to 60 °C reduces warping for materials like ABS and ASA. Speed-focused hardware includes step-servo motors with FOC for up to 600 mm/s printing and high acceleration, plus precision steel rails and dual Z-axis support to keep tall architectural parts stable. The multicolor Creality Filament System lets you manage up to 16 colors and includes auto filament ID and humidity monitoring, and two AI cameras monitor the chamber and nozzle to catch failures and tune flow in real time. Smart auto-leveling and Creality software presets simplify setup and slicing. Expect a substantial, workshop-grade machine that rewards calibration and care; its size, weight, and complexity make it less convenient for casual desktop use or quick portable setups.
Best for: Architects and modelmakers who prioritize high-speed, large-format, and multicolor printing for detailed building models and prototypes and who are comfortable operating a workshop-grade machine.
Less Ideal for: Users seeking a lightweight, compact, plug-and-play desktop printer for occasional hobby prints or frequent relocation should look at smaller, simpler models instead.
- Large 300×300×300 mm build volume suitable for full-scale architectural models
- Very high maximum print speed (up to 600 mm/s) and high acceleration for faster production
- Direct-drive extruder with hardened steel nozzle supports abrasive and engineering filaments
- Dual AI cameras and smart sensors provide real-time monitoring and failure detection
- Multicolor Creality Filament System (CFS) supports multi-material and color printing with moisture control
- Heavy, large, and more complex to set up and move compared with desktop printers
- Designed for workshop or studio use rather than quick portable or casual desktop printing
Verdict: Choose the K2 Pro Combo when you need workshop-grade, high-speed large-format and multicolor printing for professional architectural models.
Anycubic Kobra X

| Build volume | 260 × 260 × 260 mm |
|---|---|
| Max nozzle temperature | 300℃ |
| Printing speed | Up to 600 mm/s |
| Filament compatibility | PLA, PETG, TPU, PVA, ASA |
| Connectivity | 2.4G/5G Wi-Fi and LAN |
The Anycubic Kobra X is an FDM desktop printer built for faster multicolor printing without frequent filament purges. It ships with four ACE 2 Pro color units installed and can expand the palette up to 19 colors, which helps produce multi-hued prototypes in a single run. The machine emphasizes speed and durability with a hardened steel nozzle, vibration compensation, and a claimed top travel speed up to 600 mm/s, letting simple test prints complete very quickly. LeviQ 3.0 auto bed leveling with 49-point calibration simplifies first-layer setup, and features like power/filament recovery, spaghetti detection, and AI camera monitoring reduce failed prints and supervision time. Connectivity includes dual-band Wi-Fi and LAN for remote control via Anycubic apps and slicer integration. Limitations for architecture work are the modest build volume of 260 × 260 × 260 mm and the focus on multicolor rather than ultra-high-resolution detail; large or very fine structural models may require multiple assemblies or slower settings for best fidelity. For designers who value rapid, colorful concept models and low supervision, the Kobra X is a practical, productive option.
Best for: Designers and small-studio users who prioritize fast, low-supervision prototyping and want to produce colorful concept models quickly.
Less Ideal for: Professionals needing very large single-piece models or the absolute finest surface resolution for presentation-ready architectural scale models.
- Native multicolor printing with four ACE 2 Pro units and expansion to more colors for single-run multi-hued parts
- High top travel speed (up to 600 mm/s) and hardened nozzle for fast iteration and durability
- LeviQ 3.0 49-point auto leveling improves first-layer reliability and reduces set-up time
- Smart monitoring features including AI camera, spaghetti detection, and power/filament recovery lower failed-print risk
- Dual-band Wi-Fi and LAN support for remote control and monitoring through Anycubic apps
- Build volume (260 × 260 × 260 mm) limits single-piece large architectural models
- Designed for speed and multicolor printing which may require slower, tuned settings to reach highest surface detail
Verdict: A productivity-focused printer that lets architects and designers churn out fast, colorful concept models with minimal supervision.
ELEGOO Neptune 3 Pro

| Build volume | 225×225×280 mm |
|---|---|
| Nozzle diameter | brass nozzle (standard) |
| Filament diameter | 1.75 mm |
| Noise level | ~47 dB |
The ELEGOO Neptune 3 Pro is a ready-to-run FDM desktop printer aimed at hobbyists and small design studios that need reliable, no-fuss printing. It ships with most major subassemblies pre-installed and a toolkit, so you can be printing in minutes; the 36-point auto bed leveling and PEI magnetic build plate simplify first-layer setup and part removal. The dual-gear direct-drive extruder and upgraded nozzle stack (titanium throat, brass nozzle, enlarged heat sink) improve filament feeding and reduce clogging when using PLA, TPU, PETG or ABS, while the filament runout sensor and resume-on-power-loss add resilience on longer prints. Dual Z lead screws with dual motors give stable Z motion for taller models, and silent stepper motors keep noise down to about 47 dB. Limits for architects: the 225 mm square build area is fine for many concept models but constrains larger scale pieces, and advanced enclosure-dependent materials may need extra ventilation or an enclosure. The Neptune 3 Pro balances ease of use and dependable hardware for iterative model work at a modest cost.
Best for: Architects and design students who need an affordable, user-friendly desktop printer for iterative concept models and moderate-size prototypes with minimal setup overhead.
Less Ideal for: Practitioners who require very large single-piece prints or frequent use of high-temperature engineering materials that demand a heated enclosure and industrial-grade controls.
- One-click 36-point auto bed leveling for faster setup and consistent first layers
- Dual-gear direct-drive extruder with stainless steel gears for reliable filament feeding
- Filament runout sensor and power-loss resume protect long prints
- Dual Z lead screws and dual motors for stable, accurate Z-axis movement
- PEI magnetic removable build plate simplifies part removal
- 225×225×280 mm build volume may be small for large architectural models
- No enclosed chamber—printing some high-temp or warp-prone materials may require an aftermarket enclosure
Verdict: A budget-friendly, easy-to-use desktop FDM printer that delivers dependable results for small to mid-size architectural models.
Creality Ender 3 V3 SE

| Print speed | Up to 250 mm/s |
|---|---|
| Extruder type | Sprite direct extruder |
| Auto bed leveling | CR Touch with strain sensor |
| Mainboard | 32-bit silent mainboard |
The Creality Ender 3 V3 SE is a consumer-grade FDM printer built for faster prototyping with a claimed top speed of 250 mm/s and 2500 mm/s² acceleration while keeping print quality reasonable. It ships with a Sprite direct extruder that handles PLA, PETG and flexible filaments more reliably than many Bowden setups, and CR Touch plus a strain sensor provide automatic bed leveling and Z-offset that make first-layer setup straightforward. The printer's dual Z-axis with synced timing belt and dual 8 mm Y-axis shafts improve frame stability for taller or more detailed prints, and the 32-bit silent mainboard keeps noise and vibration low during long runs. Practical conveniences include one-tap filament load/unload and a flexible PC spring steel build plate for easy part removal. Limitations to note are that high top-speed claims require tuned slicer and firmware settings to avoid artifacts, and advanced users may still want firmware tweaks or upgrades for precision architectural models. For architects making quick iterations, the V3 SE is a reliable, user-friendly desktop option that balances speed and stability.
Best for: Architects and design professionals who need a desktop printer for rapid, repeated prototyping and value dependable first layers and material versatility over out-of-the-box perfection.
Less Ideal for: Users who require absolute factory-calibrated, production-level dimensional accuracy without any firmware tuning or those who want a fully assembled industrial printer for high-volume manufacturing.
- Fast maximum print speed and high acceleration for quicker prototype turnaround
- Sprite direct extruder supports PLA, PETG and TPU for versatile material choices
- CR Touch auto leveling and strain sensor simplify first-layer setup
- Dual Z-axis and reinforced Y-axis improve stability for taller prints
- 32-bit silent mainboard reduces noise and provides smoother motor control
- Top speed requires careful tuning to maintain fine detail and dimensional accuracy
- Not a fully assembled plug-and-play machine for users who want zero setup or firmware work
Verdict: For architects seeking a reliable, fast desktop printer for iterative modeling, the Ender 3 V3 SE delivers stable prints, easy bed leveling, and versatile filament support.
FLASHFORGE Adventurer 5M
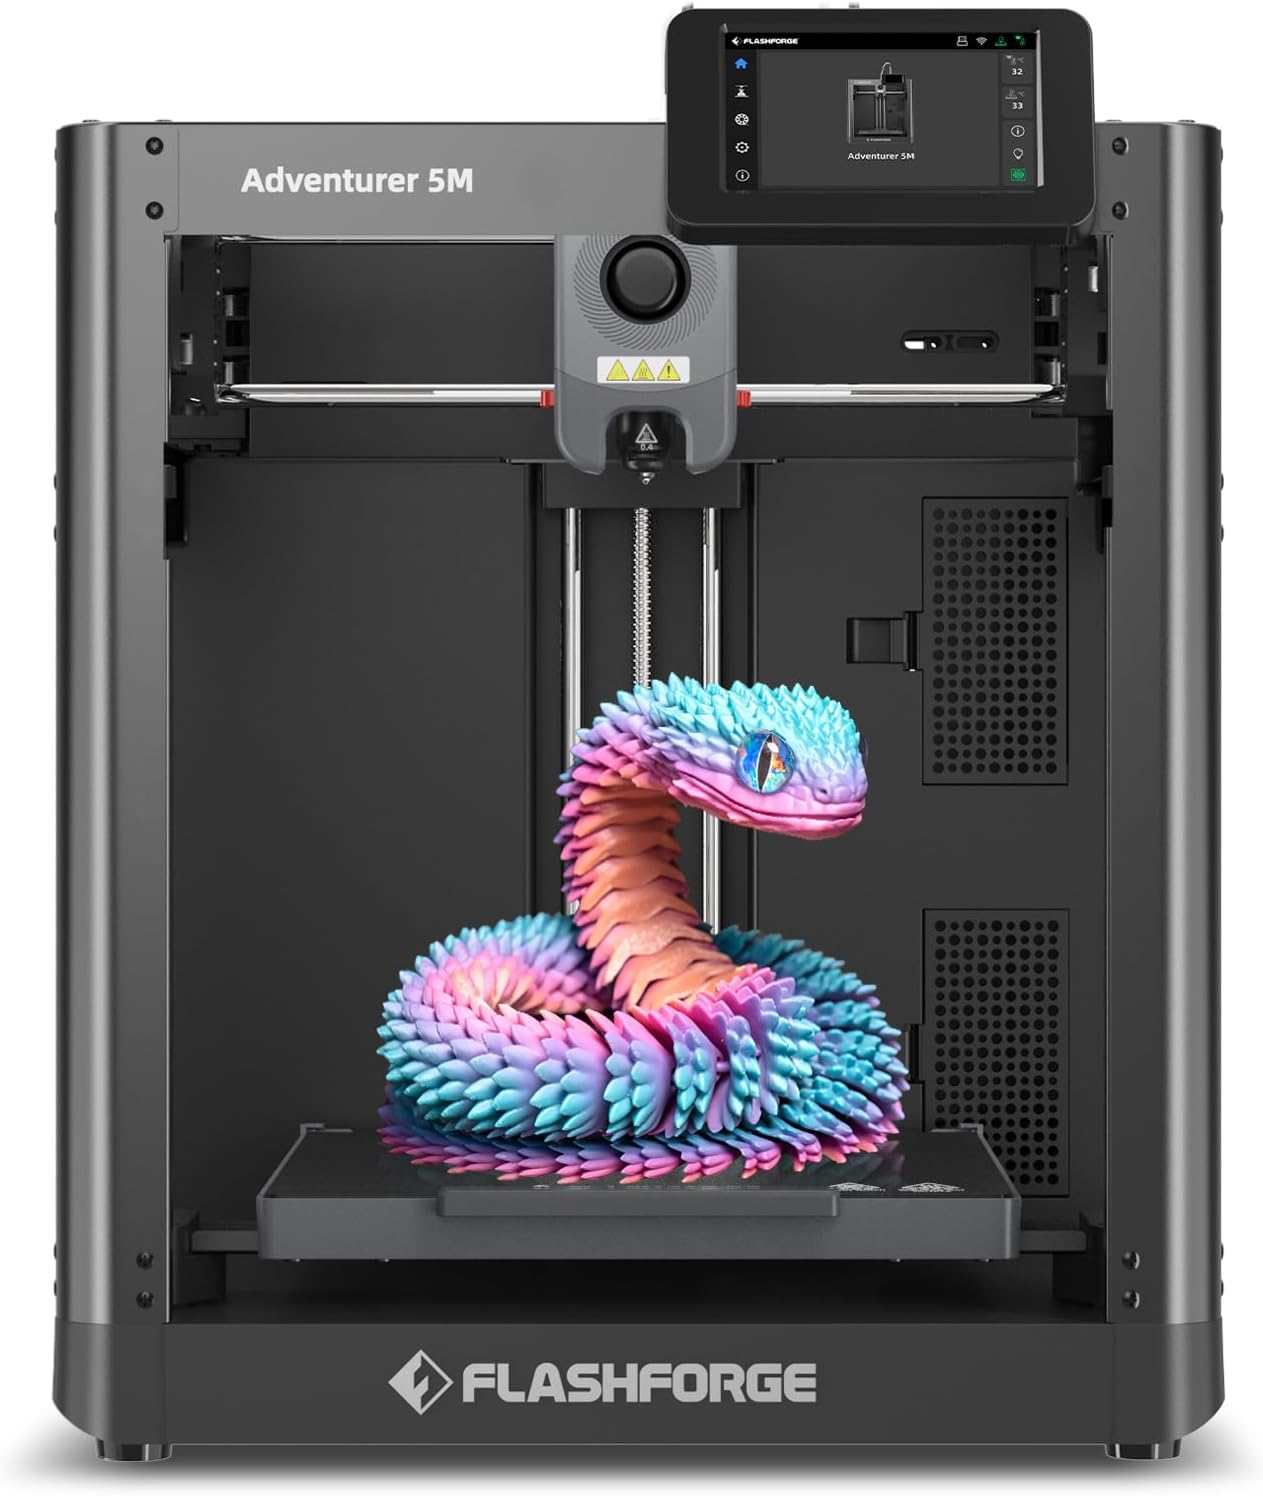
| Build Volume | 220 x 220 x 220 mm |
|---|---|
| Max Nozzle Temperature | 280°C |
| Travel Speed | 600 mm/s |
| Acceleration | 20,000 mm/s² |
| Platform | Double-Sided PEI Platform |
The FlashForge Adventurer 5M is a CoreXY desktop printer aimed at fast, practical prototyping and iterative design work. It uses an all-metal CoreXY structure and a 280°C direct-drive extruder with multiple nozzle sizes to handle PLA, ABS, PETG and other engineering filaments, and a double-sided PEI platform for easier part removal. The one-button automatic bed leveling and quick 3-second detachable nozzle reduce setup friction, while the claimed 600 mm/s travel speed and high acceleration are geared toward rapid model turnover for architects who need many iterations. A mobile app and optional camera support remote monitoring, which helps keep long prints in check. Expect strong benefits in print turnaround and workflow efficiency, but be aware very high speeds can require tuned slicer settings and good filament to maintain surface finish and dimensional accuracy. Routine nozzle and bed maintenance are needed to keep the system reliable for repeatable architectural parts.
Best for: Architects and design teams who prioritize rapid prototyping and frequent iteration and want a desktop printer that minimizes setup time while handling engineering filaments.
Less Ideal for: Users seeking the absolute highest surface-finish detail out of the box or those who need built-in multi-color printing or large-format build volumes.
- High-speed CoreXY motion system (600 mm/s) for fast print turnaround
- One-button automatic bed leveling reduces setup time and first-layer failures
- 280°C direct extruder with multiple nozzle sizes supports a range of engineering filaments
- Double-sided PEI platform enables easier part release and repeatable adhesion
- Very high travel speeds can compromise surface finish and require careful tuning
- No built-in multi-color capability on this model
Verdict: Choose the Adventurer 5M when you need a desktop printer that speeds up prototyping cycles with fast CoreXY motion and quick, low-friction setup.
FLASHFORGE Adventurer 5M Pro

| Build Volume | 220 x 220 x 220 mm |
|---|---|
| Max Nozzle Temp | Max.280°C |
| Travel Speed | 600 mm/s |
| Leveling Type | One-Button Auto Leveling |
| Platform Type | Double-Sided PEI Platform |
The Adventurer 5M Pro targets architects and design professionals who need quicker iteration without sacrificing too much detail. It uses a Core XY all-metal frame and a double-sided PEI platform to keep prints stable and simplify part removal, and the pressure-based one-button auto leveling removes manual bed-truing. High-speed specs (up to 600 mm/s travel and 20,000 mm/s² acceleration) plus multiple nozzle sizes let you favor speed for prototypes or finer nozzles for detailed models. The 280°C direct-drive extruder and support for engineering materials such as PLA, ABS, PETG, ASA, TPU and carbon-fiber blends broaden material choices for functional architectural parts. Built-in camera, internal circulation, and app control provide remote monitoring and adjustments during long prints. Trade-offs are typical for a speed-focused machine: pushing top speeds may require tuning and can expose visible layer lines compared with slower high-resolution printers, and a 220 mm build envelope limits very large architectural models unless broken into parts.
Best for: Architects and design professionals who value faster prototyping and material versatility while preferring a stable, enclosed printer that minimizes setup fiddling.
Less Ideal for: Those who routinely need very large single-piece prints or absolute maximum surface-finish at the smallest layer heights should consider larger-format or slower ultra-high-resolution machines.
- Core XY all-metal structure for improved stability during high-speed printing
- One-button pressure auto leveling reduces setup time and effort
- 280°C all-metal direct extruder supports a wide range of engineering filaments
- Multiple nozzle size options to balance speed and fine detail
- App integration and built-in camera enable remote monitoring and control
- 220×220×220 mm build volume limits printing large monolithic architectural models
- High-speed settings may require tuning to avoid visible artifacts at very fine detail
Verdict: Pick the Adventurer 5M Pro when you want a stable, enclosed printer that speeds up architectural prototyping while supporting engineering materials and easy setup.
Choosing the Right 3D Printer for Architects: Key Factors to Consider
Print Resolution and Dimensional Accuracy
Fine resolution determines how well small architectural details, thin walls, and textured surfaces reproduce in the final model. Higher resolution matters for presentation models where crisp edges and readable features convey design intent.
Dimensional accuracy affects how parts fit together and whether scaled elements like windows, railings, and interlocking components align correctly. When tolerances are important, look for machines with stable axes, calibrated extrusion or curing systems, and proven repeatability across multiple prints.
Material Compatibility and Finish Options
Different model types require different materials. Rigid filaments or resins are suitable for crisp presentation models, flexible materials can represent landscaping or soft elements, and engineering-grade polymers help test functional assemblies. Availability of specialty resins or composite filaments expands what you can produce.
Post-processing possibilities influence final appearance. Sandable or paintable materials simplify finishing, while soluble supports reduce cleanup for complex geometries. Consider which material properties you need for structural parts, surface detail, and paint adhesion.
Build Volume and Batch Productivity
Build volume dictates the maximum size of a single model and whether you can print multiple model parts in one run. Larger build areas help when you need to produce sizeable concept models or multiple variants without splitting files into many pieces.
Throughput is also about how efficiently the printer can produce multiple models. Faster machines or those that support batch printing with reliable uptime reduce total project turnaround and free up studio time for design work.
Workflow Integration and Software Support
Smooth file handling from CAD export through slicing and printer control saves time and reduces errors. Look for printers with slicers that accept common file formats, provide robust support-generation tools, and offer reliable preview and print-estimate features.
Network connectivity, job queuing, and the ability to manage prints remotely matter for studio workflows. Software that simplifies calibration, allows fine control of print parameters, and integrates with common design toolchains helps maintain consistent results.
Reliability, Maintenance, and Studio Usability
Consistent uptime and predictable maintenance cycles are essential for busy architecture studios. Machines that are easy to calibrate, with accessible service points and straightforward part replacement, reduce downtime and technical overhead.
Consider how often routine tasks are required, such as bed leveling, nozzle or resin vat replacement, and routine cleaning. Equipment that minimizes frequent, time-consuming maintenance lets you focus resources on modeling and iteration rather than troubleshooting.
Safety, Ventilation, and Workspace Requirements
3D printing can generate fumes, particulates, and potentially hazardous chemicals depending on the material. Proper ventilation or enclosed printers with filtration make the studio safer, especially when using resins or high-temperature filaments.
Workspace layout matters for handling printed parts and post-processing. Allow room for curing, sanding, washing, and finishing operations. Noise, power requirements, and ventilation needs should factor into where you locate the printer in your studio.
Choosing Between Resin and Filament for Architectural Models
Resin-based systems excel at capturing extremely fine surface detail and smooth finishes, which is valuable for presentation models and delicate ornamentation. They often deliver higher apparent resolution than filament printers, but require more careful post-processing and ventilation.
Filament printers provide a broader range of structural materials and are generally easier to use for larger models. Fused filament fabrication is often the practical choice for quick concept models, large massing studies, and parts that need to be handled or assembled frequently.
- Resin: best for fine detail and smooth surfaces; needs post-cure and careful handling
- Filament: better for larger pieces, stronger parts, and easier material handling
- Consider a hybrid studio approach when both small-detail presentation pieces and larger study models are required
Preparing CAD Files and Design Tips for Printability
Export clean STL or compatible files with consistent normals and no non-manifold geometry. Simplify overly dense meshes where possible to reduce file size without losing important detail.
Design with printing constraints in mind: add fillets to reduce stress concentrations, orient parts to minimize supports on critical faces, and include registration features for multi-part assemblies to ensure accurate alignment.
- Check scale and wall thickness for the target printing technology
- Orient parts to balance surface quality and support removal
- Split large models into assembly-friendly pieces with mating features
Post-Processing Workflow for Presentation-Ready Models
Post-processing influences the perceived quality of a model as much as the printer. Typical steps include removing supports, sanding or smoothing surfaces, priming, and painting. For resin prints, proper washing and curing are essential to achieve intended mechanical properties and surface stability.
Plan for staging post-processing near the printer but in a ventilated area. Use jigs or fixtures to hold small parts during finishing and label components to avoid assembly errors during multi-part builds.
- Use soluble supports where possible to reduce manual cleanup
- Establish a repeatable curing and finishing sequence to maintain consistent results
- Keep spare consumables and basic finishing tools on hand to avoid work stoppages
Scaling Up: From One-Off Models to Batch Production
When producing multiple options or iterations, consider printers that support repeatable bed leveling, stable temperature control, and reliable long-run operation. Automated or semi-automated workflows for job queuing and remote monitoring help streamline batch work.
Think about inventory of consumables and spare parts. The ability to quickly swap build plates, replace nozzles, or change resin vats reduces idle time between jobs and keeps production moving.
- Plan for staggered prints to maximize printer uptime
- Standardize part orientation and support settings for repeatability
- Consider serviceability and spare-part availability when committing to production workloads
Studio Ergonomics and Workspace Setup
Place printers in locations that minimize disruption while providing access to ventilation and adequate workspace for finishing. Enclosed systems with filtration or fume extraction are easier to colocate with other studio activities.
Organize storage for materials, tools, and finished parts to reduce handling time. Good lighting and magnification tools help with detailed finishing tasks and quality checks.
- Reserve a dedicated finishing station with appropriate ventilation
- Keep digital file backups and version control to track model iterations
- Train staff on safe handling and routine maintenance procedures
How We Chose the Best 3D Printer for Architects
We prioritized technical attributes and studio workflow features that matter to architects who produce presentation models and iterative prototypes. Key evaluation criteria included print resolution and dimensional accuracy, because small details and tight tolerances make architectural models legible at scale. Material compatibility and post-processing options were assessed to ensure models can be finished, painted, or bonded as required for presentation and testing. Build volume and printing speed were considered to balance single-model detail versus batch production needs. Reliability and ease of use were measured through common maintenance tasks, filament or resin handling, and typical failure modes relevant to busy studios. Software workflow and file handling, including slicing features and support generation, were reviewed for how well they accommodate CAD exports and multi-part assemblies. We excluded hobby-focused machines that lack stable dimensional repeatability or limited material choices unsuitable for presentation-grade models. We also excluded purely experimental or prototype devices without established reliability records. The resulting shortlist reflects models that combine predictable accuracy, usable materials, and practical studio workflows for architectural model-making.
Our full evaluation process is outlined in our review methodology.
FAQ
What resolution do I need for presentation-grade architectural models?
For presentation models, aim for the highest practical layer resolution your workflow supports. Resin systems commonly offer the finest apparent detail, but high-end filament setups with small nozzles can also produce acceptable results depending on viewing distance.
Can I use the same materials for study models and display models?
Often you will choose different materials based on the purpose. Study models favor faster, economical materials that handle rough handling, while display models benefit from materials that sand and paint well or deliver smoother surface finishes.
How do I ensure parts fit together accurately after printing?
Design with assembly tolerances in mind and include registration features such as pins and slots. Calibrate your printer regularly and print test-fit components at the intended scale before committing to full runs.
Is post-processing always necessary for architectural prints?
Most prints benefit from some level of post-processing to achieve a presentation-ready appearance. The extent varies: minor sanding and priming may suffice for filament parts, while resin prints typically require washing and curing plus finishing to reach stable, paintable surfaces.
What ventilation or safety precautions should a small studio take?
Provide good general ventilation and consider an enclosed printer with filtration for resin or high-temperature filament work. Use gloves and eye protection during post-processing and follow material safety guidance for storage and disposal.
Final Verdict
Choosing the right 3D printer for architects comes down to prioritizing the attributes that match your studio workflow. If your work emphasizes fine presentation models, prioritize resolution, smooth surface finish, and materials that take paint and adhesive well. If you need larger scale models or continual iteration, give more weight to build volume, throughput, and reliability. Balance tradeoffs between detail and production speed, and factor in post-processing capacity, ventilation, and maintenance needs. With those priorities clear, you can select a machine that supports your modeling approach and delivers consistent, studio-ready results.