
Note: This article contains affiliate links. If you click on these links and make a purchase, we may earn a small commission at no extra cost to you. This helps support our research and content. Read our full affiliate disclosure here.
If you need larger-than-average print area without stepping up to industrial machines, a 300mm 3D Printer hits a practical middle ground. You want repeatable dimensions, stable first layers, and a platform that tolerates longer print times without warping or layer shifts. This guide gathers seven shortlisted, practical options for makers and small workshops that need the extra Z or XY range for bigger prototypes, functional parts, or multi-piece assemblies. We evaluated each entry for the factors that matter most: accuracy, mechanical stability, and ease of daily use. Read on for a concise look at what to expect from these picks and which traits to prioritize next.
Top Picks at a Glance
| Best Overall The best all-around choice for most situations | ELEGOO Jupiter 2 16K Resin Printer |  |
| Best Quality Built to a higher standard if you want something more solid | QIDI PLUS4 3D Printer |  |
| Best Value The sweet spot between price and what you get | SainSmart WonderMaker ZR |  |
| Best Budget The cheapest option that still gets the job done reliably | Sovol T300 3D Printer |  |
| Top Rated A top-rated pick with lots of positive feedback | QIDI Plus5 3D Printer |  |
| Most Popular A crowd favorite that many people choose with confidence | Creality K2 Pro Combo |  |
| Best Seller A high-volume bestseller chosen again and again | Creality K2 Pro Combo |  |
ELEGOO Jupiter 2 16K Resin Printer

| Build volume | 302.4 × 161.98 × 300 mm |
|---|---|
| Resolution | 16K (15120 × 6230) |
| Heating | Smart tank heating to 30 °C |
| Connectivity | Dual-band Wi‑Fi, USB |
| Storage | 8 GB ROM |
The ELEGOO Jupiter 2 is a large MSLA resin printer designed for big builds and fine detail. It delivers very high native resolution (16K) across a 302.4 × 161.98 × 300 mm build volume so you can print larger parts or several smaller models in one job. Practical smart features include a two-way automated resin feed with a 2 kg bottle to reduce mid-print failures, a smart tank heater that holds resin at 30 °C for more consistent layer adhesion, and a multi-point auto-leveling system for better first layers. The machine also has a built-in chamber camera with HDR and time-lapse support so you can remotely monitor prints, and a modular quick-swap LCD and release film that simplify maintenance. Connectivity and workflow are modern with dual-band Wi-Fi, OTA firmware updates, and compatibility with Elegoo software. Trade-offs are typical for large resin systems: it is a substantial, heavy, enclosed machine that requires a dedicated workspace and routine resin handling and post-processing, and some users may prefer smaller, simpler printers for occasional hobby prints.
Best for: Buyers who want a balanced, all-round resin printer that combines very high detail with a true 300 mm-class build envelope for prototyping, small production runs, or detailed large models.
Less Ideal for: Casual hobbyists who only print occasionally or those without a ventilated workspace and willingness to manage resin post-processing should consider smaller, simpler alternatives.
- Very high 16K resolution for fine details across a 300 mm-class build volume
- Automated resin system with bulk bottle feeding to reduce mid-print resin shortages
- Smart tank heating maintains consistent resin temperature for reliable layer adhesion
- Built-in HDR chamber camera and time-lapse for real-time monitoring and diagnostics
- Modular quick-swap LCD and release film speed maintenance and reduce downtime
- Large, heavy footprint requires a dedicated ventilated workspace
- As a resin MSLA system it needs regular post-processing and careful resin handling
Verdict: If you need high-resolution resin prints at a true 300 mm-class build volume with modern smart features, the Jupiter 2 is a well-balanced choice.
QIDI PLUS4 3D Printer

| Build Volume | 305×305×280mm |
|---|---|
| Extruder Temp | ≤370°C (80W) |
| Active Chamber Heater | ≤65℃ (Second Generation) |
| Hot Bed Temperature | ≤120℃ (6mm Aluminum Bed) |
The QIDI PLUS4 is a performance-focused CoreXY printer built for printing large parts and high-temperature engineering filaments. It ships with a second-generation active chamber heating system (up to 65°C), a powerful 80W hotend that reaches 370°C, and a hardened-steel direct extruder with a multi-metal integrated nozzle to handle abrasive and high-temp materials like PPS-CF and PAHT-CF. The machine uses reinforced mechanics—dual Z motors, thicker linear shafts and lead screws, and a 6mm aluminum bed—to improve stability and bed flatness for reliable large prints. It also includes practical touches for workshop use: fully automatic bed leveling, filament runout/wrap detection, power-loss recovery, onboard HD camera, and remote control via a mobile app and slicer. Expect faster prints thanks to the CoreXY layout and high acceleration/speed capability, though high-speed printing with large or flexible filaments still requires tuning and stronger cooling settings. The printer is substantial and requires a stable workspace and some setup understanding to realize its full potential, but it delivers the thermal control and extrusion hardware enthusiasts need for demanding materials and large-format parts.
Best for: Enthusiasts and small-shop users who prioritize printing large parts and engineering-grade materials and who are ready to tune settings for speed and reliability.
Less Ideal for: Casual hobbyists who want a plug-and-play desktop printer for occasional PLA prints or users with limited bench space.
- Large 305×305×280mm build volume for big or multi-part prints
- Active heated chamber and dual-layer insulation reduce warping with high-temp filaments
- 80W hotend to 370°C and hardened-steel extruder enable abrasive and high-temperature materials
- Reinforced mechanics (dual Z, 10mm shafts, 6mm aluminum bed) improve stability and flatness
- Convenience features like auto leveling, filament detection, power-loss recovery, and remote monitoring
- Physically large and heavy, so it needs a dedicated, stable workspace
- High-speed printing and advanced materials require careful tuning and experience
Verdict: Choose the QIDI PLUS4 when you need a large-format, high-temperature CoreXY printer that is built to handle engineering filaments and demanding prints.
SainSmart WonderMaker ZR

| Build volume | 300×300×300mm |
|---|---|
| Nozzle max temp | 300 °C |
| Printing speed | Up to 600 mm/s |
| Filament inputs | 4 (MIFS) |
The SainSmart WonderMaker ZR is a large-volume CoreXY 3D printer built for multicolor and high-throughput work. It uses a Multicolor Integrated Filament System (MIFS) with four filament inputs, auto-loading and jam/runout sensors to switch colors and keep prints running without frequent intervention. The motion system and hotend are specified for very high throughput — up to 600 mm/s and a hardened steel nozzle rated to 300°C — and the dual-gear all-metal extruder plus multi-angle cooling help maintain layer quality at speed. Built-in features such as a double-sided PEI plate, a 5-inch touchscreen, integrated lighting, filament monitoring, Wi-Fi connectivity and Klipper/ORCA slicing support make it practical for repeated prototyping or a small print farm. Expect some assembly on arrival and plan for tuning to get top speeds and multicolor purges dialed in; silent mode lowers noise but the printer is not fully enclosed unless you add the optional enclosure. For builders who prioritize faster cycle times and multicolor capability in a 300 mm printer, the ZR delivers a strong factory-feature set, though achieving peak performance will require careful setup and monitoring.
Best for: A buyer who wants a practical, high-throughput 300 mm printer for prototyping or small-batch multicolor production and is willing to tune and maintain the machine for reliable results.
Less Ideal for: Casual hobbyists who want a fully preassembled, turn-key desktop printer or users who need a quiet, enclosed system out of the box.
- Integrated four-filament MIFS with auto-loading and runout detection for uninterrupted multicolor prints
- CoreXY motion and high-flow hotend capable of very high speeds and acceleration
- Hardened steel nozzle and all-metal extruder support a wide range of materials up to 300°C
- Built-in touchscreen, integrated lighting, Wi‑Fi and filament monitoring simplify daily use and remote oversight
- Requires some assembly and calibration to reach advertised high-speed performance
- Optional enclosure and camera are sold separately for quieter operation and full monitoring
Verdict: Choose the ZR if you need a 300 mm CoreXY printer built for fast multicolor production and are prepared to tune it for peak throughput.
Sovol T300 3D Printer

| Max hotend temp | 300°C |
|---|---|
| Controller | Klipper (64-bit) |
| Touchscreen | 4.3‑inch 480×272 |
| Print bed heat | 1000W AC bed, 60°C in 30s |
The Sovol T300 is a CoreXY desktop 3D printer designed to push print speed while keeping a factory‑built, mostly assembled package. It uses a 64‑bit controller running Klipper firmware and input shaping so the machine can accelerate aggressively (advertised up to 600mm/s) and reduce vibration with internal industrial‑grade linear rails that smooth motion. The integrated all‑in‑one hotend and optimized ceramic heater hit high temps for ABS and specialty filaments and the brass heating block plus a powerful part cooling fan improve thermal response and layer cooling. Dual‑gear extrusion and a 4.3‑inch touchscreen make filament control and basic operation straightforward, and the 30‑second preheat for nozzle and bed cuts waiting time dramatically. Expect noticeably faster prints for small to medium parts and good surface alignment thanks to the linear rails. Limitations to consider are the high speed claims versus real-world tuning time and material limits that still require calibration; aggressive acceleration can demand careful slicer setup and may not be ideal for very tall, delicate prints.
Best for: A buyer who wants one of the fastest consumer CoreXY printers for rapid prototyping and is comfortable spending time tuning firmware and slicer settings to get peak speed and quality.
Less Ideal for: People who want a completely hands‑off, plug‑and‑play printer for occasional hobby prints or those who prefer minimal setup and maintenance.
- Klipper firmware and input shaping enable high accelerations for much faster print times
- All‑metal frame and internal linear rails reduce vibration and improve layer consistency
- 300°C all‑in‑one hotend with fast 30s nozzle and bed preheat for quicker job turnaround
- Dual‑gear extruder improves filament grip for flexible materials and finer extrusion control
- 4.3‑inch touchscreen provides a simple, responsive local interface
- High advertised speeds require tuning and may not be achieved immediately without advanced setup
- Aggressive motion profiles increase need for maintenance and careful slicer and firmware configuration
Verdict: Buy this if you want a budget‑minded CoreXY that prioritizes high‑speed printing and fast thermal response with a sturdy metal build.
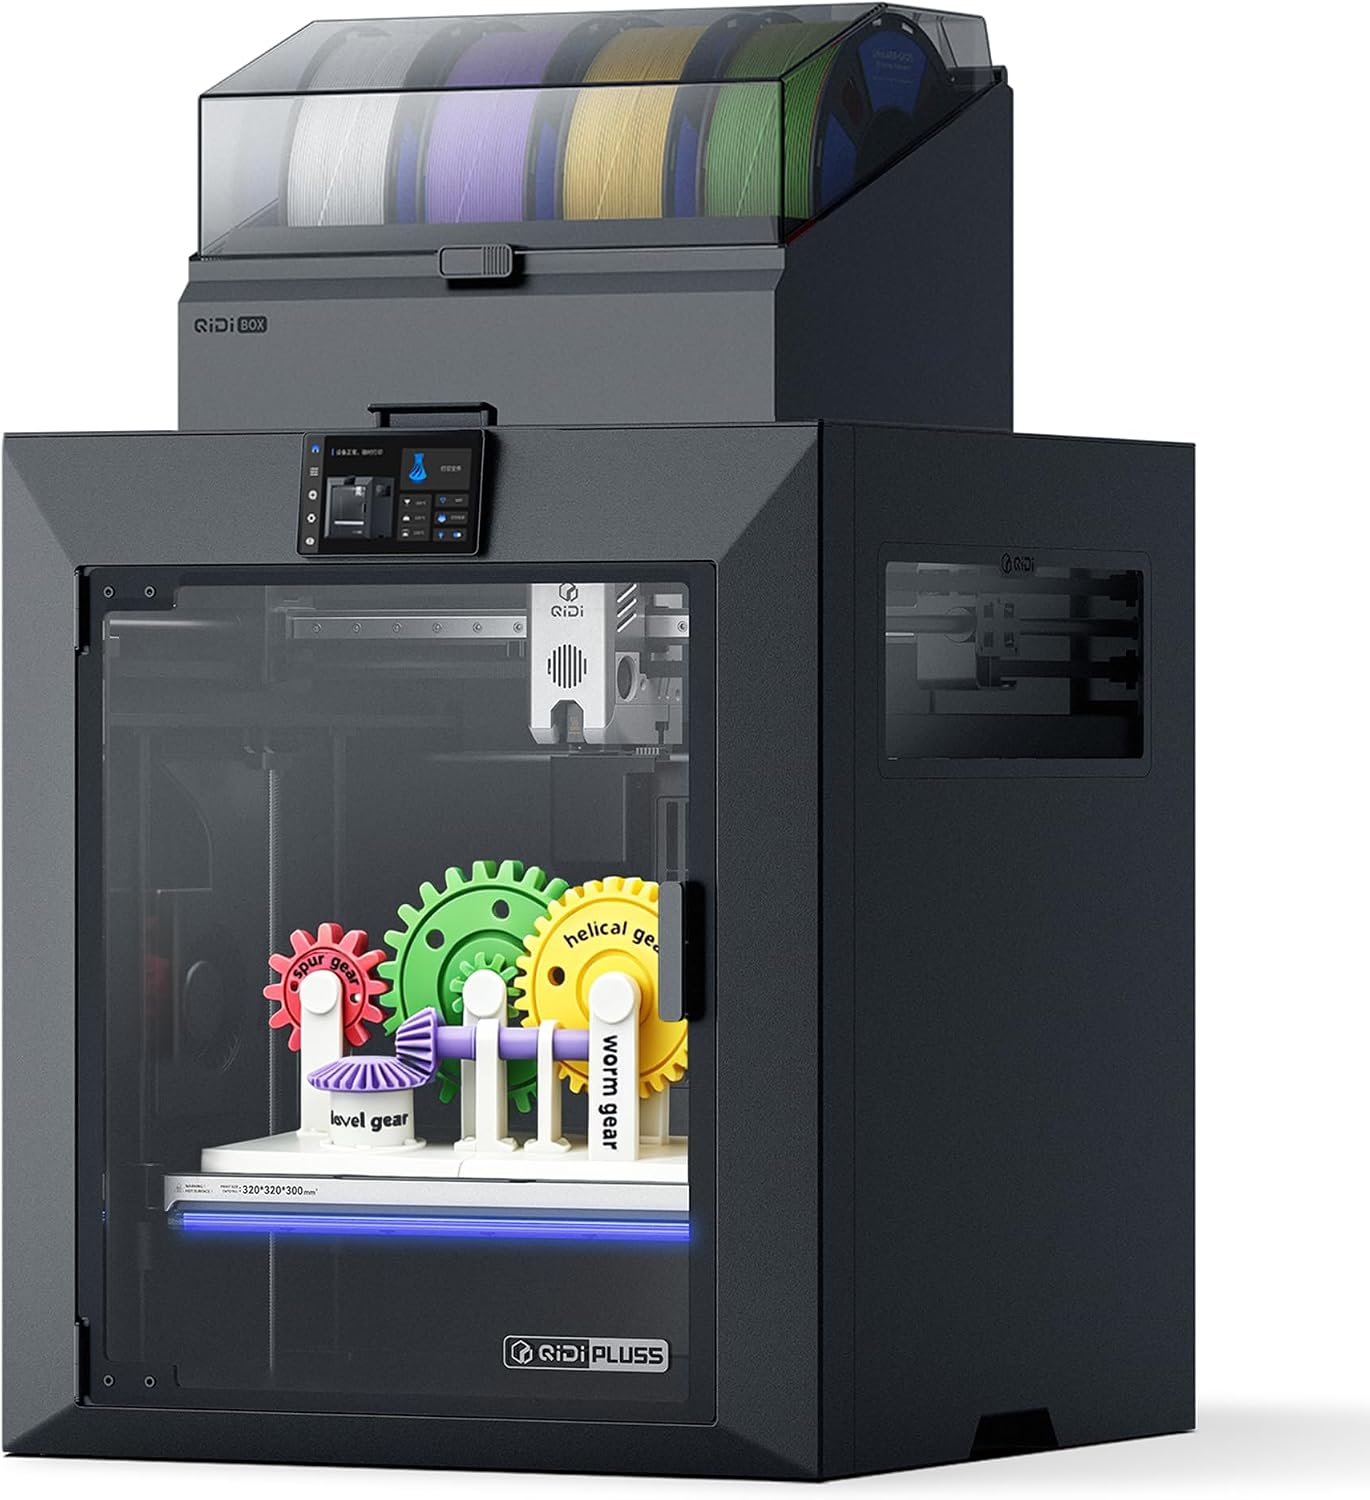
QIDI Plus5 3D Printer
| Build volume | 320×320×300mm |
|---|---|
| Nozzle temp | ≤370°C |
| Chamber temp | ≤65°C |
| Top speed | ≤600mm/s |
| Connectivity | Wi‑Fi (2.4/5GHz), Ethernet, QIDI Cloud, USB drive |
The QIDI Plus5 is a large-format enclosed FDM printer built for engineering workflows and batch production. It offers a 320×320×300mm build area, a 370°C-capable nozzle and a 65°C heated chamber so you can reliably print high-performance filaments like PC, nylon, PPS‑CF and carbon-fiber composites with reduced warping. The CoreXY motion system, linear rails and a multi-metal nozzle support faster, stable moves at up to 600mm/s while an optional Polar Cooler helps prevent heat-creep inside the enclosed chamber. Smart features include next‑gen auto-leveling, AI camera monitoring and cloud/Wi‑Fi or Ethernet control for remote job management and one-tap printing, which is handy for batch runs where you want minimal supervision. Safety and uptime are addressed with multiple thermal sensors, a flame-retardant enclosure and a 3-in-1 air filtration system for long prints. The Plus5 can be paired with the QIDI Box for multi-material, multi-color work and active filament drying. The trade-offs are its physical footprint and weight and the higher system complexity compared with small hobby machines, which means a dedicated workspace and some learning for optimal results.
Best for: Engineers, advanced makers, and small shops that need a reliable, production-capable desktop printer for durable functional parts and repeatable batch runs.
Less Ideal for: Casual hobbyists or users with limited space who only print occasional small models and prefer a plug-and-play consumer machine.
- Large 320×320×300mm build volume for full-scale prototypes and batch printing
- 370°C nozzle and 65°C heated chamber that enable engineering-grade materials and reduced warpage
- CoreXY with linear rails and high-speed capability for stable, fast printing
- Networked control plus AI camera and one-tap/cloud printing for remote monitoring and batch management
- Built-in safety features and 3-in-1 filtration support long, high-temperature prints safely
- Substantial footprint and weight require a dedicated workspace and careful placement
- Higher system complexity than consumer desktop printers can mean a steeper setup and tuning curve
Verdict: Choose the QIDI Plus5 when you need a dependable, large-format desktop printer that consistently handles engineering filaments and batch production.
Creality K2 Pro Combo

| Build volume | 350×350×350mm |
|---|---|
| Max print speed | 600mm/s |
| Layer precision | 0.05mm |
| Noise level | 45dB at 300mm/s |
The K2 Pro Combo is built around speed and a large build volume, targeting users who need fast prototyping for parts up to roughly 350mm cubed. It pairs Creality's step-servo motors and a rigid aluminum matrix frame to push print speeds up to 600mm/s while maintaining layer precision down to 0.05mm, which helps when you want quick iterations without losing fine detail. Dual AI cameras provide live toolhead and chamber monitoring to catch extrusion issues and failed prints early, and auto-leveling reduces setup fuss. Practical benefits include the ability to print multiple small parts or single large models in one run and quieter operation at moderate speeds. The main compromises are that very high speeds still require tuned slicer settings and good filament to realize the advertised results, and larger, faster machines can demand more frequent calibration and part cooling considerations. For someone prioritizing rapid, large-format prints with built-in monitoring, the K2 Pro Combo is a capable choice.
Best for: Buyers who want a 300mm-class printer that prioritizes fast turnarounds and visible print monitoring, especially hobbyists or small workshops wanting larger single-part prints or batch production.
Less Ideal for: If you need a plug-and-play, low-maintenance desktop printer for occasional small models, a simpler slower machine may be a better fit.
- Large 350×350×350mm build volume suitable for big parts or batch prints
- High top speed up to 600mm/s for fast prototyping
- Dual AI cameras for toolhead and chamber monitoring to detect failures
- Sturdy aerospace-grade aluminum matrix frame for dimensional stability
- Achieving peak speed and precision requires careful slicer tuning and quality filament
- Larger, faster prints may need more frequent calibration and cooling optimization
Verdict: Choose the K2 Pro Combo when you need a 300mm-class printer that delivers very fast, large-format prototyping with built-in camera monitoring.
Creality K2 Pro Combo

| Build Volume | 300×300×300 mm |
|---|---|
| Max Printing Speed | ≤600 mm/s |
| Nozzle Temperature | 300 °C |
| Chamber Heating | Up to 60 °C |
| Leveling Type | Auto leveling |
The Creality K2 Pro Combo is a fully assembled 3D printer built for fast, large multicolor and multi-material prints. It uses Creality Filament System (CFS) modules for up to 16-color workflows and offers a 300×300×300 mm build volume that handles helmet-size models or multiple parts in one run. Mechanically it leans heavy-duty: an aerospace-grade aluminum frame, precision steel X-axis rail, dual Z-axis with four linear rods, and a quick-swap direct drive extruder with a hardened steel nozzle for abrasive filaments. Motion hardware and step-servo motors enable claimed speeds up to 600 mm/s and high acceleration while tuned fans keep noise down. Smart features include dual AI cameras for chamber and nozzle monitoring, targeted auto-level probing, chamber heating to 60°C for engineering materials, onboard air purification, and Creality OS/Print integration for slicing and printer management. The printer is feature-rich and engineered for reliability, but its size and advanced systems mean a steeper setup learning curve and workspace commitment compared with compact desktop printers.
Best for: Buyers who prioritize reliable, professional-capable prints and want built-in multicolor/multi-material workflows with features that reduce print failures and monitoring time.
Less Ideal for: If you need a compact, lightweight, completely beginner plug-and-play machine for occasional small prints, this large, feature-dense printer is more than necessary.
- Large 300×300×300 mm build volume for big parts or batch printing
- CFS multicolor filament system for automated multicolor and multi-material workflows
- Sturdy metal frame, precision rails, and dual Z-axis for dimensional stability
- Hardened steel nozzle and direct drive extruder handle abrasive and engineering filaments
- Dual AI cameras and targeted auto-leveling reduce failed prints and speed setup
- Physically large and heavy, requiring a dedicated workspace and stable surface
- Advanced feature set adds complexity for users wanting a simple plug-and-play desktop printer
Verdict: Choose the K2 Pro Combo when you need a durable, high-speed 300 mm printer that simplifies multicolor and engineering-material workflows for reliable, professional results.
Choosing the Right 300Mm 3D Printer: Key Factors to Consider
Build Volume and True Usable Space
Bigger nominal dimensions do not always translate to usable print area. Check the real usable volume after accounting for carriage clearance, endstop offsets, and heated bed mounting. For a 300mm 3D Printer, you want to confirm the usable Z or XY is close to the advertised figure so multi-part assemblies or full-height prototypes actually fit.
Usable space also affects print orientation decisions. Limited clearance around the extruder carriage can force awkward orientations that increase support material and lengthen print times. When sizing for projects, measure the practical envelope rather than relying solely on spec sheets.
Thermal Management and Bed Adhesion
Large prints take a long time and are more sensitive to temperature gradients. A heated bed with even temperature distribution and an enclosure or effective airflow management reduces warping and layer separation. Consider how the machine maintains bed and hot end temperatures during multi-hour prints and whether it supports enclosures if you plan to use materials that require stable ambient conditions.
Effective adhesion solutions matter more at larger sizes because a single lifted corner can ruin a long print. Look for reliable bed surface options, bed leveling systems, and whether the platform accepts common adhesion aids like PEI sheets or glass plates without sacrificing flatness.
Mechanical Design and Motion Components
Frame stiffness and the quality of motion hardware dictate how well a printer holds dimensional accuracy over long builds. Robust frames with proper bracing, quality linear rails or well-made rods, and adequately sized belts or lead screws reduce wobble and layer artifacts. On tall or wide prints, even minor frame flex multiplies into visible defects.
Examine the type and mounting of the motion components, belt widths, pulley bearings, and whether the design isolates vibrations. Machines with heavier gantries or unsupported spans should rely on stronger linear guides or dual-rail arrangements to maintain repeatability.
Filament Handling and Extrusion Reliability
Long jobs are more likely to fail because of filament issues. Reliable filament feeding, compatible spool mounts that prevent tangles, and extruder designs that limit heat soak or slipping are essential. Consider whether the extruder can handle higher-flow demands for larger nozzles and whether filament path accessibility makes clearing clogs straightforward.
Also assess support for different filament types. Some materials need higher nozzle or chamber temperatures for large prints; the printer should be rated or built to handle these without premature motor or bearing failures.
Leveling, Calibration, and Ease of Use
A printer that simplifies routine calibration saves time and reduces failed prints. Automatic bed leveling systems, mesh compensation, and accessible adjustment points help maintain first-layer quality on big surfaces. For 300mm-class machines, small miscalibrations scale up into bigger problems, so the more automated and repeatable the process, the better.
Also consider how the interface exposes calibration tools and whether common maintenance tasks are straightforward. Quick access to belts, nozzle, and bed surfaces speeds recovery from issues during long print cycles.
Choosing the Right Nozzle Size and Layer Height
Nozzle diameter and layer height determine both surface finish and print time. For large parts a slightly larger nozzle speeds up extrusion and reduces print duration, but you must balance that against reduced fine detail. Choose nozzle sizes and layer heights that fit the part's functional requirements rather than defaulting to the finest settings.
When increasing nozzle size, adjust print speeds and extrusion multipliers to match the higher volumetric flow. Also consider if the hot end and extrusion drive are rated for sustained higher flows, which matter for long prints with big layer cross-sections.
- Larger nozzles shorten print time but lower fine detail.
- Higher layer heights improve throughput with minor dimensional tradeoffs.
- Ensure extruder and hot end can sustain higher volumetric flow.
Enclosures, Ambient Control, and Material Choices
Some materials benefit from a controlled chamber to reduce cracking and warping on large prints. An enclosure or at least guided airflow management helps maintain consistent ambient temperature around the part. This is especially important for engineering plastics that require a warm environment during cooling.
If you plan to print a variety of filaments, consider whether the printer supports enclosures or accessories to manage ambient conditions. Also evaluate how easy it is to add insulation or panels if you will regularly use temperature-sensitive materials.
- Enclosures stabilize print cooling for engineering plastics.
- Ambient control reduces delamination on tall prints.
- Modular enclosures offer flexibility if you rarely print sensitive materials.
Monitoring Long Prints and Recovery Options
Long-duration prints benefit from job monitoring and recovery features. Look for printers with reliable pause-and-resume functions that can recover from power interruptions, filament runout detection, or print crashes. Camera monitoring or remote job status updates are useful for spotting problems early without staying by the machine for every hour.
Also consider practical recovery tools like filament change routines that minimize seam marks and automated pauses for inserts. The more built-in the recovery workflow, the less manual intervention required for multi-hour builds.
- Power-loss recovery prevents losing hours of work.
- Filament runout detection helps avoid mid-print failures.
- Remote monitoring reduces unnecessary on-site supervision.
Maintenance Routines That Matter for Large-Format Use
Routine maintenance has a greater payoff for larger printers because a failed component is more likely to ruin a long print. Regular belt tension checks, lubrication of linear elements, and periodic bed surface inspections reduce unexpected failures. Keep a simple checklist for pre-print checks to catch issues before they scale into multi-hour failures.
Also plan for spare consumables. Keeping an extra set of nozzles, a spare build surface, and a backup filament spool ready reduces downtime between print attempts.
- Pre-print checklists catch common failure causes early.
- Spare nozzles and bed surfaces minimize downtime.
- Scheduled motion system inspections extend consistent performance.
Integrating Prints Into Prototyping and Production Workflows
A 300mm 3D Printer often sits between desktop hobby use and small-batch production. Consider how print scheduling, part orientation, and post-processing fit into your broader workflow. Large prints may need more finishing work, so plan for sanding, vapor smoothing, or machining allowances when designing parts.
Think about batch strategies too. Breaking large designs into printable subassemblies can shorten individual job times and reduce risk. Modular design combined with consistent dimensional accuracy simplifies final assembly and reduces failed full-size prints.
- Plan post-processing when sizing and orienting parts.
- Split large parts into assemblies to reduce risk.
- Coordinate print schedules to balance machine availability.
How We Chose the Best 300Mm 3D Printer
We focused on attributes that predict real-world success for longer, larger builds. Our primary evaluation criteria were dimensional accuracy on large prints, thermal and bed adhesion stability during extended jobs, and mechanical rigidity to resist layer shifts. We also weighed user-facing factors such as ease of setup and routine maintenance because small workshops benefit from machines that do not require constant tuning. Additional filters excluded machines aimed strictly at industrial high-end production or tiny desktop hobby rigs under 200mm build depth to keep comparisons relevant to the 300mm class. Concretely, we examined reported layer precision across full-height prints, bed heating and leveling systems, frame design and motion hardware, and filament feed reliability for long-duration extrusion. We also considered firmware features and connectivity that improve job monitoring and recovery. Units were excluded if they lacked a proven way to manage long prints, such as dependable bed adhesion strategies or proper motion component sizing. The resulting selections are those that balance large-format capability with day-to-day reliability.
Our full evaluation process is outlined in our review methodology.
FAQ
Will a 300mm 3D Printer print faster than a smaller machine?
Not automatically. Print speed depends on nozzle size, layer height, and maximum safe extrusion flow. Larger parts can take longer simply because there is more material to lay down. Choosing larger nozzles and coarser layer heights will increase throughput but may sacrifice surface detail.
Do I need an enclosure for large-format prints?
It depends on the material. For PLA you can often get away without one, but engineering plastics benefit from a controlled ambient temperature. An enclosure helps prevent warping and delamination on taller or larger parts.
How important is bed leveling on a 300mm 3D Printer?
Very important. Small leveling errors scale with surface area and height, so automated leveling or an accurate mesh compensation routine significantly improves first-layer adhesion and reduces failed prints on big surfaces.
Can I use the same filaments I use on smaller printers?
Usually yes, but ensure the extruder, hot end, and chamber can handle the demands of long prints with specific materials. Some filaments need higher temperatures or a stable ambient environment to print reliably at large scales.
What maintenance should I perform before a multi-hour print?
Check belt tension and pulley alignment, verify the bed surface is clean and flat, confirm nozzle condition, and preheat the bed and nozzle to operating temperatures. Also inspect the filament path and spool mounting to prevent tangles during long runs.
Final Verdict
Prioritize stable thermal management, robust motion components, and reliable extrusion when choosing a 300mm 3D Printer. Larger build volume amplifies small problems, so focus on machines with proven bed adhesion strategies, solid frames, and easy calibration tools. If you plan long or frequent large prints, favor features that simplify monitoring and recovery. With those tradeoffs in mind, you can choose a machine that delivers consistent large-format results without constant hands-on tuning.