
Note: This article contains affiliate links. If you click on these links and make a purchase, we may earn a small commission at no extra cost to you. This helps support our research and content. Read our full affiliate disclosure here.
Picking the right desktop 3D printer matters whether you are prototyping, making small production runs, or learning additive manufacturing. The right machine reduces trial-and-error, cuts material waste, and speeds up time to a finished part. This guide presents seven shortlisted desktop 3D printers chosen for consistent output and real-world usability. We evaluated candidates across print accuracy, bed adhesion and leveling, material compatibility, and user-facing features so you can match a printer to your workspace and skills. Read on for a concise overview of what to expect from each top pick and which features matter most for common desktop printing tasks.
Top Picks at a Glance
| Best Overall The best all-around choice for most situations | Creality K1C 3D Printer |  |
| Best Quality Built to a higher standard if you want something more solid | Original Prusa MK4S |  |
| Best Value The sweet spot between price and what you get | Creality Ender 3 V3 SE |  |
| Best Budget The cheapest option that still gets the job done reliably | Entina Tina2C Mini 3D Printer |  |
| Top Rated A top-rated pick with lots of positive feedback | Snapmaker U1 3D Printer |  |
| Most Popular A crowd favorite that many people choose with confidence | Bambu Lab P1S Combo |  |
| Best Seller A high-volume bestseller chosen again and again | FLASHFORGE Adventurer 5M |  |
Creality K1C 3D Printer

| Print volume | 8.66×8.66×9.84 inch |
|---|---|
| Max nozzle temp | 300 ℃ |
| Supported filaments | PLA/ASA/ABS/TPU/PLA-CF/PET-CF |
| Auto features | Auto Z offset and auto leveling |
The Creality K1C is a ready-to-run desktop 3D printer aimed at hobbyists and small shops that want faster turnarounds without a steep setup. It arrives largely assembled and boots with a guided setup so you can start printing within minutes, and its auto Z-offset and auto leveling reduce fiddly bed adjustments. The machine uses a clog-free direct extruder with a steel-tipped copper nozzle and titanium-alloy heatbreak that supports higher temperature filaments up to 300°C, making PLA, ABS, TPU and carbon-fiber-filled filaments possible. Creality claims a very high top speed and acceleration for rapid prints, while an upgraded multi-fan cooling system and special ducting help with layer quality and bridging. The integrated AI camera watches prints for common failures and enables time-lapse recording. Trade-offs include a relatively small build volume for more ambitious parts and the usual learning curve when dialing prints at high speed, but for users who value convenience and faster prototyping the K1C is a practical desktop option.
Best for: Buyers who want a compact, mostly plug-and-play desktop printer for fast prototyping and everyday hobby prints without spending hours on setup and leveling.
Less Ideal for: Users who need large-format printing for single big parts or those who prioritize ultimate top-speed dialing without iterative tuning should look elsewhere.
- Mostly preassembled and plug-and-play setup for fast first prints
- Auto Z-offset and auto leveling reduce manual bed tramming
- Clog-resistant direct extruder with high-temp capability (up to 300°C) for a wider filament range
- AI camera for real-time monitoring and time-lapse capture
- Upgraded multi-fan cooling design that improves layer adhesion and reduces stringing
- Small build volume limits printing of large single-piece models
- Very high advertised speeds may require tuning to maintain quality
Verdict: The K1C is a compact, mostly plug-and-play desktop printer that accelerates prototyping with high-temp extrusion and built-in AI monitoring.
Original Prusa MK4S

| Print volume | 9.84 x 8.3 x 8.6 in |
|---|---|
| Included filament | 1 kg Prusament PLA Galaxy Black |
| Item model number | MK4S-COM-PEI |
The Original Prusa MK4S is a ready-to-run desktop FDM printer aimed at makers and small workshops that need fast, repeatable output with good surface finish. It ships fully assembled and includes a 1 kg spool of Prusament PLA so you can start printing right away; the 9.84 x 8.3 x 8.6 inch build volume covers most hobby and prototyping jobs. Input shaping and other motion compensation features reduce ringing at higher speeds, letting you push throughput without a large hit to edge quality. Prusa's ecosystem and open-source design mean firmware updates, upgrade paths, and a mature materials library are practical long-term benefits for frequent users. The unit is designed for day-to-day reliability, but its professional focus means it is larger and more capable than entry-level hobby machines and assumes the user will appreciate tuning and firmware options rather than a purely plug-and-play, smartphone-driven experience.
Best for: Buyers who prioritize print speed, dimensional accuracy, and a serviceable platform they can upgrade and maintain for frequent prototyping or small-batch production.
Less Ideal for: Casual first-time users who want the smallest, simplest plug-and-play printer or teams that need very large build volumes out of the box.
- Fully assembled for fast setup and immediate printing
- Input shaping reduces vibrations for cleaner edges at higher speeds
- Built on an open-source, upgradeable platform with ongoing firmware support
- Included 1 kg spool of Prusament PLA lets you test prints out of the box
- Build volume is modest for larger production parts
- Not aimed at zero-configuration users who want mobile app driven simplicity
Verdict: Choose the MK4S if you want a fast, professionally oriented desktop FDM printer that balances high-speed capability with reliable, upgradeable performance.
Creality Ender 3 V3 SE

| Item model number | Ender 3 V3 SE |
|---|---|
| Manufacturer | Creality 3D |
| Printing speed | Up to 250 mm/s |
| Mainboard | 32-bit silent mainboard |
The Creality Ender 3 V3 SE is a small desktop FDM printer aimed at hobbyists and makers who want faster turnarounds without a steep learning curve. It uses a Sprite direct extruder that handles PLA, PETG, and flexible filaments more reliably than older Bowden setups, and features auto filament load/unload to simplify routine tasks. CR Touch auto leveling with a strain sensor and an intuitive motion-graphics UI make getting a good first layer significantly easier, and the dual Z-axis with reinforced Y-axis shafts reduces wobble for cleaner tall prints. A 32-bit silent mainboard and improved stepper drives lower noise while maintaining precise motion, and the flexible PC spring steel build plate makes part removal straightforward. Its stated top speed and acceleration promise quicker prints, though pushing high speeds can still require tuning and may not suit parts needing the absolute finest detail. Assembly is straightforward and beginner-friendly, but advanced users looking for larger build volumes or heated/enclosed chambers for demanding materials will want more capable machines.
Best for: Buyers who want a compact, easy-to-assemble desktop printer that speeds up routine prints and reduces setup friction while still handling common filament types.
Less Ideal for: People who need large-format printing, industrial throughput, or a heated enclosed chamber for advanced engineering materials should consider more capable models.
- Sprite direct extruder supports PLA, PETG, and TPU with more reliable feeding
- CR Touch auto leveling and strain-sensor Z offset for easier first-layer setup
- Dual Z-axis and sturdy Y-axis linear shafts reduce Z wobble for improved print quality
- 32-bit silent mainboard and advanced stepper drivers for quieter, smoother operation
- Flexible PC spring steel build plate simplifies part removal
- Smaller build volume than larger desktop machines limits oversized prints
- High top speeds require tuning to maintain fine detail on some models
Verdict: A user-friendly desktop printer that speeds up everyday FDM printing with a reliable direct extruder and automated leveling, ideal for hobbyists who prioritize efficiency and ease of use.
Entina Tina2C Mini 3D Printer

| Print volume | 3.9 × 3.9 × 3.9 inches |
|---|---|
| Connectivity | 2.4G WiFi, TF card |
| Compatibility | Windows, macOS, Linux, Chromebook |
| App features | Poloprint Cloud with AI search and model library |
The Entina Tina2C is a small, fully assembled desktop FDM printer aimed at first-time users and kids, designed to get you printing in minutes through the Poloprint Cloud app. Setup and one-click printing from the app make it a low-friction entry point, while WiFi and TF card support let you print online or offline. Practical features like auto leveling, power-loss recovery, a flexible magnetic build plate, and a quick-swap printhead reduce maintenance and increase first-print success. The unit also emphasizes safety and quiet operation for home or classroom use and includes an extensive library and AI-powered tools for guided learning and STEM projects. Limitations are its very small 3.9 × 3.9 × 3.9 inch build volume that constrains project size, and as a budget-oriented beginner machine it lacks the advanced controls and larger print area hobbyists may want. For simple models, education projects, and rapid hands-on learning, it delivers a friendly, low-stress experience, but users who need larger prints or higher-end tuning will outgrow it quickly.
Best for: Buyers looking for an affordable, plug-and-play desktop printer to introduce kids or beginners to 3D printing and STEM projects will appreciate its guided app, safety features, and low learning curve.
Less Ideal for: Users who need to print larger functional parts, require advanced tuning, or expect high-end professional prints should consider larger or more capable desktop printers instead.
- App-guided setup and one-click printing that speed first prints
- WiFi and TF card options for flexible online or offline printing
- Auto leveling and power-loss recovery improve successful prints
- Magnetic flexible build plate and quick-swap printhead simplify maintenance
- Designed for quiet, safe operation suitable for home and classroom
- Very small 3.9 × 3.9 × 3.9 inch build volume limits project size
- Not targeted at advanced users who want larger beds or fine-tuned controls
Verdict: A budget-friendly, kid-friendly desktop printer that makes learning 3D printing easy through guided app controls and low-maintenance features.
Snapmaker U1 3D Printer

| Build volume | 270 x 270 x 270 mm |
|---|---|
| Max print speed | 500 mm/s |
| Toolheads | 4 independent toolheads with SnapSwap changer |
| Material compatibility | PLA, PVA, TPU, PETG, PCTG, ABS, ASA, PA, PC |
The Snapmaker U1 is a desktop CoreXY 3D printer built around a four-toolhead SnapSwap system that swaps complete hotend assemblies in about five seconds to enable true multi-color and multi-material prints without long purge cycles. Typical use cases are multi-color models, mixed-material functional parts, and small-batch prototyping where switching between PLA, TPU, PVA, PETG or engineering filaments is frequent. The machine pairs a rigid CoreXY frame and carbon-fiber X rails for high-speed printing up to 500 mm/s across a 270 × 270 × 270 mm build volume while automatic toolhead offset calibration, vibration compensation, and fine-tuned extrusion help deliver consistent first layers and dimensional accuracy. Practical benefits include far less filament waste compared with purge-based color changes, faster multi-head jobs, and a beginner-friendly workflow with a model library, touchscreen, Orca slicer, and remote app monitoring. Important limitations are the larger footprint and weight compared with compact hobby printers and the need to manage four preloaded toolheads and their filaments, which raises consumable management compared with single-extruder machines.
Best for: Buyers who prioritize reliable, repeatable multi-color or mixed-material prints and want to minimize material waste and downtime during frequent filament changes.
Less Ideal for: Those who need a very small, lightweight hobby printer or who prefer the simplicity of a single-extruder setup with minimal filament management.
- SnapSwap four-toolhead system switches full toolheads in about five seconds for near-instant color or material changes
- Significantly reduces filament waste by avoiding long purge sequences
- Automatic calibration and vibration compensation improve reliability and first-layer consistency
- Rigid CoreXY frame with carbon fiber rails supports high-speed printing up to 500 mm/s
- Wide material compatibility for mixed-material and multi-color functional parts
- Heavier and larger footprint than many desktop hobby printers
- Managing four preloaded toolheads and filament spools adds operational complexity
- Higher initial system complexity may require more routine maintenance than single-extruder units
Verdict: Choose the U1 if you need a dependable desktop printer that delivers fast, low-waste multi-color and mixed-material prints for prototyping or production-like workflows.
Bambu Lab P1S Combo

| Build Volume | 256×256×256 mm³ |
|---|---|
| Max Speed | 500 mm/s |
| Max Acceleration | 20 m/s² |
| Supported Filaments | PLA, PETG, TPU, PVA, PET, ABS, ASA |
The P1S Combo pairs a CoreXY motion system with an automated material system to deliver fast, multi-color desktop prints while keeping setup simple. It is intended for makers who want quick turnarounds: the printer advertises up to 500 mm/s travel and strong acceleration for shorter print times, and a direct-drive extruder that widens filament compatibility to include TPU and engineering plastics. The enclosed build chamber and automatic bed leveling help produce consistent results with trickier filaments, and the included AMS makes multi-color or multi-material prints practical without manual filament swaps. Practical benefits include a 256×256×256 mm build volume that handles most hobby and prototype parts and a camera for timelapse recordings. Trade-offs are that the advanced speed and AMS add complexity and require careful tuning and reliable filament handling to avoid failed multi-color prints, and high-performance settings may increase noise and wear compared with slower print profiles. This unit is ready-to-use out of the box for experienced hobbyists and small workshops who prioritize speed and multi-material capability.
Best for: Buyers who value speed and multi-color capability and want a near-ready desktop printer that delivers fast prototyping and polished multi-material prints with some setup and tuning.
Less Ideal for: If you need a completely silent, low-maintenance printer for casual occasional prints or require fiber-reinforced composites, this high-performance combo is not the best match.
- Very fast travel speeds and high acceleration reduce print times for prototyping.
- AMS enables multi-color and multi-material prints without manual filament swapping.
- Enclosed design with auto bed leveling improves success with temperature-sensitive filaments.
- Direct-drive extruder increases compatibility with flexible and specialty filaments.
- Built-in camera supports timelapse and print monitoring.
- High-speed settings and AMS add operational complexity and require tuning.
- Not recommended for carbon or glass fiber reinforced filaments.
Verdict: Choose the P1S Combo when you want a desktop printer that prioritizes high-speed multi-color and multi-material printing for fast prototyping and detailed multi-filament projects.
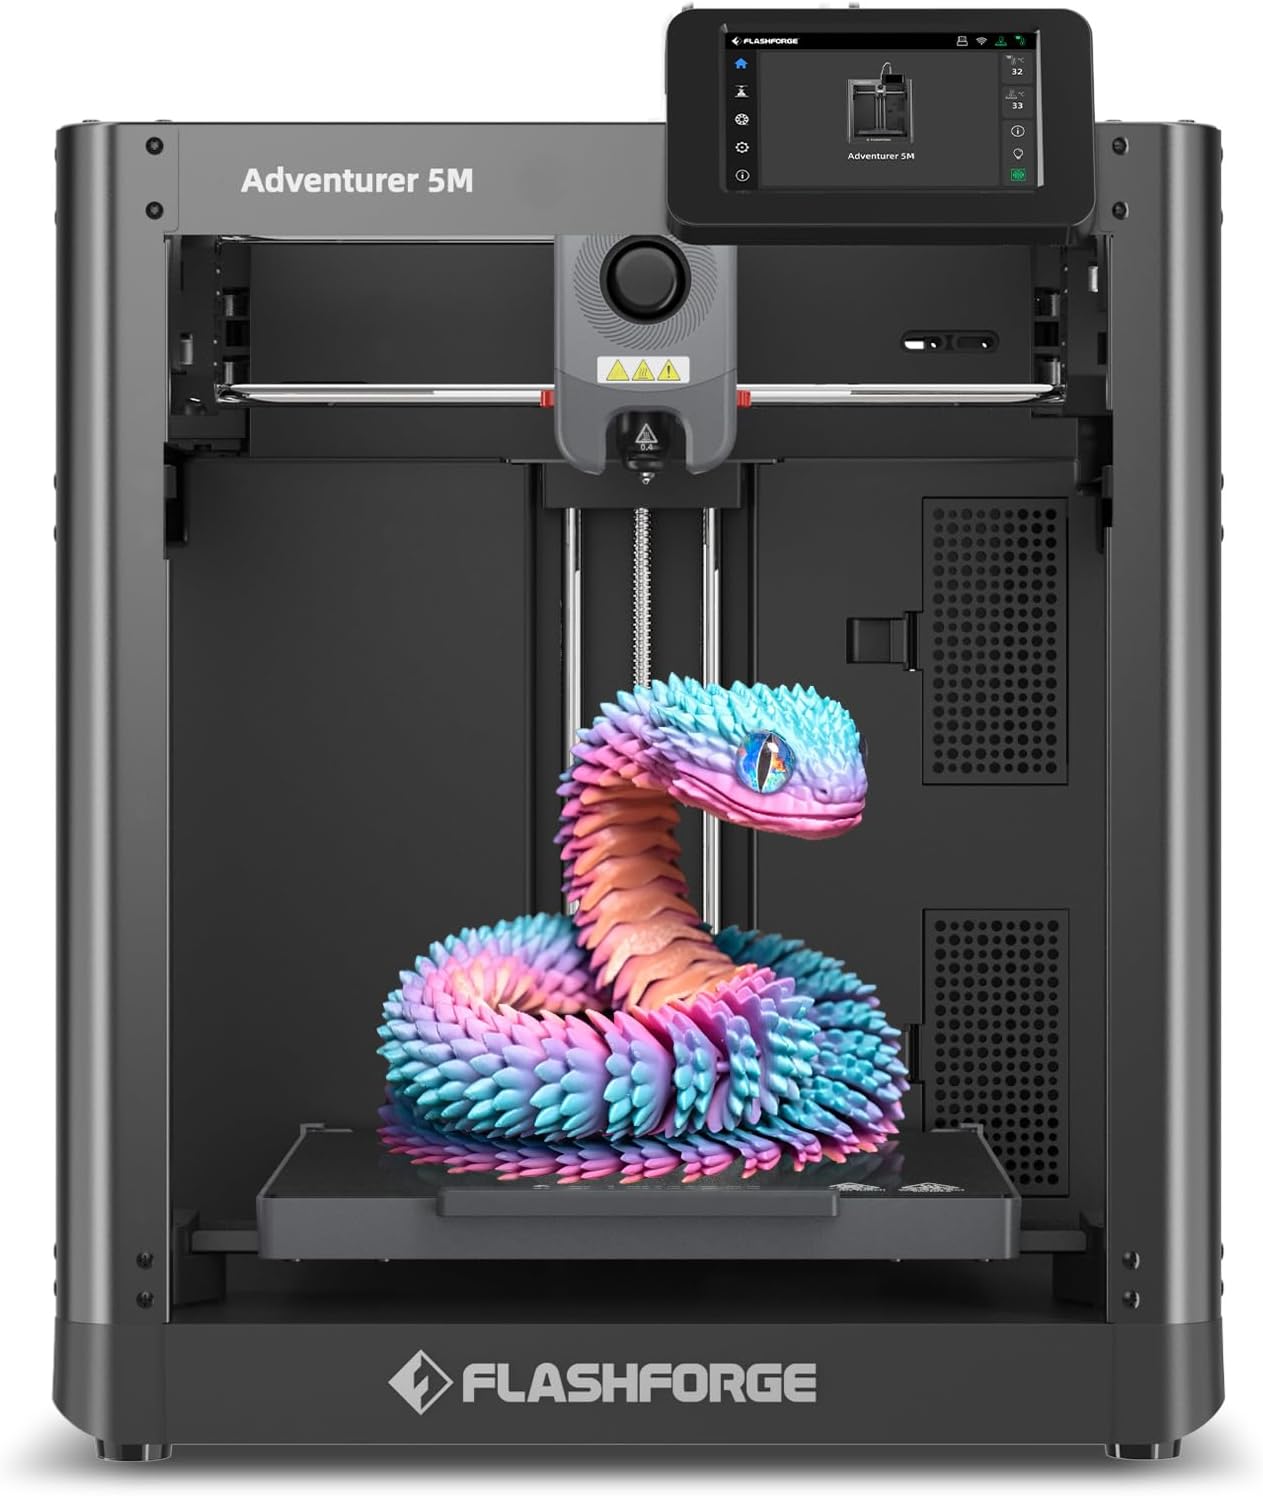
FLASHFORGE Adventurer 5M
| Build Volume | 220 x 220 x 220 mm |
|---|---|
| Max Extruder Temp | 280°C |
| Travel Speed | 600mm/s |
| Leveling Type | One-Button Auto Leveling |
| Platform Type | Double-Sided PEI Platform |
The FLASHFORGE Adventurer 5M is a CoreXY desktop 3D printer aimed at speeding up prototyping while keeping setup simple. It prints in a 220×220×220mm envelope and uses one-button automatic bed leveling to improve first-layer reliability for users who prefer minimal fiddling. The printer emphasizes speed with a claimed 600mm/s travel and a high-flow 32mm³/s nozzle plus vibration compensation to retain detail at faster print rates. Practical touches include a double-sided PEI platform for easier part removal, hotend temperatures up to 280°C for a wide range of filaments, quick 3-second detachable nozzle swaps, and mobile app monitoring for remote status checks. Trade-offs are typical for a fast, enclosed CoreXY: high-speed settings may require tuning to avoid ringing on fine parts, and some advanced materials benefit from higher nozzle temps available on other models. For buyers who value plug-and-play convenience and faster cycle times, the AD5M balances user-friendly features with engineering-grade capability, but expect to spend some time dialing settings for the best high-speed surface finish.
Best for: Buyers who want a reliable, mostly hands-off desktop printer that accelerates prototyping and reduces setup time while still supporting a broad range of common filaments.
Less Ideal for: Users who prioritize out-of-the-box ultra-high-temperature printing or absolute top-tier surface finish at maximum speeds should consider machines targeted at industrial materials or slower precision printing.
- One-button automatic bed leveling for easier first layers
- CoreXY all-metal structure with high travel speeds for faster prints
- 280°C direct-drive extruder and multiple nozzle sizes for versatile filament support
- Double-sided PEI platform simplifies part removal
- Mobile app monitoring and quick-detach nozzle speed up workflow
- High advertised speeds may require tuning to avoid quality issues on detailed parts
- Some engineering materials may need higher hotend temperatures than 280°C
Verdict: Pick the Adventurer 5M if you want a user-friendly CoreXY desktop printer that speeds up prototyping with automated leveling and versatile filament support.
Choosing the Right Desktop 3D Printer: Key Factors to Consider
Print Accuracy and Layer Resolution
How finely a printer can resolve features determines the fidelity of small parts and surface finish. Layer height, XY positioning accuracy, and stable motion systems translate into actual dimensional precision on printed parts.
Assess the claimed layer resolution in the context of the printer's motion system and extrusion control. A low micron layer height is useful only if the frame rigidity, stepper control, and hotend can deliver consistent extrusion. For desktop use, balance desired detail with print time and expected post-processing.
Bed Adhesion and Leveling
Successful first layers are crucial to completing prints without warping or detachment. A reliable bed surface, consistent heating, and an accurate leveling method reduce failed prints and wasted material.
Consider whether the printer offers assisted or automatic bed leveling, a removable or textured build plate, and uniform heating. These features matter more when printing larger parts or using warpage-prone materials.
Material Compatibility and Hotend Capability
Different projects demand different filaments. PLA is forgiving, while ABS, PETG, TPU, and more advanced polymers require higher temperatures and controlled environments.
Look for hotend temperature range, whether the hotend is all-metal for higher-temperature filaments, and if the printer can be enclosed to maintain ambient temperature. Ease of switching filament types and support for flexible filaments are important for varied workshop use.
Build Volume and Workspace Fit
Build volume defines the maximum part size you can print in one go and influences whether you need to split models. For desktop users, physical footprint and noise level also affect where the machine can live.
Match the printer's build envelope to your typical projects. Consider whether the printer's height and depth fit on your bench, and whether an enclosed printer's ventilation needs or noise output are acceptable in your environment.
Software, Connectivity, and Workflow
Software determines how you prepare, send, and monitor prints. A smooth workflow reduces errors and saves time from model to finished part.
Evaluate slicer compatibility, built-in touchscreen controls, wireless or USB connectivity options, and remote monitoring capabilities. Open or well-documented firmware and community support can ease troubleshooting and upgrades.
Maintenance, Parts Accessibility, and Reliability
Routine upkeep like nozzle changes, bed replacements, and belt tensioning affects long-term ownership costs and downtime. Readily available replacement parts and straightforward maintenance procedures keep a desktop printer productive.
Consider how accessible common wear parts are and whether the design allows quick swaps. A machine that tolerates occasional adjustments and has robust assemblies will be more reliable for daily use.
Matching Printer Features to Your Use Case
Different desktop printing tasks call for different priorities. Rapid prototyping values speed and repeatable dimensional accuracy, while hobbyist sculpting emphasizes surface finish and fine detail. Small production or jigs may prioritize uptime and consistent bed adhesion.
List the types of parts you plan to print and rank the most important attributes: resolution, strength, flexibility of materials, or print volume. Use that ranking to filter candidates by the criteria above so you focus on printers that actually match your workflow.
- Prototyping: prioritize dimensional stability and repeatability
- Cosmetic parts: favor higher resolution and finer nozzles
- Functional parts: check for stronger materials and sturdy extrusion
- Flexible or elastic components: ensure flexible filament handling
Workflows That Reduce Failed Prints
Adopt a consistent pre-print routine to cut the number of failed jobs. Level and clean the build surface before each session, verify filament condition, and run a short test print after major changes.
Small changes to slicer settings such as first-layer speed, extrusion multiplier, and nozzle temperature can dramatically improve first-layer adhesion and reduce warping risks.
- Run a quick skirt or brim for larger parts to stabilize edges
- Use heated bed settings appropriate to the filament
- Keep spare nozzles and a cleanup kit on hand
Optimizing Print Settings for Better Results
Tuning slicer parameters is where you gain most control over print quality. Start with manufacturer or community-recommended profiles, then tune flow, retraction, and cooling based on test prints.
Adjust support density and orientation to balance ease of removal with surface quality on overhangs. For fine detail, reduce layer height and slow down perimeters while keeping infill and support speeds higher to save time.
- Print a calibration cube and temperature tower to find the sweet spot
- Optimize infill patterns for strength versus print time
- Tune retraction to minimize stringing without causing clogs
Maintaining Your Desktop Printer
Regular maintenance keeps prints consistent and extends the machine's life. Clean the build plate, check belts and pulleys for proper tension, and inspect the hotend assembly for residue build-up.
Replace wear items proactively and document routine adjustments so you can revert if a change causes problems. A basic maintenance log helps diagnose intermittent issues when they arise.
- Schedule nozzle and bed cleaning at regular intervals
- Keep spare belts, thermistors, and nozzles available
- Periodically check frame bolts for tightness
Safety and Ventilation Considerations
Some filaments emit fumes when heated. Ensure adequate ventilation when printing materials that require higher temperatures. For indoor desktop setups, using an enclosure with filtered airflow can reduce odors and help with temperature control.
Follow basic electrical safety, keep the printer on a stable surface, and avoid leaving long prints unattended without monitoring. Smoke detectors and a fire extinguisher rated for electrical fires are sensible precautions in a workshop environment.
- Use enclosures or extractors when printing high-temp filaments
- Ensure proper cable routing and strain relief
- Monitor prints visually or with a camera if leaving them running
How We Chose the Best Desktop 3D Printer
We selected machines based on the practical needs of desktop 3D printing rather than novelty features. Primary evaluation criteria included print accuracy and repeatability, under-the-hood motion and extrusion systems that affect part detail, and bed adhesion and leveling performance because those directly determine first-layer success. We also weighed material compatibility and hotend capability to ensure the printers can handle common filament types safely and reliably. User experience factors such as software ease, connectivity options, and maintenance demands were included to reflect real-life ownership, especially for makers and small workshops. We excluded experimental kits that require extensive fabrication or setups that fall outside typical desktop use. Printers that rely on obscure consumables or require proprietary ecosystems were filtered out unless they delivered unique, justified benefits. Our choices favor machines that provide clear documentation, approachable workflows, and reproducible results for typical desktop printing tasks.
Our full evaluation process is outlined in our review methodology.
FAQ
What build volume should I choose for desktop projects?
Choose a build volume that fits your typical part size plus a margin for fixtures or orientation changes. Larger volumes add flexibility but increase footprint and warm-up time. For many hobbyists a moderate build area balances capability and desk space.
Can I print flexible filaments on a typical desktop 3D printer?
Many desktop machines can handle flexible filaments if they have a compatible extrusion path and the recommended print settings. Direct-drive extruders usually manage flexible materials more reliably than long Bowden setups, though adjustments to speed and retraction are often needed.
How important is an enclosed build chamber?
An enclosure helps maintain ambient temperature, which reduces warping for heat-sensitive materials and improves layer bonding. It is less critical for PLA but becomes important for ABS and other high-temp filaments.
What routine maintenance keeps prints consistent?
Regularly clean the build surface, inspect and tighten belts and fasteners, and keep the hotend and nozzle free of residue. Lubricate linear rails if applicable and replace worn consumables like nozzles before they cause quality issues.
Do I need advanced software to get good results?
Good results start with a reliable slicer and sensible settings. Advanced software features help streamline workflows but are not essential. Many users achieve excellent prints by tuning basic parameters and using community profiles.
Final Verdict
Focus on the attributes that matter most for the parts you plan to print. Prioritize print accuracy and bed adhesion for detailed or large parts, and look for material compatibility and ease of use if you will switch filaments frequently. Balance build volume and workspace constraints against noise and ventilation needs. Ultimately choose a desktop 3D printer that aligns with your workflow, maintenance tolerance, and the materials you intend to use. Prioritize reproducible results and straightforward upkeep to get the most value from your investment.