
Note: This article contains affiliate links. If you click on these links and make a purchase, we may earn a small commission at no extra cost to you. This helps support our research and content. Read our full affiliate disclosure here.
If you need bigger parts without moving to industrial machines, a large 3D printer under $1,000 can unlock prototypes, jigs, and functional components printed in one piece. Larger-format printers expand what you can create at home or in a small workshop, but they also introduce tradeoffs in bed leveling, frame rigidity, and filament handling. This guide shortlists seven top large-format 3D printers priced under $1,000 and evaluates each by the practical factors that matter for long prints. We focus on build volume, print reliability, mechanical stability, and ease of use so you can pick a machine that produces consistent parts at scale. Read on for a breakdown of what matters and actionable buying guidance before the product list.
Top Picks at a Glance
| Best Overall The best all-around choice for most situations | Creality Ender 5 Max |  |
| Best Quality Built to a higher standard if you want something more solid | Bambu Lab P2S Combo |  |
| Best Value The sweet spot between price and what you get | Sovol SV08 Core-XY 3D Printer |  |
| Best Budget The cheapest option that still gets the job done reliably | LONGER LK5 Pro 3D Printer |  |
| Top Rated A top-rated pick with lots of positive feedback | Snapmaker U1 3D Printer |  |
| Most Popular A crowd favorite that many people choose with confidence | Bambu Lab P1S Combo |  |
| Best Seller A high-volume bestseller chosen again and again | FLASHFORGE Creator 5 |  |
Creality Ender 5 Max

| Build volume | 400×400×400 mm |
|---|---|
| Motion system | CoreXY |
| Bed heater | 1000W rapid-heating bed |
| Auto leveling | 64-point automatic leveling |
| Extruder | Dual-gear direct-drive |
The Creality Ender 5 Max is a large-format CoreXY 3D printer built for batch work and oversized models. It pairs a 400×400×400 mm build area with a rigid all-metal frame and X-axis linear rail to reduce vibration and keep long prints dimensionally accurate. The 64-point automatic bed leveling and auto Z-offset make first-layer setup simple, while the dual-gear direct-drive extruder improves filament feeding for long continuous runs. A 1000W rapid-heating bed and epoxy build plate speed warm-up and help with adhesion across PLA, PETG, ABS and other common filaments. Network-friendly features like WLAN multi-printer control and a tri-color status indicator are useful for small print farms, and the smart features such as silent mode and input shaping help balance speed with print quality. Expect a steeper footprint and the need for space and ventilation for large prints, and some users may need to tune high-speed settings to avoid artifacts at the fastest speeds. For balanced buyers wanting large single-piece prints or higher throughput, the Ender 5 Max offers a capable, production-minded package.
Best for: Creators and small businesses who need a single printer that can produce large parts or run continuous batches and value automated leveling, stable mechanics, and networked farm features.
Less Ideal for: Hobbyists with limited space or casual users who mostly print small parts and prefer a compact, plug-and-play desktop machine.
- Very large 400×400×400 mm build volume for oversized parts or batch printing
- CoreXY design with linear rail and dual Z-axis for faster motion and improved stability
- 64-point auto leveling and auto Z-offset for reliable first-layer calibration
- 1000W rapid-heating bed and epoxy build plate for faster warm-up and strong adhesion
- WLAN multi-printer control and status indicators support print-farm workflows
- Large footprint and weight require dedicated space and handling
- High-speed capability may require tuning to avoid print artifacts on detailed parts
Verdict: Pick the Ender 5 Max if you need a production-minded large-format printer that combines automation, a rigid CoreXY platform and fast heating for higher-throughput printing under $1,000.
Bambu Lab P2S Combo

| Top speed | up to 600 mm/s |
|---|---|
| Filament drying temp | up to 65 °C |
| Extruder | PMSM Servo Extruder |
| Chamber temp control | Adaptive Airflow, maintains ~50 °C |
The Bambu Lab P2S Combo packages a high-speed CoreXY printer with the AMS 2 Pro filament management system to deliver fast, accurate prints and practical multi-color capability. The P2S engine is designed for velocity and precision, with a PMSM servo extruder and Active Flowrate Compensation that keep layers consistent even at very high travel speeds, while automatic calibration and quick-swap nozzles make setup and nozzle changes straightforward. The included AMS 2 Pro adds multi-spool handling and built-in filament drying up to 65 C, which helps with humidity-sensitive materials and lets you run multi-color or multi-material jobs without manual filament swaps. Adaptive Airflow and a carbon filter help manage cooling and chamber temperature for better overhangs and use of engineering filaments. Limits to consider: true multi-color printing requires the AMS 2 Pro bundle, and the combo size and capability push into enthusiast territory where learning slicer settings and material profiles still matter. For buyers chasing speed and a streamlined multi-filament workflow, the P2S Combo is a compelling option under $1,000 in this category.
Best for: Buyers who prioritize print speed and a streamlined multi-filament workflow and who are comfortable tuning profiles to get the most from a high-performance desktop printer.
Less Ideal for: Casual hobbyists who only need single-color, small prints or users with very tight bench space looking for an ultra-compact machine.
- Very high top printing speeds with precision-oriented servo extruder
- Quick setup and nozzle swaps enable fast turnarounds
- AMS 2 Pro provides multi-spool handling and filament drying to reduce print failures
- Adaptive Airflow and carbon filter improve cooling control and safer operation
- Multi-color printing requires the AMS 2 Pro combo rather than the base printer alone
- Large footprint may be a constraint for limited workspaces
Verdict: If you want one of the fastest consumer CoreXY systems with a ready-made multi-spool workflow, the P2S Combo delivers speed and practical multi-color capability in a single package.
Sovol SV08 Core-XY 3D Printer

| Build volume | 350 x 350 x 345 mm |
|---|---|
| Max hotend temperature | 300°C |
| Firmware | Klipper |
| Kinematics | CoreXY |
| Auto leveling | Quad-gantry with 4 independent Z motors |
The Sovol SV08 is a CoreXY desktop 3D printer aimed at faster, larger prints: it offers a 350 x 350 x 345mm build volume, Voron‑derived open‑source design, and Klipper firmware for input shaping and pressure advance. Typical use is medium to large functional parts or prototypes where speed matters; the AC heated bed and ceramic heating block reach high temperatures quickly, and a 300°C capable hotend broadens material compatibility. Quad-gantry auto leveling with four independent Z motors and a pressure sensor simplifies first-layer setup and reduces the need for manual tramming. The printer includes features for remote monitoring and ships with OrcaSlicer presets tuned for faster toolpaths. Trade-offs are that high-speed printing requires careful tuning and good cooling to avoid artifacts, and advanced firmware like Klipper adds a learning curve for users unfamiliar with it. Build quality and accessory ecosystem look strong, but achieving the fastest advertised speeds will depend on slicer settings and part geometry rather than hardware alone.
Best for: Buyers who prioritize fast, large-format printing and want a machine they can tune and customize for better throughput and accuracy.
Less Ideal for: Casual users who want a plug-and-play printer with minimal setup or those unwilling to spend time learning Klipper and slicer tuning.
- Large 350 x 350 x 345mm build volume for big parts or batches
- CoreXY kinematics plus Klipper firmware for higher-speed, higher-accuracy motion control
- Quad-gantry auto leveling with 4 independent Z motors and a pressure sensor for consistent first layers
- High-temperature hotend and AC heated bed that heat quickly for broader filament support
- Open-source ecosystem and OrcaSlicer presets that simplify tuning and customization
- High top speeds require careful firmware and slicer tuning to avoid print quality issues
- Advanced firmware and tuning increase the learning curve for beginners
Verdict: Choose the SV08 if you need a large, high-speed CoreXY printer that rewards time spent tuning with much faster, versatile prints.
LONGER LK5 Pro 3D Printer
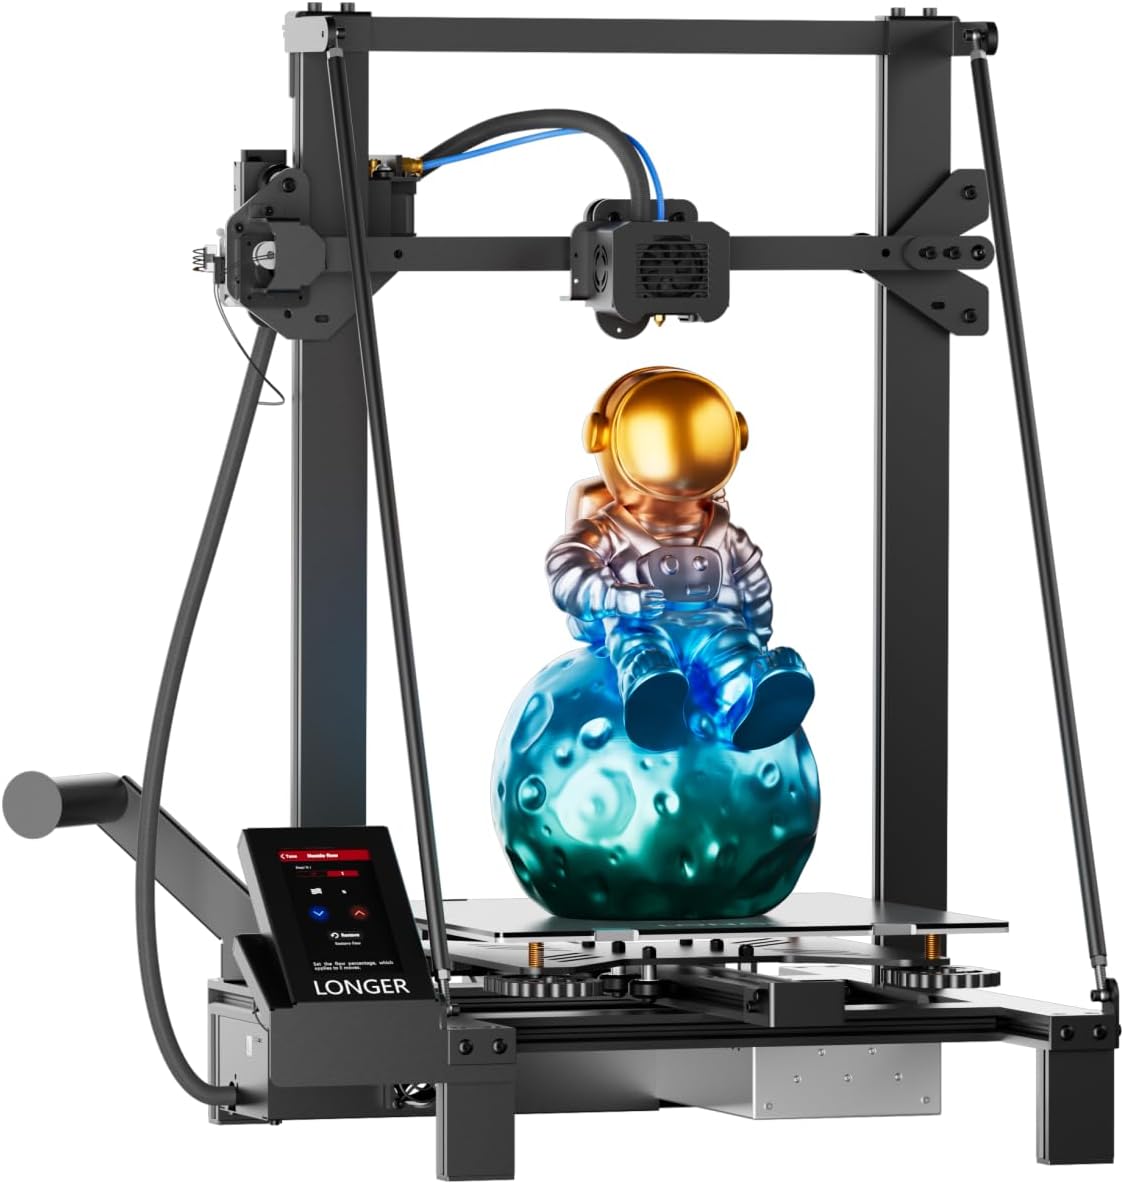
| Build volume | 300×300×400 mm |
|---|---|
| Printing speed | Up to 180 mm/s |
| Driver type | TMC2209 silent drivers |
| Assembly level | 95% pre-assembled |
| Special features | Filament detection, resume-after-power-loss |
The LONGER LK5 Pro is a 95% preassembled FDM printer built around a large 300×300×400mm build area intended for hobbyists and makers who need bigger prints without a lot of setup. It prints faster than many entry models at up to 180mm/s and uses a reinforced triangular frame and lattice glass bed to reduce vibration and improve first-layer adhesion and part flatness. Practical touches include TMC2209 silent stepper drivers for quieter operation, filament runout detection and a resume-after-power-loss function to avoid wasted prints, and an open source mainboard for firmware tinkering. Because it ships mostly assembled and targets beginners, you can get printing quickly while still having room to upgrade over time. Limitations to note are that claimed top speeds and 0.1mm precision depend heavily on tuning and filament choice, and heavier or very tall prints may still require careful calibration to avoid layer artifacts. The LK5 Pro is a solid budget-friendly choice if you want large-scale prints with useful reliability features and room to grow.
Best for: Buyers on a tight budget who need a roomy build volume and want a printer that prints reliably out of the box while still allowing firmware tinkering and upgrades.
Less Ideal for: Users who need guaranteed factory‑level dimensional accuracy out of the box or who prefer fully enclosed machines for ABS and high‑temperature materials.
- Large 300×300×400mm build volume for big parts and assemblies
- 95% pre-assembled for quicker setup and first prints
- Filament runout detection and power-resume reduce failed prints and wasted filament
- TMC2209 silent drivers make printing noticeably quieter than older entry printers
- Open source mainboard allows firmware customization and community upgrades
- Top speed and 0.1mm precision are achievable only with careful calibration and appropriate filament
- Not fully assembled so some mechanical setup and tuning is still required
Verdict: If you want a large-format, budget-friendly 3D printer that minimizes failed prints and is easy to start with while still supporting upgrades, the LK5 Pro is a strong choice.
Snapmaker U1 3D Printer

| Build volume | 270 × 270 × 270 mm |
|---|---|
| Max speed | 500 mm/s |
| Toolheads | 4 independent toolheads with SnapSwap |
| Compatible materials | PLA, PVA, TPU, PETG, PCTG, ABS, ASA, PA, PC |
The Snapmaker U1 is a large CoreXY 3D printer built around a four-toolhead SnapSwap system that swaps fully loaded, preheated heads in about five seconds to enable true multi-color and multi-material prints with minimal purging. It is typically used for detailed prototypes, functional parts, and multi-color models where switching materials or colors mid-print is common. Notable features include the rock-solid steel-ball kinematic locks tested over a million swaps, automatic toolhead offset calibration, vibration compensation, a 3.5-inch touchscreen with remote app control, and a dedicated slicing ecosystem. The system reduces filament waste by limiting purging and speeds multi-material jobs substantially, which lowers operating costs for makers and small shops. Practical limits are typical of large, fast CoreXY systems: setup and tuning of advanced mixed-material prints still requires care, high-speed prints can amplify ringing if not tuned, and the printer is relatively heavy and takes workspace. For buyers prioritizing dependable multi-head switching and lower material waste in a sub-$1,000 large-format machine, the U1 delivers a robust, production-oriented workflow.
Best for: Buyers who need a reliable, production-minded large-format printer that minimizes filament waste and delivers fast, repeatable multi-color or multi-material prints for prototypes and small-batch runs.
Less Ideal for: Casual hobbyists looking for a compact, plug-and-play desktop printer or buyers who cannot dedicate a stable, heavy workspace to a large machine.
- Four independent, preheated toolheads with a 5-second SnapSwap reduces downtime between colors or materials
- Steel-ball kinematic locking mechanism provides repeatable, secure toolhead positioning validated over extensive cycles
- Smart calibration (toolhead offset, vibration compensation, extrusion tuning) simplifies setup and improves dimensional accuracy
- CoreXY motion with carbon fiber X-axis rails enables high-speed printing up to 500 mm/s across a large 270 × 270 × 270 mm build volume
- Large machine weight and footprint make it less portable and require a dedicated workspace
- High-speed mixed-material prints still need tuning to avoid artifacts like ringing or layer adhesion issues
Verdict: If you want a dependable large-format printer under $1,000 that drastically cuts multi-color waste and swaps materials in seconds, the Snapmaker U1 is a strong choice.
Bambu Lab P1S Combo

| Build Volume | 256*256*256 mm³ |
|---|---|
| Max Speed | 500 mm/s |
| Max Acceleration | 20 m/s² |
| Supported Filaments | PLA, PETG, TPU, PVA, PET, ABS, ASA; capable: PA, PC |
The Bambu Lab P1S Combo packages a CoreXY high-speed 3D printer with an AMS multi-material system to enable multi-color and multi-material parts. It is designed for fast prints — the platform supports up to 500 mm/s travel and aggressive acceleration — and the enclosed frame plus automatic bed leveling helps maintain print quality with more demanding filaments. Setup is advertised as quick and the printer supports a wide range of common materials including PLA, PETG, TPU, PVA, ABS and ASA, while optionally handling engineering filaments like PA and PC. The AMS expands creative options by letting you switch colors and materials without manual filament swaps, which is useful for prototypes and visual parts. Important limitations to note are the size and weight of the combo and the requirement to connect the AMS for multi-color capability, which adds complexity compared with single-extruder systems; very abrasive fiber-filled filaments are not recommended. For buyers who prioritize speed and multi-color output in a mostly ready-to-run package, the P1S Combo delivers a strong combination of performance and convenience.
Best for: Buyers who want a fast, mostly ready-to-run 3D printer that can produce multi-color or multi-material parts with minimal manual filament switching and value social proof from a well-reviewed product.
Less Ideal for: People who need a very compact, lightweight printer or who plan to print heavily with abrasive fiber-filled materials should look elsewhere.
- Very high travel speed and acceleration for faster print turnaround
- Enclosed frame improves reliability with temperature-sensitive filaments
- AMS enables up to 16-color/multi-material printing without manual swaps
- Auto bed leveling simplifies first-layer tuning for consistent prints
- Combo adds bulk and installation complexity compared with standalone printers
- Not recommended for abrasive carbon or glass fiber filled filaments
Verdict: If you want a fast, enclosed printer with built-in multi-color capability, the P1S Combo delivers high-speed, multi-material printing in a ready-to-use package.
FLASHFORGE Creator 5

| Extruder Quantity | 4 Independent Toolhead |
|---|---|
| Color Switching Speed | 7 Seconds |
| Extuder Type | Max.320℃ Direct Drive,Hardened |
| Travel Speed and Acceleration | 600mm/s and 30,000mm/s² |
| Build Volume | 256 x 256 x 256 mm |
The FLASHFORGE Creator 5 is a CoreXY FDM machine built around four independent toolheads so you can print multiple colors or materials in a single job without the purge towers and cross-contamination of single-nozzle systems. It uses FlashSwap toolheads that preheat in the background for roughly 7-second swaps, which speeds multi-color jobs and cuts filament waste compared with purge-based approaches. The printer supports engineering filaments such as PLA, PETG, TPU and carbon-fiber blends, and it includes automatic calibration, camera monitoring, chamber lighting, and active vibration compensation to keep prints consistent at high CoreXY speeds up to 600 mm/s. Practical benefits include cleaner multi-material parts, faster color changes, and lower material costs for multi-color work. Important caveats are that the Creator 5 is a relatively large, heavier desktop machine that will need a stable workspace and some setup familiarity, and advanced multi-material prints still require tuning of slicer settings and materials to hit the best surface finish.
Best for: Buyers who want a reliable, lower-waste multi-color/multi-material 3D printer for desktop production and value practical automation that reduces routine tinkering.
Less Ideal for: People who need a compact, lightweight printer for casual hobby use or those who prefer plug-and-play simplicity with single-filament machines.
- Four independent toolheads for true multi-color and multi-material printing without nozzle cross-contamination
- FlashSwap 7-second tool changes that reduce downtime and eliminate purge waste
- Automatic calibration, camera monitoring, and vibration compensation for consistent, high-speed CoreXY performance
- Supports a range of filaments including PLA, PETG, TPU and carbon-fiber blends
- Large and heavy footprint requires a dedicated, stable workspace
- Advanced multi-material prints still need slicer tuning and material management to achieve optimal finishes
Verdict: Pick the Creator 5 if you want a fast, factory-style multi-head printer that delivers true multi-color and multi-material prints with minimal filament waste.
Choosing the Right Large 3D Printer: Key Factors to Consider
Actual Usable Build Volume
Nominal build dimensions tell only part of the story. What matters is the usable print area after accounting for hotend travel, part cooling ducts, and carriage limits. A printer advertised with a very large Z height may still restrict the X or Y usable space due to gantry clearance or bed overhangs. Confirm the practical interior dimensions and whether the listed volume is tested under realistic slicing settings.
Usable build volume affects how you design parts for one-piece prints. Larger usable space reduces the need for seams and glue-ups, but only if the printer's motion system keeps accuracy consistent across the full range. Consider whether the printer supports load distribution features such as reinforced frames or dual Z leadscrews to maintain accuracy at the extremes of travel.
Mechanical Stability and Frame Rigidity
Frame stiffness directly influences print quality on tall or wide parts. A loosely braced frame lets vibrations and axis flex create visible layer misalignment and ringing, especially at higher print speeds or during long jobs. Look for designs that use thick aluminum extrusions, gussets, or full-sheet frames rather than thin stamped plates.
Pay attention to how linear motion is implemented. Heavy gantries, dual-rail Z systems, or reinforced belt tensioning reduce wobble and keep layers registering correctly over time. For large-format prints, even small flex can accumulate into meaningful dimensional error, so prioritize mechanical robustness when choosing a large 3D printer.
Thermal System: Bed and Hotend
A heated bed that reaches and maintains target temperatures across the full surface is critical for adhesion on large parts. Uneven bed heating leads to warping and first-layer issues that are more pronounced on big prints. Check whether the bed has adequate power, a good thermal spreader, and mounting that minimizes heat loss to the frame.
Hotend capabilities matter for filament choice and print speed. A hotend that holds temperature tightly and can supply consistent melt flow supports reliable layer bonding. For large parts that use more filament and longer extrusion durations, consider hotend durability, compatibility with hardened nozzles, and whether the machine supports higher-temperature filaments if needed.
Filament Handling and Drying
Large prints consume a lot of filament and can take many hours, which increases exposure to moisture and contamination. Integrated or optional filament chambers, enclosures, or active drying systems help keep filament dry, reducing stringing, brittleness, and nozzle clogs. Even spooled filament sitting in open air for a long print can degrade surface finish and interlayer adhesion.
Consider whether the printer includes filament runout detection and easy filament path routing to prevent mid-print issues. For frequent use on large jobs, plan for storage solutions or on-printer spooling that minimize filament movement and protect against humidity.
Firmware, Controls, and Workflow
A capable control system and mature firmware reduce the friction of preparing and running long prints. Features such as reliable bed leveling (auto or assisted), resume-from-power loss, and temperature fail-safes directly affect success rates. Good firmware also makes it easier to tune retraction, acceleration, and jerk settings for large-scale prints.
Workflow integrations like network printing, touchscreen interfaces, and clear status feedback cut down on setup time and monitoring burden. When printing large parts, convenient remote monitoring and the ability to pause and inspect early layers can save hours by catching issues before they ruin a long job.
Serviceability and Community Support
Large printers require occasional maintenance: belt tensioning, lead-screw lubrication, and firmware tweaks. Availability of clear documentation, replacement parts, and an active user community makes routine upkeep faster and less stressful. Community-generated profiles and slicer settings can dramatically reduce the tuning time for big prints.
Serviceability also covers how easy it is to replace wear items such as nozzles, belts, and bed surfaces without specialized tools. Machines designed for straightforward maintenance reduce downtime between large jobs and keep the printer productive in a small shop environment.
Balancing Print Speed and Part Accuracy
Faster travel and higher acceleration shorten print time but increase the chance of ringing and dimensional drift, particularly on large parts. Slowing down outer-wall speeds and tuning acceleration can preserve surface quality without dramatically increasing total print time.
For large-format work, consider printing critical features at reduced speed while allowing infill to run faster. This split-speed strategy keeps essential surfaces accurate and expedites noncritical geometry.
- Use adaptive speed settings to prioritize surface quality on visible faces
- Lower acceleration for tall layers to reduce wobble
- Tune jerk and cornering settings to minimize ringing on wide surfaces
Enclosures and Environmental Control
An enclosure stabilizes ambient temperature, reduces drafts, and improves adhesion for temperature-sensitive filaments. For big prints, minimizing temperature swings across a long job reduces warping and layer separation.
Even a simple removable lid or a containment box can make a measurable difference for ABS-like materials and when printing large, flat surfaces. Ensure the enclosure allows safe venting if high-temperature filaments are used.
- Check clearance for taller parts before enclosing
- Monitor internal temperature for filament-specific ranges
- Provide access panels for filament changes and inspections
Slicing Strategies for Large Parts
Slicing large models requires different considerations from small prints. Use thicker first layers, slower outer walls, and increased skirt/brim widths to ensure adhesion. For very tall prints, enable z-hop or use wipe settings to reduce oozing artifacts.
Consider splitting a model into subparts when functional assembly surfaces are easy to bond. When single-piece printing is necessary, orient the model to minimize unsupported overhangs and distribute mass to reduce top-heavy wobble.
- Use larger line widths for internal infill to speed up prints
- Add brims, rafts, or skirt lines to improve bed adhesion
- Orient parts to minimize long overhangs and reduce support material
Maintenance Routines That Keep Long Jobs Successful
Establish a quick pre-print checklist: verify belt tension, check lead-screw lubrication, confirm bed flatness, and run a short skirt to validate extrusion. Catching small mechanical issues before a long job prevents wasted hours.
Keep spare consumables on hand such as nozzles, bed surfaces, and common fasteners. For shops running frequent large prints, scheduled preventive maintenance reduces the risk of mid-print failures.
- Perform a bed-level or mesh bed probe before long prints
- Swap in a freshly cleaned nozzle for high-detail large parts
- Log failed prints and note causes to refine future settings
Material Choices for Large-Format Printing
PLA is easy to print at large sizes but can be brittle for functional parts. More durable materials require reliable thermal control and sometimes an enclosure. Choose materials that match part function and the printer's thermal capabilities.
Large prints use more filament, so plan for material storage and drying. When strength is required, use higher infill, thicker walls, and consider composite filaments only if the printer supports hardened nozzles.
- Select filament with consistent diameter and low moisture
- Increase wall thickness for structural parts
- Test material settings on medium-scale prints before committing to a long job
How We Chose the Best Large 3D Printer
We shortlisted machines that deliver genuinely large build volumes while staying within the under $1,000 constraint. Our selection prioritized printers with proven mechanical stability, repeatable dimensional accuracy over long prints, and features that reduce failed prints. We looked for sturdy frames, heatbed and hotend performance, and filament handling options suited to sustained large-format jobs. Evaluation criteria included maximum usable build volume, consistent dimensional accuracy on multi-hour prints, heated bed and hotend performance for common filaments, and user-facing features such as bed leveling and enclosure compatibility. We also considered firmware maturity and community support as proxies for reliability and troubleshooting resources. Excluded from consideration were machines that only achieve large dimensions through gimmicky extensions, printers with unacceptably flimsy frames, or models lacking basic safety features like thermal runaways. We also omitted devices that require extensive aftermarket modifications to reach usable, repeatable large-format printing. The result is a curated set of options that balance size with practical, everyday reliability.
Our full evaluation process is outlined in our review methodology.
FAQ
How large is large enough for my application?
It depends on the parts you need. If you plan one-piece prototypes or jigs, measure the maximum item dimensions plus clearance for clamps and fixtures. Larger build volumes reduce joins but increase printing time and potential for warping.
Do I need an enclosure for large prints?
Often, yes for temperature-sensitive filaments. An enclosure helps reduce warping and delamination on large flat areas or long prints. For PLA you may get by without one, but ABS and similar materials benefit from controlled ambient conditions.
How important is bed leveling on a large printer?
Very important. Uneven first layers are amplified on wider beds and cause adhesion problems across a large surface. Auto or assisted leveling systems that produce a reliable mesh across the whole bed are especially helpful for consistent results.
Can I print large, strong functional parts on a sub-$1,000 printer?
Often you can, provided the machine has adequate frame rigidity, a capable hotend, and a stable heated bed. Expect to tune settings and possibly use stronger filaments with adjusted print parameters for structural applications.
How do I avoid failed prints mid-job?
Use filament runout detection, resume-on-power-loss features, and monitor bed and hotend temperatures. Run a short test print at scale to validate adhesion and extrusion before committing to a multi-hour job.
Final Verdict
When shopping for a large 3D printer under $1,000, prioritize usable build volume and mechanical stability over raw advertised dimensions. A stiff frame, reliable bed heating, and a dependable hotend produce repeatable results on long jobs. Consider workflow features like filament handling, resume-on-power-loss, and good firmware to reduce the time spent troubleshooting. Tradeoffs are inevitable: larger builds take longer and demand more attention to thermal control and maintenance. Choose the machine that matches the biggest parts you need to print while offering the stability and support resources that make lengthy prints dependable.