
Note: This article contains affiliate links. If you click on these links and make a purchase, we may earn a small commission at no extra cost to you. This helps support our research and content. Read our full affiliate disclosure here.
If you are outfitting a school lab or a classroom makerspace, selecting the right 3D printer matters for safety, student engagement, and lesson continuity. The wrong machine can mean constant troubleshooting, downtime, or additional supervision needs. This guide collects the top classroom-ready 3D printers shortlisted for dependable prints, straightforward operation, and classroom-safe features. We assessed units based on safety, ease of use, and maintenance demands so you can pick a model that keeps students printing and teachers teaching. Read on to see the top classroom picks and the criteria we used to evaluate them.
Top Picks at a Glance
| Best Overall The best all-around choice for most situations | Flashforge Adventurer 5M AD5M |  |
| Best Quality Built to a higher standard if you want something more solid | Snapmaker U1 3D Printer |  |
| Best Value The sweet spot between price and what you get | Creality Ender 3 V3 SE |  |
| Best Budget The cheapest option that still gets the job done reliably | XZN Mini 3D Printer |  |
| Top Rated A top-rated pick with lots of positive feedback | ELEGOO Neptune 3 Pro |  |
| Most Popular A crowd favorite that many people choose with confidence | Creality K1C 3D Printer |  |
| Best Seller A high-volume bestseller chosen again and again | Bambu Lab P1S 3D Printer |  |
Flashforge Adventurer 5M AD5M

| Print Size | 220 x 220 x 220 mm |
|---|---|
| Max Speed | 600mm/s |
| Max Extruder Temp. | 280°C |
| Compatible Nozzles | 0.25/0.4/0.6/0.8mm |
| Printing Connection | WIFI, Ethernet, USB Stick |
The Flashforge Adventurer 5M is a classroom-friendly CoreXY printer that emphasizes speed and ease of use. It prints with PLA, PETG and TPU and is built for quick setup: one-click auto bed leveling, a magnetic PEI plate that pops off for part removal, and a snap-on nozzle system that swaps in seconds. The AD5M targets rapid prototyping with a high-flow hotend, 50W heater and Flashforge's firmware optimizations to reach very fast travel and extrusion speeds, while a rigid aluminum frame and dual linear rails reduce vibration for more consistent layers. Built-in features like a filament sensor, power-loss resume and app-based remote monitoring simplify day-to-day classroom operation. Important limits to note are the modest 220 × 220 × 220 mm build volume for larger projects and that active enclosure and higher-temperature materials require the optional enclosure or upgrades. For teachers and makers who need dependable, fast prints and minimal fiddling, the AD5M balances performance and usability.
Best for: Teachers and classroom makers who prioritize fast, reliable prints with minimal setup and maintenance for frequent prototyping and lesson projects.
Less Ideal for: Programs that need large-format printing or frequent high-temperature ABS/engineering-materials work without investing in an enclosure upgrade.
- High CoreXY speeds and acceleration for faster print turnaround
- One-click auto bed leveling and magnetic PEI plate simplify first-layer setup and part removal
- Quick-change nozzle system reduces downtime for nozzle swaps and diameter changes
- Filament sensor and power-loss resume improve reliability in classroom environments
- Sturdy aluminum frame and dual linear rails cut vibration for better dimensional accuracy
- Relatively small build volume compared with larger educational printers
- Advanced materials printing (ABS/ASA) requires enclosure upgrade and additional setup
Verdict: A fast, easy-to-use CoreXY printer that delivers classroom-ready reliability and rapid prototyping in a compact package.
Snapmaker U1 3D Printer

| Build volume | 270 x 270 x 270 mm |
|---|---|
| Max print speed | 500 mm/s |
| Toolheads | 4 independent toolheads with 5s SnapSwap |
| Compatible materials | PLA, PVA, TPU, PETG, ABS, ASA, PA, PC, etc. |
The Snapmaker U1 is a performance-focused CoreXY 3D printer designed for true multi-color and mixed-material prints using four independent, preloaded toolheads and a 5-second SnapSwap changer. In practice it lets you print complex, multi-material models without long filament purges because entire hotends are swapped rather than purging filament through a single nozzle, which reduces waste and speeds up multi-color jobs. The machine targets speed and reliability with a rigid CoreXY motion system and carbon fiber X-axis rails capable of up to 500 mm/s while maintaining dimensional accuracy across a sizable 270×270×270 mm build volume. Smart calibration, automatic toolhead offset adjustment, vibration compensation, built-in model library, and Snapmaker Orca slicing make setup and classroom use easier for students and instructors. Limitations include the physical complexity and maintenance overhead of a multi-toolhead system and the need to manage multiple filaments and toolheads versus single-extruder printers. For labs that need fast, repeatable multi-material prints, the U1 delivers clear time and material savings.
Best for: Teachers and makers running performance-driven classroom labs who need fast, repeatable multi-color or multi-material prints and want to minimize material waste and print time.
Less Ideal for: Schools or programs seeking the simplest, lowest-maintenance starter printer for basic single-color prototypes or very tight budgets should consider simpler single-extruder models instead.
- True multi-color and multi-material printing via four independent preloaded toolheads
- Fast 5-second tool changes with a validated locking mechanism for reduced downtime
- Significantly reduced filament waste compared with purge-based color changes
- High-speed CoreXY motion system with carbon fiber rails for faster prints and retained accuracy
- Smart calibration and integrated software tools that simplify setup and monitoring
- More complex hardware and maintenance than single-extruder classroom printers
- Requires managing multiple filaments and toolheads which adds workflow steps
Verdict: Pick the U1 when you need classroom-ready speed and true multi-material, multi-color printing with much lower waste than purge-based systems.
Creality Ender 3 V3 SE

| Build Volume | 220×220×250 mm |
|---|---|
| Printing Speed | Typical 180 mm/s, Max 250 mm/s |
| Extruder Type | Sprite Direct Extruder |
| Leveling Mode | CR Touch Auto Leveling |
| Mainboard | 32-bit Silent Mainboard |
The Creality Ender 3 V3 SE is a desktop FDM printer designed to get classrooms printing quickly with minimal fuss. It uses a CR Touch auto leveling sensor and strain-sensing auto Z-offset so the bed is calibrated automatically, and an auto filament load/unload routine simplifies filament changes for students. The Sprite direct drive extruder handles PLA, PETG and flexible TPU reliably, while a flexible PC spring steel build plate makes parts easy to remove. Dual Z-axis lead screws and hardened Y-axis shafts stabilize motion to reduce Z wobble during longer prints, and a 32-bit silent mainboard keeps noise low for a classroom environment. The unit is capable of high print speeds up to 250 mm/s, though reaching top speeds will require tuned settings and suitable filament. Practical limits include a modest 220×220×250 mm build volume that constrains large projects and a nozzle temperature ceiling that caps certain high-temperature materials. For routine classroom models, prototypes, and STEAM lessons the Ender 3 V3 SE balances automation, reliability, and approachable setup.
Best for: Teachers and lab coordinators who need a classroom-ready printer that minimizes setup time, automates leveling and filament changes, and delivers reliable prints for lessons and prototypes.
Less Ideal for: Programs that require large-format printing, high-temperature engineering materials, or out-of-the-box industrial-grade throughput should consider larger or specialized machines.
- CR Touch auto leveling and auto Z-offset reduce manual bed adjustments
- Automatic filament loading and unloading simplify filament changes
- Sprite direct drive extruder supports PLA, PETG and TPU reliably
- Stable dual Z-axis and hardened Y-axis shafts minimize Z wobble for consistent prints
- 32-bit silent mainboard keeps operating noise low for shared spaces
- Build volume of 220×220×250 mm limits larger classroom projects
- Top printing speeds require careful tuning and compatible filament to maintain quality
Verdict: A classroom-friendly 3D printer that prioritizes easy setup, automated leveling and filament handling to keep student projects moving with minimal teacher intervention.
XZN Mini 3D Printer

| Top speed | 250mm/s |
|---|---|
| Positioning precision | 0.01mm |
| Included accessories | Roll of PLA filament and SD card |
This compact XZN mini 3D printer is a classroom-friendly starter machine that ships fully assembled and includes a roll of PLA filament and an SD card with pre-sliced files. It targets young learners and beginners by simplifying setup with one-button auto-leveling, one-touch filament loading, and an automatic nozzle cleaning feature, while a PEI heated bed helps with easy part removal. The printer claims high precision to 0.01mm and a top speed of 250mm/s, so short demo prints and classroom projects complete quickly. Practical benefits for schools include a ready-out-of-box experience, a small footprint that fits on desks, and included learning materials on the card. Limitations to note are the small form factor and starter kit scope, which mean it is best for simple models and learning rather than large or industrial parts, and classroom IT or teachers should plan for filament resupplies and occasional maintenance despite the user-friendly features.
Best for: Teachers and program coordinators seeking an inexpensive, ready-to-run 3D printer to introduce students to basic printing and rapid classroom projects without lengthy setup.
Less Ideal for: Labs or classes that need large build volumes, advanced material compatibility, or industrial-grade throughput should choose a larger, more capable machine.
- Ships fully assembled with starter filament and SD card for immediate use
- One-button auto-leveling and one-touch filament loading reduce setup time
- PEI heated bed makes printed parts easier to remove
- High claimed precision and fast top speed enable quick classroom demos
- Small build volume and starter kit focus limit it to simple projects
- Classrooms will need to budget for ongoing filament and occasional servicing
Verdict: A budget-friendly, fully assembled starter 3D printer built for classroom use that gets students printing quickly with minimal setup.
ELEGOO Neptune 3 Pro

| Build volume | 225×225×280 mm |
|---|---|
| Extruder | Dual‑gear direct drive |
| Bed surface | PEI magnetic platform |
| Auto leveling | 36‑point auto bed leveling |
| Sensors | Filament runout; power‑loss resume |
The ELEGOO Neptune 3 Pro is a compact FDM printer intended for quick setup and steady day-to-day printing. It ships with major parts pre‑assembled, a PEI magnetic build plate, and a toolkit so teachers can get it printing in minimal time. Reliability features include a dual‑gear stainless steel direct‑drive extruder with a titanium throat and improved heat sink to reduce clogs, a 36‑point auto bed leveling routine for repeatable first layers, filament runout detection, and power‑loss resume to protect long classroom prints. Motion hardware—STM32 board, silent stepper motors, dual lead screws and dual Z motors—helps keep movement accurate and quiet enough for shared spaces. Practical limits are its modest 225×225×280 mm build volume and the need for occasional tuning and maintenance typical of FDM machines; more advanced materials or fully enclosed heated chambers are not a focus here. For classroom environments it balances ease of use with features that reduce failed prints and downtime.
Best for: Teachers and makerspace coordinators who need a dependable, easy‑to‑deploy FDM printer that minimizes failed prints and monitoring time in a classroom setting.
Less Ideal for: Programs that require large format printing, high‑temperature industrial filaments, or a fully enclosed build chamber for ABS and similar materials.
- Pre‑assembled main parts and toolkit speed up classroom setup
- 36‑point auto bed leveling improves first‑layer consistency
- Direct‑drive dual‑gear extruder and upgraded nozzle hardware reduce jams
- Filament runout sensor and power‑loss resume protect long prints
- Quiet motors and stable Z‑axis hardware suitable for shared learning spaces
- Build volume is modest for larger classroom projects
- Not an enclosed printer, so high‑temperature or odorous materials are limited
Verdict: A classroom‑ready FDM printer that prioritizes reliable, low‑maintenance printing with features that reduce failed prints and downtime.
Creality K1C 3D Printer

| Print system | CoreXY |
|---|---|
| Max speed | 600 mm/s |
| Extruder type | Direct extruder with tri-metal nozzle |
| Noise (silent mode) | ≤45 dB |
| Air filtration | Activated carbon |
The Creality K1C is a CoreXY desktop printer built for fast classroom production, offering up to 600 mm/s print speed and high acceleration for quick prototypes. It uses an enhanced direct extruder and a tri-metal nozzle that tolerate higher temperatures and abrasive filaments such as carbon fiber, which makes it useful for engineering or maker-education projects. Setup is simplified by one-tap auto calibration and an installation-free design, and the integrated AI camera provides live monitoring and time-lapse capture for demonstrations or remote supervision. Noise is manageable thanks to a silent mode and an activated carbon air filtration system helps control odors in shared spaces. Practical limits include the need for proper ventilation and material handling when printing abrasive or high-temp filaments, and very high speeds may require tuning to maintain fine-detail quality. For classrooms that value throughput and active monitoring, the K1C balances speed, durability, and convenience.
Best for: Teachers and lab instructors who need a durable, high-throughput printer for hands-on lessons and remote monitoring during class projects.
Less Ideal for: Users seeking the absolute finest detail for display-quality miniatures or those unwilling to spend time tuning high-speed prints should consider a slower, detail-focused model instead.
- CoreXY motion system enabling much faster print speeds and higher acceleration for rapid prototyping
- Direct extruder with tri-metal nozzle that supports abrasive and high-temperature filaments
- One-tap auto calibration reduces setup time for teachers and students
- Built-in AI camera for real-time monitoring and time-lapse recording
- Quiet operation mode and activated carbon filtration for odor and particle control in classrooms
- Very high top speeds may require additional tuning to preserve fine surface detail
Verdict: Pick the K1C when your classroom priority is fast, reliable printing with built-in monitoring and support for tougher filaments.
Bambu Lab P1S 3D Printer
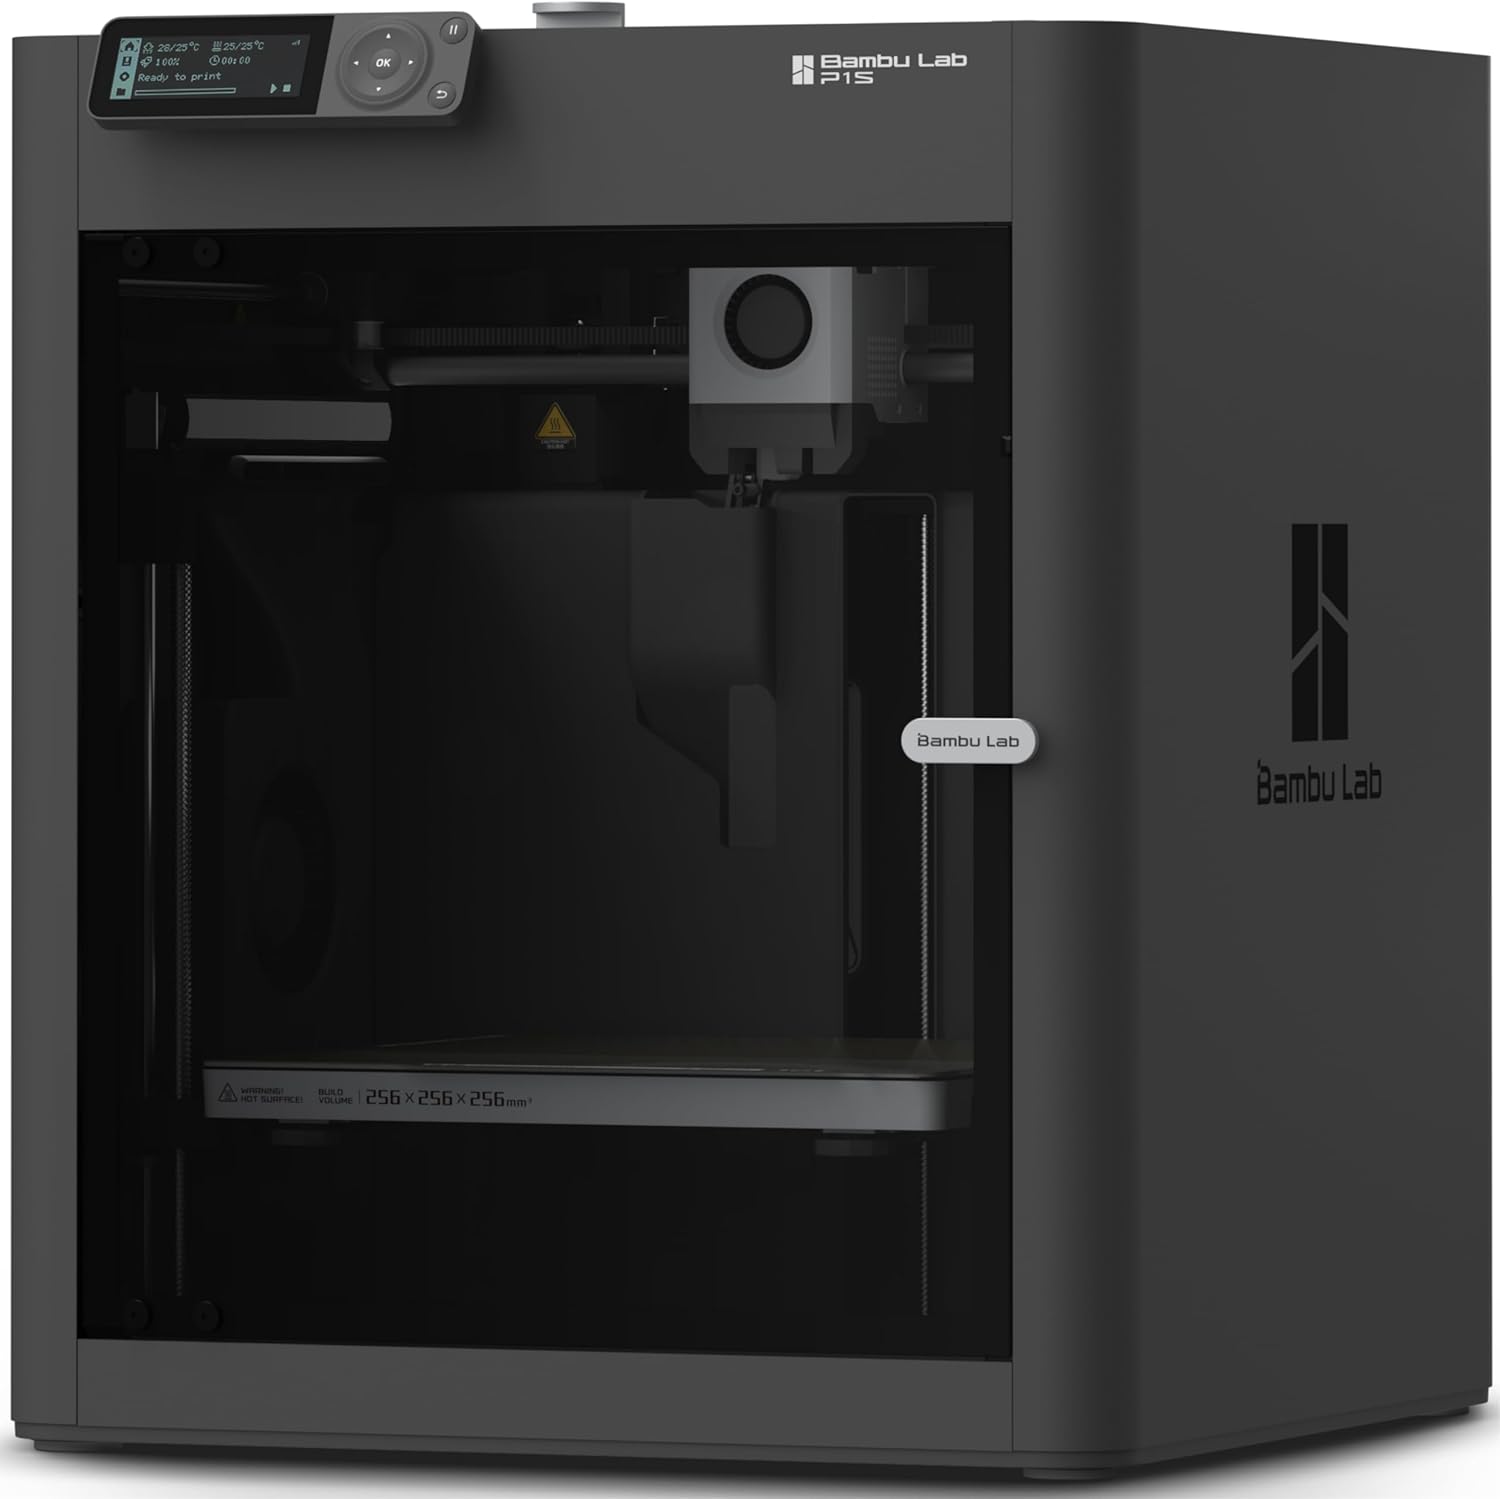
| Build Volume | 256 × 256 × 256 mm |
|---|---|
| Max Speed | 500 mm/s |
| Max Acceleration | 20 m/s² |
| Supported Filaments | PLA, PETG, TPU, PVA, PET, ABS, ASA; capable: PA, PC |
The Bambu Lab P1S is an enclosed CoreXY FDM printer aimed at users who want dependable, relatively fast desktop printing with minimal fuss. It offers a 256 × 256 × 256 mm build volume, direct-drive extruder, automatic bed leveling, and a closed body that helps when printing more temperature-sensitive materials. The P1S is touted for high-speed performance — up to 500 mm/s and high acceleration — which cuts print times on classroom projects, and it supports a wide selection of filaments including PLA, PETG, TPU and many common engineering plastics. Setup is straightforward and the ecosystem includes a model library and camera for timelapse, which make it easy for teachers to get students printing quickly. Important practical limits are its advised avoidance of carbon or glass fiber filled filaments and the need to add the AMS accessory if multi-color print capability is required. For risk-averse buyers in a school setting, the enclosed design and automated leveling reduce troubleshooting and classroom downtime.
Best for: Teachers or labs seeking a user-friendly, reliable classroom printer that minimizes setup time and reduces print failures so students can focus on projects rather than maintenance.
Less Ideal for: Makers or classes that need to print with abrasive fiber-reinforced materials or require out-of-the-box multi-color printing without buying additional accessories.
- Enclosed CoreXY design improves print stability and helps with temperature-sensitive filaments
- Automatic bed leveling reduces setup and calibration time
- High top speed and acceleration for faster classroom prints
- Direct-drive extruder broadens usable filament types including flexible TPU
- Includes camera and access to a model library to simplify classroom workflows
- Not recommended for carbon or glass fiber reinforced filaments
- Multi-color printing requires purchasing and connecting the AMS accessory
Verdict: A classroom-friendly, enclosed 3D printer that emphasizes fast, low-maintenance printing and broad filament support for reliable student use.
Choosing the Right 3D Printer for Classrooms: Key Factors to Consider
Safety Features and Enclosure
An enclosed build chamber or partial enclosure reduces the chance students touching hot components and helps contain fumes from common filaments. Look for machine designs with guarded or shrouded hot ends, covered belts and gears, and doors that interlock or restrict access while the printer is operating.
Safety features matter because classrooms include learners of varying ages and supervision levels. A machine that minimizes exposed hot surfaces and moving parts reduces risk and allows teachers to focus on instruction rather than constant monitoring. Also consider odor control and whether your school requires filtration or ventilation for certain filament types.
Ease of Use and Student-Friendly Controls
A simple, intuitive user interface and reliable bed-leveling system cut setup time and reduce teacher interventions. Features such as assisted or automatic bed leveling, preconfigured print profiles for common filaments, and an easy-to-navigate touchscreen or web interface speed classroom lessons.
Student-friendly controls also include straightforward filament loading and unloading, clear status indicators, and physical designs that let students observe prints without accessing risky components. The easier a printer is to operate, the more class time is spent on design and learning rather than troubleshooting.
Print Reliability and First-Layer Success
Consistent first-layer adhesion and reliable extrusion mean fewer failed prints and less wasted material and class time. Look for stable heated beds, good build-surface options, and proven extruder designs that handle standard classroom filaments like PLA without frequent jams.
Reliability affects lesson planning. When printers consistently finish jobs, teachers can schedule projects across multiple class periods and build more ambitious assignments. Consider models known for maintaining calibration between sessions and those that handle a range of simple geometries reliably.
Maintenance Requirements and Consumables
Classroom printers should be easy to maintain with accessible parts and clear maintenance intervals. Replaceable nozzles, easy-to-clean build plates, and straightforward access to belts and drive components cut technician time. Consider whether routine tasks such as nozzle cleaning, bed resurfacing, or firmware updates are manageable for school staff.
Consumables and commonly replaced parts should be readily available and simple to swap. Lower-maintenance designs reduce unexpected downtime and help keep curricula on schedule.
Connectivity, File Management, and Classroom Integration
Good connectivity options support classroom workflows. Built-in Wi-Fi or Ethernet, USB thumb drive support, and simple web-based management allow teachers to queue prints, manage multiple machines, and distribute print files to students securely. Some printers include teacher controls or user accounts to prevent accidental changes to settings.
Consider how files are prepared and sent to the printer. Compatibility with common slicer software and the presence of preconfigured profiles for classroom filaments speed setup and reduce the learning curve for both teachers and students.
Build Volume and Print Speed Tradeoffs
Balance between build volume and print speed depends on the types of projects you plan to run. Larger build areas let whole-class projects or bigger models be printed in one piece, but larger prints take longer and tie up the machine. Faster printers help throughput but may sacrifice print surface detail on complex models.
When planning a makerspace, consider project types, available class time, and whether multiple smaller prints scheduled in sequence will serve your needs better than fewer large prints. Also think about whether you need consistent dimensional accuracy for functional parts versus prototyping and display models.
Setting Up a Classroom 3D Printing Station
Plan an area with stable tables and enough space for printed parts to cool without obstruction. Place printers away from high-traffic zones to limit accidental bumps and near power outlets and network connections when possible.
Provide clear signage and student instructions at each station. Mark boundaries students should not cross during prints and keep basic maintenance tools and safety gear in a labeled, easily accessible container.
- Designate a print staging area for finished parts to cool and be labeled
- Keep spare nozzles, build-surface tape, and basic tools on hand
- Use surge-protected power strips and label circuits for easy troubleshooting
Recommended Filaments and When to Use Them
PLA is the most classroom-friendly filament due to low odor, low warping, and ease of use. It works well for prototypes, display models, and student projects where strength and heat resistance are not critical.
For applications that require stronger parts, consider filaments with higher toughness but be mindful of higher nozzle temperatures and potential ventilation needs. If classroom safety policies restrict certain materials, check school guidelines before introducing them.
- PLA: Beginner-friendly, low-odor, best for most projects
- Tougher filaments: Use when parts need extra strength; verify ventilation and printer capability
- Avoid filaments that produce heavy fumes unless proper ventilation and filters are available
Managing Multiple Students and Print Queues
Establish a simple print submission workflow so teachers can review and approve files before a print starts. Use a shared folder or classroom management tool and schedule prints to avoid machine congestion during class periods.
Consider rotating student groups through design, preparation, and post-processing tasks so more students participate even if only a few machines are available. Keep an expected print time log so students understand how long their job will occupy a machine.
- Require teacher approval for final print files
- Batch small prints together to improve throughput
- Schedule regular maintenance windows between heavy use periods
Basic Troubleshooting Every Teacher Should Know
Train staff to handle common issues like first-layer adhesion problems, filament jams, and bed-leveling checks. Simple steps such as cleaning the bed surface, recalibrating Z-offset, and inspecting filament paths resolve many interruptions.
Keep a troubleshooting checklist that lists quick remedies and escalation steps for more complex issues. That reduces time spent diagnosing and helps less-experienced staff feel confident managing the printers.
- Check bed leveling and bed surface cleanliness first for adhesion issues
- Inspect the extruder path and nozzle for clogs before deep disassembly
- Document recurring errors to spot hardware or workflow patterns
Safety Policies and Student Supervision
Create clear classroom rules about who may operate the printer and when. Younger students often require direct supervision when interacting with equipment. Older students can be trained for more independent use but still follow safety protocols.
Mandate the use of safety glasses during post-processing or when handling support removal. Ensure staff know how to shut down machines quickly in case of a jam or unexpected behavior.
- Define age-appropriate responsibilities and supervision levels
- Require training before independent operation
- Keep a simple emergency shutdown procedure visible near each printer
How We Chose the Best 3D Printer for Classrooms
We focused on attributes that affect daily classroom use and long-term program viability. Priority went to printers with enclosed or well-managed hot-end areas and reliable filament handling to limit burn and entanglement risks. We emphasized user interfaces and workflow: easy bed leveling, intuitive menus, and filament management systems reduce teacher intervention and speed lesson flow. Print reliability and consistency were judged by reported first-layer success rates, supported filament types, and robust extruder designs. Maintenance needs and parts accessibility were reviewed to estimate downtime and routine service time. Connectivity and classroom integration—USB, Wi-Fi, and simple slicing workflows—were considered for lesson planning and file management. We excluded industrial or workshop-only machines that require specialized ventilation, advanced calibration, or professional-only maintenance. The final shortlist favors machines designed for schools, makerspaces, and beginner-to-intermediate student use, where safety, uptime, and straightforward operation matter most.
Our full evaluation process is outlined in our review methodology.
FAQ
What is the safest filament to use around students?
PLA is generally safest for classrooms because it prints at low temperatures and emits minimal odor. It is easy to handle and does not typically require specialized ventilation.
How many printers do I need for a typical class of 25 students?
It depends on project scope and class time. For hands-on design and printing within a semester, two to four machines staggered across class sections often provide workable throughput when paired with a clear scheduling system.
Can students prepare print files themselves?
Often yes, with supervision. Teach students a standard slicer workflow and provide preconfigured profiles. Requiring teacher approval before printing helps prevent settings that cause failures or unsafe conditions.
How frequently do classroom printers need maintenance?
Routine maintenance tasks such as bed cleaning, nozzle checks, and firmware updates should be done weekly with moderate use. More extensive servicing depends on hours of operation and observed issues.
Do classroom printers need special ventilation?
For low-temperature filaments like PLA, special ventilation is usually not required but good room ventilation is recommended. If you plan to use higher-temperature filaments, check school policies and consider filtration or dedicated ventilation.
Final Verdict
Prioritize safety, reliability, and ease of use when choosing a 3D printer for classrooms. Machines that reduce teacher intervention through automated leveling, simple filament handling, and solid first-layer performance will maximize class time for design and learning. Plan for maintenance and classroom workflows up front to avoid downtime and to keep student projects moving. With clear safety policies and the right machine priorities, you can build a practical printing program that supports a wide range of student activities.