
Note: This article contains affiliate links. If you click on these links and make a purchase, we may earn a small commission at no extra cost to you. This helps support our research and content. Read our full affiliate disclosure here.
If you need reliable desktop manufacturing for product development, the right 3D printer for engineers makes rapid iteration practical. Engineers rely on consistent dimensional accuracy, a wide material palette, and predictable part strength as they move from concept to functional prototypes. This guide shortlists the leading options for engineering-focused workflows and explains the decision criteria that matter most to technical users. Expect picks that emphasize print accuracy, material support, workflow integration, and build reliability. Read on to find an option that fits your prototyping cadence and technical requirements.
Top Picks at a Glance
| Best Overall The best all-around choice for most situations | ELEGOO Centauri Carbon 2 Combo |  |
| Best Quality Built to a higher standard if you want something more solid | Bambu Lab P1S 3D Printer |  |
| Best Value The sweet spot between price and what you get | Creality Ender 3 V3 SE |  |
| Best Budget The cheapest option that still gets the job done reliably | Creality SPARKX i7 3D Printer |  |
| Top Rated A top-rated pick with lots of positive feedback | ANYCUBIC Photon P1 |  |
| Most Popular A crowd favorite that many people choose with confidence | FLASHFORGE Adventurer 5M |  |
| Best Seller A high-volume bestseller chosen again and again | FLASHFORGE AD5X 3D Printer | 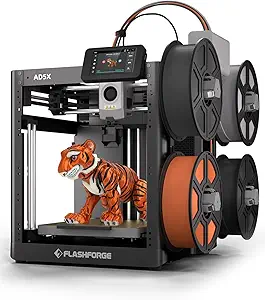 |
ELEGOO Centauri Carbon 2 Combo

| Build volume | 256 x 256 x 256 mm |
|---|---|
| Max nozzle temp | 350°C |
| Printing speed | Up to 500 mm/s |
| Motion system | CoreXY |
The Centauri Carbon 2 Combo is a CoreXY FDM printer built around speed and multicolor capability for engineering-minded users. It combines a rigid die-cast aluminum frame, dual 4260 steppers and low-friction linear guides to push print velocities up to 500 mm/s with high acceleration while active vibration compensation helps keep detail and dimensional accuracy. The CANVAS multicolor system offers instant color switching, RFID filament detection, auto-refill and tangle prevention so multi-material prints run with less supervision, and the platform emphasizes automated calibration and continuous print monitoring for a largely hands-off setup. Temperature control to 350°C and support for PLA/ABS/TPU and engineering filaments expands material choices for functional prototypes. Expect faster cycle times than typical hobby printers, but achieving peak speeds requires tuned profiles and quality filament, and large-format or ultra-fine feature work may still benefit from slower settings. The integrated ecosystem and Nexprint hub streamline slicing and job management, making this a strong option for rapid iteration and multicolor prototypes in an engineering lab or small R&D shop.
Best for: Engineers and small R&D teams who prioritize rapid prototyping and multicolor functional parts and want a largely automated, production-adjacent desktop workflow.
Less Ideal for: Hobbyists seeking a plug-and-play, low-complexity machine for occasional single-color prints or users who prefer ultra-fine surface finish over print speed.
- High CoreXY speeds up to 500 mm/s for fast prototyping
- Integrated CANVAS system for instant 4-color switching and filament management
- Auto calibration and continuous monitoring reduce setup time and failed prints
- 350°C capable nozzle broadens material compatibility to engineering filaments
- Rigid die-cast aluminum frame and vibration compensation for improved print stability
- Real-world print quality at top speeds needs careful tuning and high-quality filament
- Multicolor system adds mechanical and software complexity compared with single-extruder setups
Verdict: Buy this if you need a fast, multicolor CoreXY printer that accelerates prototype iteration with automated calibration and broad material support.
Bambu Lab P1S 3D Printer
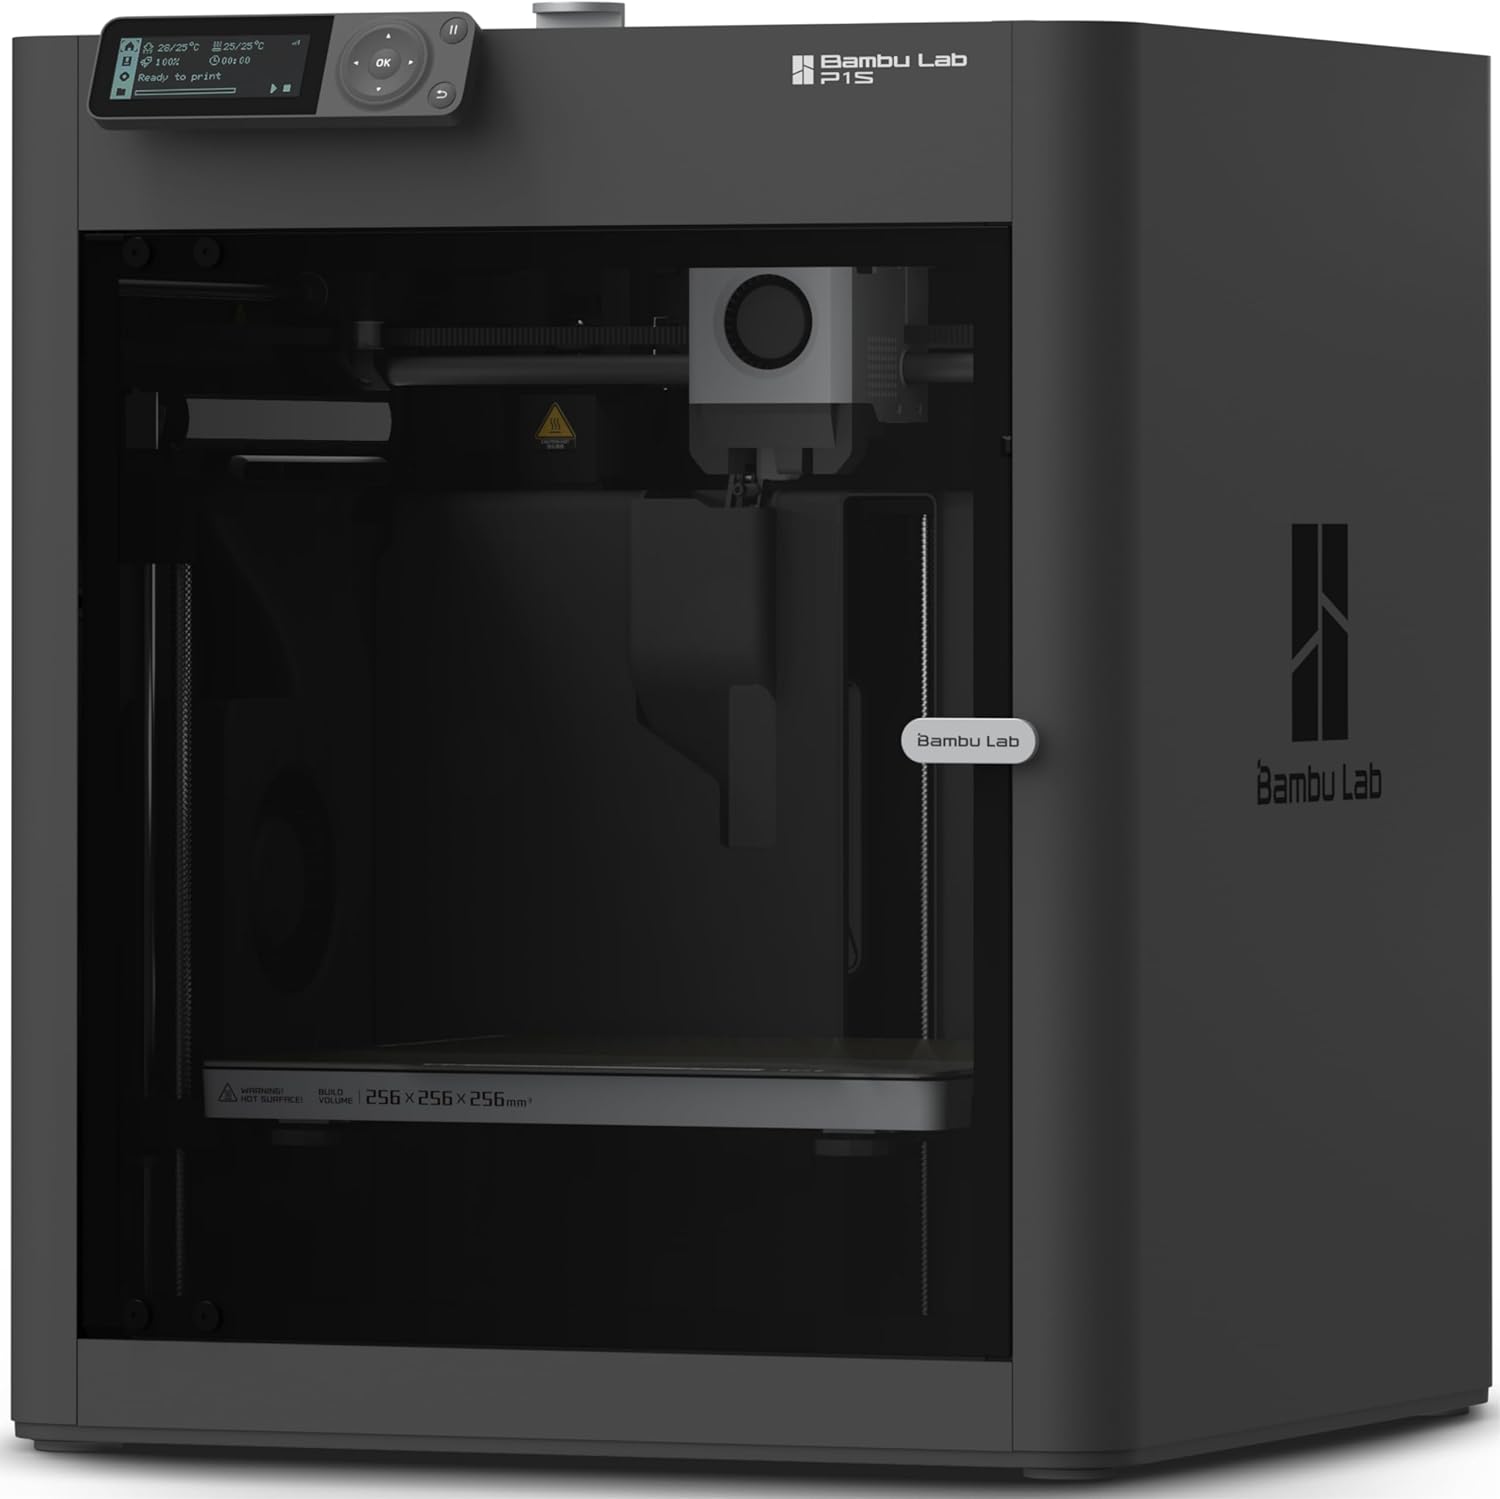
| Build Volume | 256×256×256 mm³ |
|---|---|
| Max Speed | 500 mm/s |
| Max Acceleration | 20 m/s² |
| Supported Filaments | PLA, PETG, TPU, PVA, PET, ABS, ASA; capable: PA, PC |
The Bambu Lab P1S is an enclosed CoreXY FDM printer built around speed and usable precision for engineering-focused prints. It delivers very fast motion—advertised top speeds up to 500 mm/s with high acceleration—so parts that would take hours on slower machines complete much quicker here, which is useful for iterative prototyping. The machine includes a direct-drive extruder that broadens material compatibility to flexible and engineering filaments, automatic bed leveling to reduce setup headaches, and a built-in camera for timelapse documentation. Its larger 256×256×256 mm build volume gives enough room for most mechanical prototypes, and the closed body helps with printing higher-temperature or warp-prone materials. Limitations include the need to connect Bambu Lab's AMS accessory for true multi-color/multi-material work and a relative emphasis on speed that may require tuning for the highest-detail surface finishes. The P1S is shipped in a mostly ready-to-run state, so you can get into printing quickly but advanced users should expect to fine-tune slicer settings to balance speed and surface quality.
Best for: Engineers and prototypers who prioritize rapid iteration and broad material support and want a mostly ready-to-run machine that accelerates design testing.
Less Ideal for: If you need native multi-color printing out of the box or require the absolute finest surface finish without manual tuning, consider alternatives or add-ons before buying.
- High maximum speed and acceleration for fast iteration cycles
- Direct-drive extruder improves compatibility with flexible and engineering filaments
- Enclosed CoreXY frame stabilizes temperature and reduces warping with advanced materials
- Automatic bed leveling and quick setup reduce time spent on calibration
- Built-in camera for timelapse and print monitoring
- Multi-color or multi-material printing requires purchasing and attaching the AMS accessory
- Very high speeds may need careful slicer tuning to achieve finest surface detail
Verdict: Buy this if you want a fast, enclosed CoreXY printer that cuts prototype turnaround time while supporting a wide range of engineering filaments.
Creality Ender 3 V3 SE
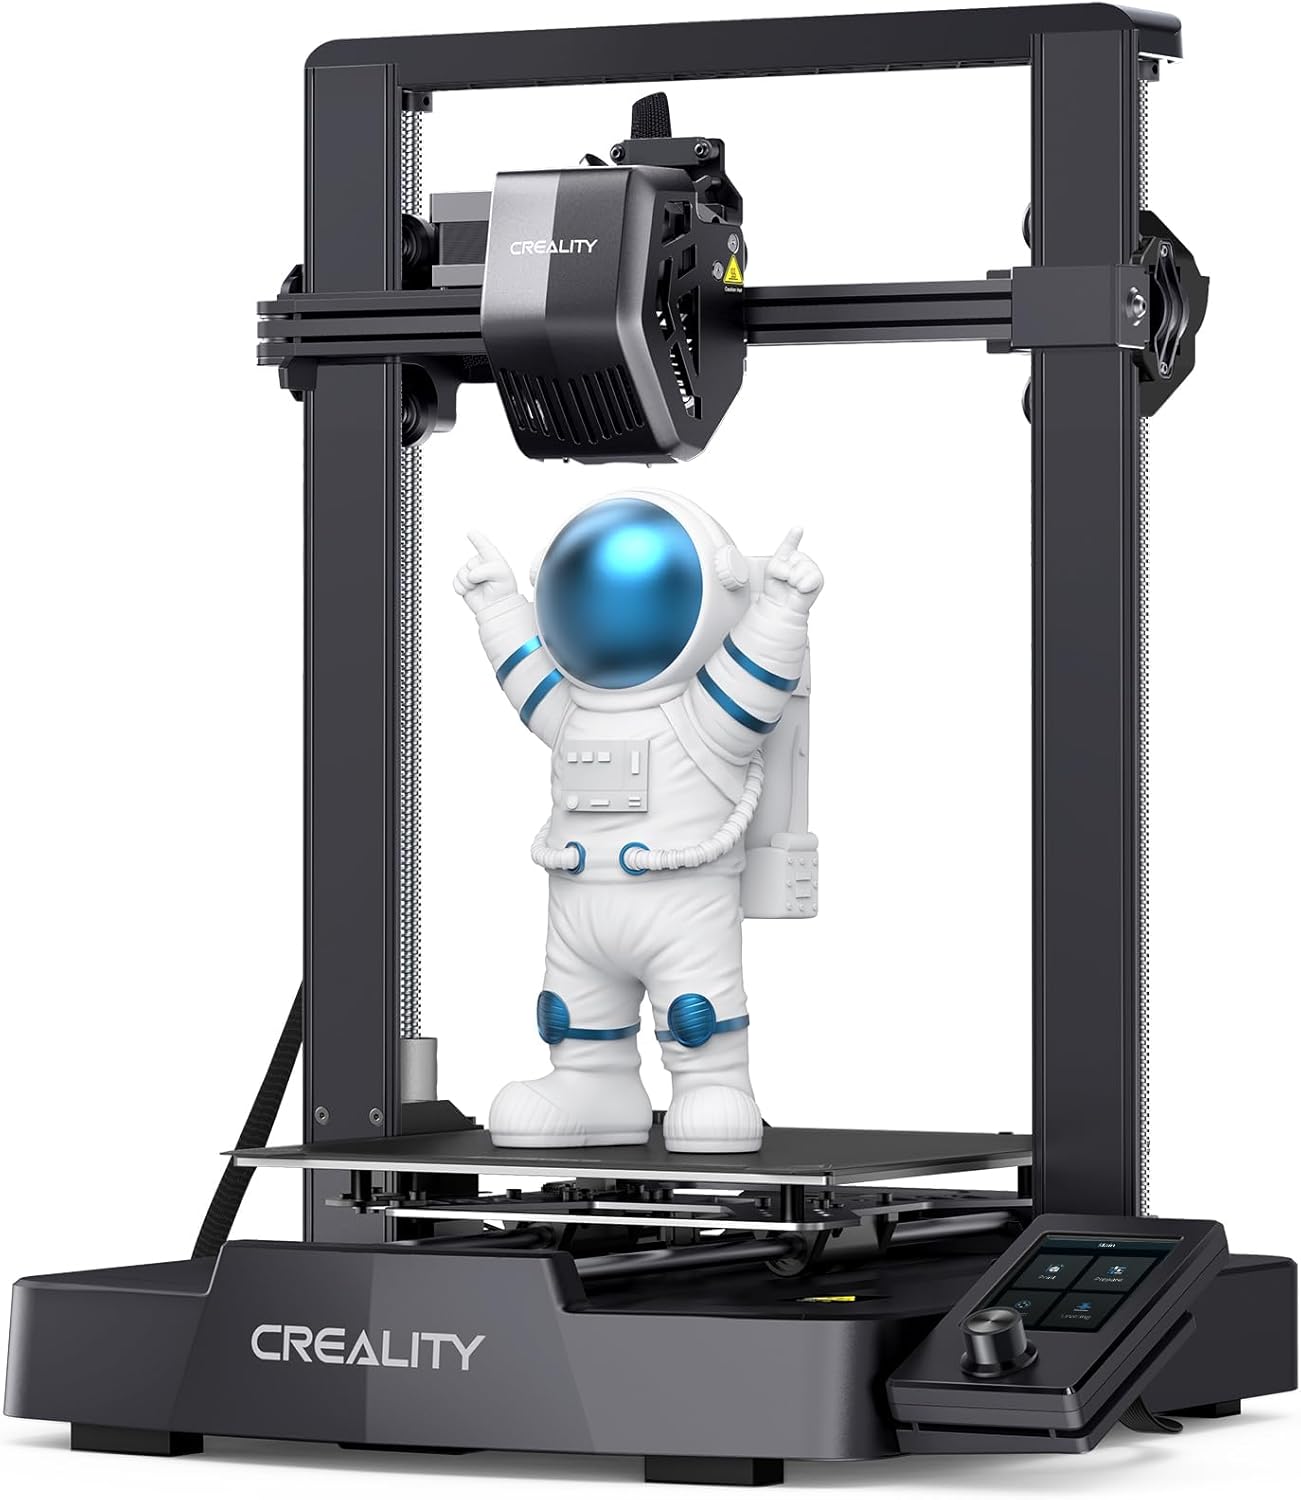
| Max printing speed | 250 mm/s |
|---|---|
| Printing acceleration | 2500 mm/s² |
| Build volume | 220×220×250 mm |
| Extruder | Full-metal Sprite direct extruder |
The Ender 3 V3 SE is a desktop FDM printer aimed at speeding up everyday engineering prints while keeping setup simple. It uses a metal "Sprite" dual-gear direct extruder for stronger filament drive and better handling of PLA, PETG and flexible filaments, and the CR Touch auto-leveling plus a strain sensor automates bed calibration and Z-offset so you can spend less time fiddling before prints. Creality rates the machine for high-speed printing up to 250 mm/s with 2500 mm/s² acceleration, and a dual Z-axis plus Y-axis linear shafts improve stability and reduce Z wobble for finer layer accuracy at higher speeds. The unit ships largely preassembled with a 3-step setup that can get you from box to first print in about 20 minutes, and there are convenient auto filament load and unload controls on the upgraded UI. Limitations are typical for this price class: the build volume is modest compared with larger workbench machines and extreme high-speed settings will still require tuned slicer profiles to avoid quality loss.
Best for: Engineers and practical builders who want a ready-to-run desktop printer that reduces setup and calibration time and can accelerate prototyping without extensive tinkering.
Less Ideal for: Users who need large-format printing capacity or those who expect perfect surface finish at top speed without spending time on print profile tuning.
- Sprite full-metal dual-gear direct extruder improves filament feeding for PLA, PETG and flexible materials
- CR Touch auto-leveling and strain sensor automate bed calibration and Z-offset
- High advertised top speed (250 mm/s) and strong acceleration for faster print turnaround
- Preassembled design with 3-step setup gets the printer ready in about 20 minutes
- Dual Z-axis and Y-axis linear shafts reduce wobble for more stable high-speed printing
- Modest build volume limits large part printing compared with larger workbench printers
- High-speed printing requires careful tuning of slicer settings to maintain surface quality
Verdict: Choose the Ender 3 V3 SE if you want a compact, engineer-friendly desktop printer that speeds up prototyping with automated leveling and a reliable metal direct extruder.
Creality SPARKX i7 3D Printer

| Build volume | 260×260×255mm |
|---|---|
| Auto leveling | Full-Auto Leveling |
| Camera | AI camera included |
| Hotend | 5-second quick-swap hotend |
| Connectivity | WiFi |
The Creality SPARKX i7 is a desktop FDM printer aimed at simplifying regular engineering and prototyping work with features that reduce setup and monitoring overhead. It offers a 260×260×255mm build volume and a flexible PEI plate for easier part removal, and the full-auto bed leveling plus nozzle Z-offset and input-shaping calibration get prints started with minimal fiddling. An integrated AI camera provides remote monitoring, time-lapse capture, and basic failure detection while a physical cover protects privacy when monitoring is not needed. The tool-free 5-second quick-swap hotend makes nozzle changes and maintenance fast, and a one-touch low-noise mode helps during long prints. Practical limits include reliance on the vendor ecosystem for optional multi-color upgrades and that advanced users may still want to tweak slicer settings for highly tuned mechanical parts. For budget-minded engineering uses the i7 balances convenience and capability for frequent desktop prototyping and classroom or small-lab workflows.
Best for: Engineers and makers who need a reliable everyday prototyping printer that minimizes setup and monitoring time so they can iterate designs quickly on a budget.
Less Ideal for: Specialists who require industrial-grade high-temperature materials, large-format production runs, or built-in multi-material heads out of the box should consider a more dedicated machine.
- Full-auto bed leveling and input-shaping calibration reduce manual setup time
- Built-in AI camera enables remote monitoring, time-lapse, and failure detection
- 5-second tool-free quick-swap hotend simplifies nozzle changes and maintenance
- Large 260×260×255mm build volume fits bigger prototypes and batch prints
- One-touch low-noise mode and optimized motion system for quieter high-speed printing
- Multi-color printing requires optional CFS Lite accessory sold separately
- Advanced mechanical tuning still needs manual slicer adjustments for precision parts
Verdict: A practical, budget-friendly desktop printer that streamlines setup and remote monitoring to speed iterative engineering and prototyping.
ANYCUBIC Photon P1

| Build Area | 8.78 x 4.96 x 9.05 in. |
|---|---|
| LCD Type | 10.1'' Mono LCD |
| XY Resolution | 13312 x 5120 (14K) |
| Resin Viscosity Support | Up to 8,000 cps |
The ANYCUBIC Photon P1 is a resin LCD printer aimed at professional and engineering use, offering a large 8.78 x 4.96 x 9.05 inch build volume and a 10.1" mono LCD with high XY resolution. It supports dual-color and dual-material printing so you can run two resins or colors in a single job, which is useful for prototyping parts with different mechanical or visual properties. The machine emphasizes stability with a ball screw and precision guide rails to reduce motion vibration, Wave Release film to lower part-release force, and a factory-calibrated Smart Leveling 3.0 that auto-checks before every print. Practical additions for workshop reliability include resin heating for high-viscosity materials, AI monitoring for plate installation and resin-level/residue detection, and power recovery to resume prints after interruptions. Trade-offs to consider are the typical resin workflow overhead—post-curing and cleaning—and the added complexity of dual-material setups for users who only need single-color prints. For engineers prioritizing repeatable, high-detail resin parts, the Photon P1 focuses on dependable, production-oriented printing rather than consumer simplicity.
Best for: Engineers and small-scale production teams who need reliable, repeatable resin prints with the option to combine materials or colors for functional prototypes and detailed components.
Less Ideal for: Hobbyists seeking a minimal-maintenance, plug-and-play machine or those unwilling to manage resin post-processing and dual-material setup complexities.
- Dual-color and dual-material printing for combined material or color parts in one job
- High XY resolution and 10.1" mono LCD for detailed, engineering-grade prints
- Stable mechanical design with ball screw and precision rails to reduce vibration
- Smart Leveling 3.0 and AI monitoring that catch setup and resin issues before printing
- Resin heating and wide resin compatibility including high-viscosity industrial resins
- Requires standard resin post-processing (washing and curing) and the associated consumables
- Dual-material capability adds setup complexity compared with single-resin printers
Verdict: Buy this if you want a workshop-ready resin printer that prioritizes print stability, industrial resin compatibility, and repeatable dual-material results for engineering prototypes.
FLASHFORGE Adventurer 5M
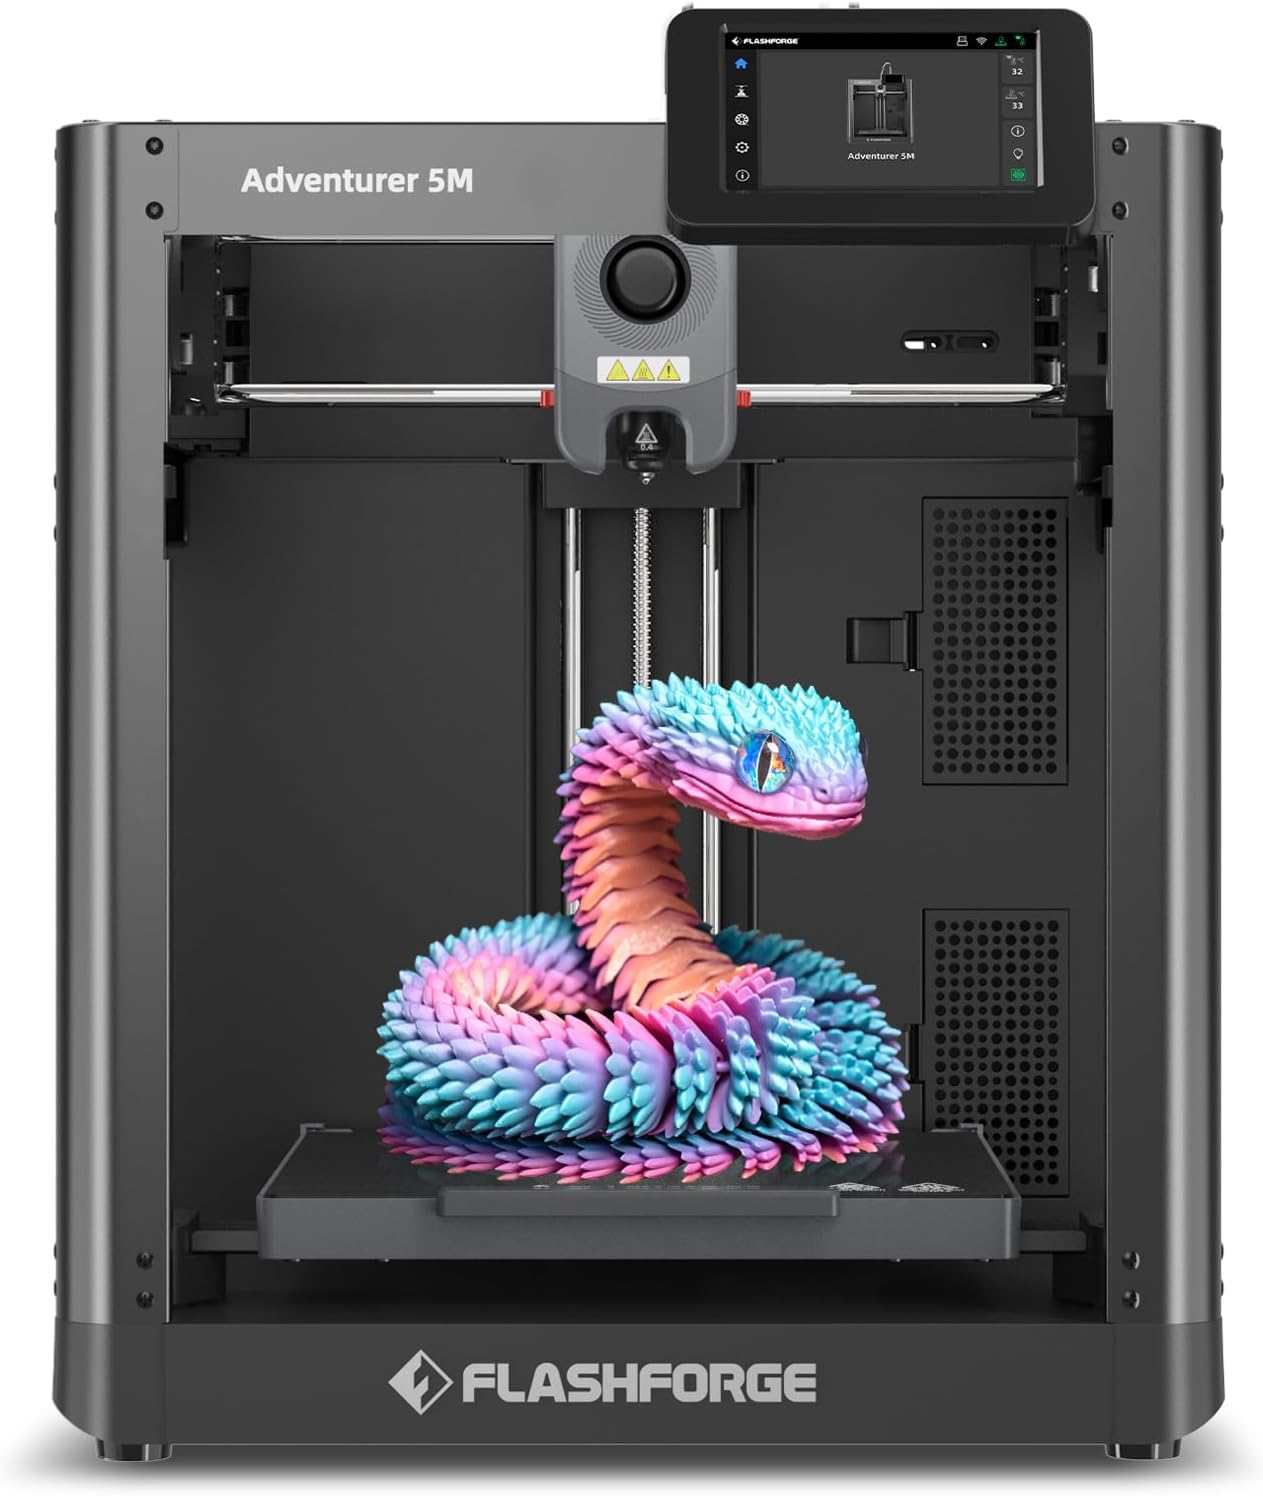
| Build Volume | 220 x 220 x 220 mm |
|---|---|
| Travel Speed | 600 mm/s |
| Acceleration | 20,000 mm/s² |
| Max Nozzle Temperature | 280°C |
| Platform Type | Double-Sided PEI Platform |
The FLASHFORGE Adventurer 5M is a CoreXY desktop printer built for fast, repeatable prototyping and small-scale production. It combines one-button automatic bed leveling, a 280°C direct-drive extruder, and a dual-sided PEI platform to simplify setup and part removal, while the all-metal CoreXY frame and vibration compensation help maintain dimensional accuracy at higher speeds. The printer targets rapid workflows with a listed 600 mm/s travel speed and aggressive acceleration for much shorter cycle times, plus quick 3-second nozzle swaps and multiple nozzle size options for tuning detail versus throughput. Practical benefits include a short warm-up time, mobile app monitoring for remote oversight, and compatibility with common engineering filaments such as PLA, PETG, ABS, TPU, and carbon-fiber blends. Important limitations are that extreme high-speed claims require careful tuning and suitable slicer settings to avoid surface artifacts, and smaller build volume means larger parts must be split. The Adventurer 5M best serves engineers who need reliable, high-throughput desktop printing for prototypes and iterative parts testing rather than large-format builds.
Best for: Engineers and prototyping teams who prioritize fast iteration and predictable, repeatable desktop prints for functional parts and small-batch production.
Less Ideal for: Users who need very large build volume or who prefer a plug-and-play consumer printer with minimal tuning for cosmetic, low-speed hobby prints.
- CoreXY all-metal structure for rigidity and consistent motion at higher speeds
- One-button automatic bed leveling reduces setup time and improves first-layer reliability
- 280°C direct extruder and multiple nozzle sizes support engineering materials
- Fast travel speed and high acceleration for shorter print cycles
- Dual-sided PEI platform enables easier part removal and good adhesion
- High-speed operation often needs tuning to avoid surface quality loss
- Build volume limited to 220 × 220 × 220 mm, restricting large single-piece prints
Verdict: Choose the Adventurer 5M when you need a compact CoreXY printer that delivers fast, engineering-grade prototyping with reliable automatic leveling and high-temperature extrusion.
FLASHFORGE AD5X 3D Printer

| Build volume | 220 x 220 x 220 mm |
|---|---|
| Max nozzle temperature | 300°C |
| Structure | Open Core XY |
| Nozzle sizes | 0.25 / 0.4 / 0.6 / 0.8 mm |
| Max travel speed | 600 mm/s |
The AD5X targets engineers and advanced hobbyists who need faster prototyping without a steep learning curve. It uses a Core XY structure and high acceleration to reach travel speeds up to 600 mm/s, which shortens run times for medium-sized parts, and the machine supports simultaneous up to four-color prints for multi-material or multi-color prototypes. Practical features include one-click auto bed leveling, an automatic filament feed/retract system, resume-after-power-loss, and a 300°C direct-drive extruder that broadens material choices to PLA, ABS, PETG, TPU and carbon-fiber blends. The printer ships with a 0.4 mm nozzle and offers quick-detach nozzles ranging 0.25–0.8 mm so you can trade resolution for speed when needed. Downsides for cautious buyers are that the unit is an open-frame Core XY which can expose prints to drafts, and achieving the highest advertised speeds typically requires fine tuning and parts cooling adjustments. The AD5X is best used for rapid iteration, functional prototypes, and multi-color concept models when you want faster throughput and flexible material support.
Best for: Engineers and product designers who prioritize quicker prototype cycles and material flexibility but want user-friendly assists like auto-leveling and resume printing to reduce setup risk.
Less Ideal for: Laboratories or production lines that require a fully enclosed, temperature-controlled build chamber for consistent high-temperature materials or certified repeatability.
- High travel speed and acceleration for faster prototype turnaround
- 300°C direct-drive extruder supports a wide range of engineering filaments
- One-click auto bed leveling and resume-printing reduce failed prints
- Supports up to four-color printing for multi-material or color prototypes
- Quick-detach nozzle options from 0.25–0.8 mm for resolution or speed trade-offs
- Open Core XY structure can be sensitive to ambient drafts and temperature for advanced materials
- Achieving top speeds requires calibration and may need cooling/parameter tuning
Verdict: Choose the AD5X if you need a faster Core XY desktop printer that balances high-speed prototyping and multicolor capability with user-friendly features for lower setup risk.
Choosing the Right 3D Printer for Engineers: Key Factors to Consider
Print Accuracy and Tolerance
Dimensional accuracy determines how closely a printed part matches CAD dimensions, which is critical for fit and assembly testing. Consider the machine's stated layer resolution, XY positioning precision, and real-world test reports. Higher accuracy reduces the need for iteration and downstream machining when parts must mate with off-the-shelf components.
Look for features that improve repeatability, such as rigid frames, high-quality linear rails, and closed-loop stepper or servo control. Calibration steps, available compensation tools, and accessible maintenance procedures also affect long-term dimensional consistency.
Material Compatibility and Mechanical Properties
Engineers often need a range of materials from standard PLA and ABS to engineering filaments like PETG, Nylon, and high-temp thermoplastics. Material compatibility affects part strength, thermal resistance, and chemical compatibility for functional testing. Check maximum nozzle and bed temperatures, recommended hotend types, and whether the machine supports hardened nozzles and enclosed heated chambers.
Consider the ability to print composites, filled filaments, or flexible materials if your prototypes demand them. Also evaluate vendor documentation and community-tested print settings for engineering-grade filaments to reduce trial-and-error.
Build Volume and Scalability
Build volume affects what you can print in a single job and whether large prototypes require splitting into assemblies. For engineering use, a larger usable build area can speed iteration by allowing full-size functional prototypes rather than scaled models. Think about whether your workflow benefits from a single large print bed or from multiple smaller machines running in parallel.
Scalability also includes upgrade paths such as larger beds, toolhead swaps, or modular enclosures. Machines designed to be serviceable and upgradable extend useful life across multiple project types.
Reliability, Maintenance, and Uptime
Consistent uptime matters when prototypes are on tight schedules. Reliability relates to both mechanical robustness and the quality of consumable components. Look for designs with easy access to wear parts, clear maintenance intervals, and straightforward part replacement procedures.
Consider available diagnostics, firmware stability, and how the machine handles long prints. Machines with predictable failure modes and good documentation minimize time lost to troubleshooting, which is crucial in professional development cycles.
Software, Workflow Integration, and File Handling
A stable, capable slicing toolchain and networked printing options speed iteration and collaboration. Engineers should assess native software features such as advanced slicing control, dimensional compensation, and support for common file formats. Integration with version control or job management systems helps coordinate team efforts and preserves print settings for repeatability.
APIs, remote monitoring, and print queuing reduce manual intervention and allow machines to be shared efficiently across a lab or office. Also verify whether the machine supports common industrial formats and post-processing workflows used in testing and validation.
Enclosure, Temperature Control, and Safety
Controlled build environments improve print quality for temperature-sensitive materials and reduce warping. An enclosure with active temperature management is important when printing engineering plastics that need consistent ambient conditions. Safety features such as filament runout detection, thermal runaway protection, and grounded enclosures are also important in professional settings.
Consider ventilation and emissions when printing specialty materials. Machines that allow add-on filtration or that ship with certified enclosures reduce exposure to fumes and particles during prolonged use.
Choosing Between FDM and Resin for Engineering Needs
Fused deposition modeling and resin-based technologies offer different strengths for engineering prototypes. FDM is generally better for durable, functional parts and a wider range of thermoplastics, while resin systems excel at very fine surface detail and complex geometries. Choose based on whether mechanical testing or surface accuracy is the primary goal.
Consider resin for small, highly detailed validation models or parts that require intricate internal features. Use FDM when you need toughness, heat resistance, or access to engineering-grade filament formulations.
- FDM: good for strength, engineering plastics, and larger parts
- Resin: high detail, smooth surfaces, and fine feature resolution
- Post-processing needs differ: sanding and machining vs washing and curing
Calibration, Test Prints, and Validation Protocols
Establish a calibration routine that includes dimensional test prints, temperature tower trials, and retraction tests for filament systems. Regularly scheduled validation prints help detect drift in accuracy before it affects important prototypes.
Document settings that produce acceptable mechanical properties for each material you use. Track print-to-print variability and include environmental conditions in your notes to reproduce successful prints reliably.
- Run a dimensional cube and measure critical axes
- Print tensile or flex samples when assessing material strength
- Keep a log of settings and ambient conditions for repeatability
Post-Processing and Finishing for Functional Parts
Post-processing choices influence part performance and fit. For functional prototypes, processes like annealing, vapor smoothing, or light machining can improve strength, surface finish, or dimensional stability. Select post-processing methods that align with the material's properties and the part's intended use.
Plan for fixturing and machining access when designing parts to be post-processed. Simple design changes can make finishing faster and reduce the risk of damaging critical features during handling.
- Annealing can increase heat resistance for some thermoplastics
- Vapor smoothing improves sealing surfaces but may alter dimensions
- Design for post-processing access to avoid rework
Scaling From Single Prototypes to Small-Batch Production
When moving from single prototypes to small-batch runs, consider repeatability and process control. Machines that allow identical settings to be exported and applied across multiple units reduce variation in batch production. Look for stable material sourcing and consistent filament batches to minimize part-to-part differences.
Evaluate whether printing multiple parts in a single bed or printing across multiple machines gives better throughput for your needs. Factor in inspection steps and assembly time when sizing a small production workflow.
- Use jigs and fixtures to ensure consistent assembly of printed components
- Standardize print profiles and material lots for batch reliability
- Plan quality checks into the production workflow
Maintenance Best Practices for Engineering Workflows
Preventive maintenance reduces unexpected downtime. Keep a schedule for lubrication, belt tension checks, and nozzle inspections. Replace wear items proactively based on run hours rather than waiting for failure.
Train team members on basic troubleshooting and part replacement so minor issues do not halt critical projects. Maintain a small inventory of common consumables and spare parts aligned with your expected print volume.
- Log run hours and maintenance actions for traceability
- Keep spare nozzles, belts, and thermistor hardware on hand
- Use standard operating procedures for machine startups and shutdowns
How We Chose the Best 3D Printer for Engineers
We prioritized machines that meet the technical demands of engineering workflows rather than hobbyist convenience. Our selection filters focused on print accuracy, repeatability, material compatibility, and usable build volume, since these directly affect prototype fidelity and functional testing. We also considered machine reliability, firmware and software ecosystem, and how straightforward maintenance and calibration are for repeated professional use. Connectivity and workflow features, such as network printing, job queuing, and native slicing support, were included because they reduce iteration time in team settings. Noise and enclosure options were assessed for lab and office environments where ambient conditions matter. We excluded units aimed solely at casual hobbyists, printers with undocumented material specifications, and machines lacking clear calibration procedures. The final list reflects devices that balance precision, materials, and practical workflow features important to engineering teams.
Our full evaluation process is outlined in our review methodology.
FAQ
What print tolerances can I expect from engineering-focused printers?
Tolerances depend on technology and calibration. Precision desktop machines often achieve dimensional accuracy within a few hundredths of a millimeter on small features, while larger parts may show greater variability. Regular calibration and rigid machine construction are key to maintaining tight tolerances.
Can I print load-bearing parts with desktop 3D printers?
Yes, with the right materials and print settings you can produce functional, load-bearing prototypes. Use engineering thermoplastics, optimize part orientation and infill, and validate with mechanical testing. For critical applications, always perform mechanical validation under expected service conditions.
How important is enclosure and temperature control for engineering materials?
Enclosures and stable ambient temperature are important when printing materials prone to warping, such as Nylon or high-temp polymers. A controlled environment improves interlayer adhesion and reduces distortion, leading to more reliable mechanical properties.
What maintenance should I plan for frequent prototyping use?
Schedule routine checks for belt tension, rail lubrication, nozzle condition, and bed flatness. Replace wear items on predictable intervals and keep a small stock of consumables. Documenting maintenance and print logs helps identify emerging issues before they cause downtime.
How do I choose print orientation for strength-critical parts?
Orient parts so principal load paths align with layer directions that provide better strength, and minimize stress across layer interfaces when possible. Consider using higher infill, thicker shell walls, or printing in multiple pieces for stronger joins. Testing sample orientations is a practical way to confirm the best approach.
Final Verdict
For engineering-focused prototyping, prioritize machines that deliver consistent dimensional accuracy, broad material support, and reliable uptime. Tradeoffs typically involve build volume versus precision, and breadth of material compatibility versus ease of setup. Focus on calibration, documented print profiles, and maintainable hardware to keep iteration cycles short. With those priorities in place, you can confidently choose a 3D printer that supports both concept validation and early-stage functional testing.