
Note: This article contains affiliate links. If you click on these links and make a purchase, we may earn a small commission at no extra cost to you. This helps support our research and content. Read our full affiliate disclosure here.
If you are new to decorative stitching, choosing the right embroidery sewing machine for beginners makes a big difference in how quickly you learn and how professional your finished pieces look. The right machine reduces setup headaches, keeps thread breaks and skipped stitches to a minimum, and gives you predictable hooping and design placement so your time is spent creating instead of troubleshooting. This guide highlights six shortlisted embroidery sewing machines built with novice users in mind. We evaluated each pick on factors that matter to first-time embroiderers, including ease of use, stitch quality, and reliable hooping. Read on to see which features to prioritize and what to expect when you start stitching.
Top Picks at a Glance
| Best Overall The best all-around choice for most situations | FLEURDENZ D777 Embroidery Machine |  |
| Best Quality Built to a higher standard if you want something more solid | Brother SE2000 Embroidery Machine |  |
| Best Value The sweet spot between price and what you get | Poolin EOC05 Embroidery Machine |  |
| Best Budget The cheapest option that still gets the job done reliably | PooLin EOC03 Embroidery Machine |  |
| Top Rated A top-rated pick with lots of positive feedback | Smartstitch S-1001 Embroidery Machine |  |
| Most Popular A crowd favorite that many people choose with confidence | Brother PE535 Embroidery Machine |  |
FLEURDENZ D777 Embroidery Machine

| Embroidery area | 6.7 x 11 inches |
|---|---|
| Touchscreen | 7 inch HD |
| Built-in designs | 180 |
| Power source | Corded Electric |
The FLEURDENZ D777 is a beginner-focused combo machine that handles both embroidery and simple sewing tasks in a single tabletop unit. It offers a 6.7 x 11 inch embroidery field that is large enough for hats, bags, patches, and garment accents, and a 7 inch touchscreen for design preview and on-machine control. Practical features such as automatic needle threading, one-touch thread cutting, independent bobbin winding, and USB design import reduce setup time and make repeated tasks less fiddly for new users. The machine also includes 180 built-in designs and two hoops to get started without extra purchases. In real-world use the D777 is positioned for hobbyists and home crafters who want to personalize gifts and do occasional repairs while learning embroidery; the solid-feeling build and clearer screen help build confidence during the learning curve. Expect it to cover most beginner projects well, but users needing heavy-duty, continuous production or advanced industrial features should look for higher-end dedicated embroidery systems.
Best for: Home crafters and beginners who want one machine that teaches embroidery basics while also handling everyday sewing tasks and small personalized projects.
Less Ideal for: People who need a commercial-grade embroidery workflow, high-speed production, or advanced multi-needle features should consider pro-level machines instead.
- Combined embroidery and basic sewing functions reduce the need for multiple machines
- 6.7 x 11 inch embroidery area suits hats, bags, and apparel accents
- 7 inch touchscreen provides clear design preview and easier on-machine edits
- Automatic needle threading and one-touch thread cutting speed up setup
- USB design import and 180 built-in designs give creative flexibility out of the box
- Not intended for heavy commercial production or continuous high-volume use
- Relatively heavy desktop footprint compared with compact beginner machines
Verdict: A user-friendly, all-in-one machine that makes learning embroidery easy while still covering basic home sewing needs.
Brother SE2000 Embroidery Machine

| Built-in embroidery designs | 193 (plus 50,000+ downloadable) |
|---|---|
| Built-in stitches | 241 |
| Embroidery field | 5" x 7" |
| Display | 3.7" LCD touchscreen |
The Brother SE2000 combines a full-featured embroidery workspace with everyday sewing capability, making it a practical choice for beginners who want growth potential. It offers a large 5 x 7" embroidery field, 193 built-in designs plus downloadable extras, and 241 built-in stitches with 10 buttonhole styles, so you can move from simple repairs to sizable decorative projects without swapping machines. The 3.7" LCD touchscreen and wireless LAN let you preview designs, position motifs, and send files without fuss, while the included Ultimate Embroidery Package supplies multiple hoops, stabilizers, a 20-thread set, and accessories to get started right away. The My Custom Stitch feature and multi-position hoop expand creative options, but the machine is a substantial tabletop unit and requires dedicated space and some time to learn its menus and setup. For hobbyists focused on detailed embroidery and steady advancement, it balances convenience and capability in an approachable package.
Best for: A beginner who wants a machine that grows with their skills and prioritizes embroidery performance and design flexibility over minimalism or portability.
Less Ideal for: Casual sewers who need a compact, lightweight machine for occasional mending or for those who prefer a simple plug-and-play unit with minimal setup.
- Large 5 x 7" embroidery area for bigger designs
- Comes with extensive starter kit including multiple hoops, threads, and stabilizers
- Wireless connectivity and touchscreen for easy design transfers and previews
- Wide built-in stitch and design selection plus downloadable designs
- Relatively heavy and requires a dedicated workspace
- Learning curve to master embroidery settings and software integration
Verdict: Choose the SE2000 if you want a beginner-friendly machine that prioritizes embroidery capability and includes a complete starter kit to begin larger decorative projects quickly.
Poolin EOC05 Embroidery Machine

| Embroidery area | 4 x 9.25 inch |
|---|---|
| Screen | 7-inch touchscreen |
| Power Source | Corded Electric |
| File formats supported | DST, DSB |
The Poolin EOC05 is an embroidery-only desktop machine aimed at beginners and hobbyists who want to make personalized clothing, bags, and home décor. It uses a 4 x 9.25 inch hoop that handles typical home projects and pairs a large 7-inch color touchscreen with Institch OS2 to guide setup and stitching. You can transfer designs via Wi‑Fi or USB and use Poolin's free inStitch software to create or edit patterns, which makes it simple to try custom designs without third‑party apps. The package includes two hoops and a starter kit with threads, stabilizers, bobbins, needles, and basic tools so you can start stitching right away. Because it is embroidery-only, there is no sewing function, and the 4 x 9.25 inch field is not suited to very large pieces or production work. The machine is corded electric and intended for home use rather than commercial throughput, but for a practical beginner it delivers approachable controls, useful bundled accessories, and straightforward connectivity for learning and small personal projects.
Best for: Beginners and home DIYers who want a straightforward embroidery machine that bundles software, connectivity, and starter supplies so they can learn and produce personalized projects quickly.
Less Ideal for: Users who need a combined sewing-and-embroidery machine, require larger-than-home-sized embroidery fields, or plan to run high-volume or commercial production.
- Large 7-inch color touchscreen for clear on-machine navigation and previews
- Wi‑Fi and USB design transfer with free inStitch software for easy pattern management
- Includes two hoops and a comprehensive starter kit (threads, stabilizers, bobbins, needles, tools) to begin immediately
- Focused embroidery-only design simplifies learning for new users
- 4 x 9.25 inch embroidery area limits the size of single designs
- Not suitable for sewing tasks since it lacks a sewing function
Verdict: Buy this if you want an affordable, beginner-oriented embroidery machine that combines a large touchscreen, Wi‑Fi/USB design transfer, and a starter kit to get stitching right away.
PooLin EOC03 Embroidery Machine

| Built-in designs | 130 |
|---|---|
| Fonts | 8 |
| Embroidery area | 4×4 in and 4×9.25 in |
| Power source | Corded Electric |
| Input voltage | 110 volts |
The PooLin EOC03 is designed for new embroiderers who want an easy-to-use, ready-to-run machine for home projects. It offers two embroidery areas (4×4 and 4×9.25 inches), 130 built-in designs and 8 fonts so you can start personalizing garments, bags, and gifts right away. The Institch operating system simplifies design selection and basic editing, and WiFi transfer plus free design software makes moving custom patterns from your computer or phone straightforward. PooLin bundles a starter kit, table, thread stand, prewound bobbins and stabilizers so beginners do not need to buy many extras. Practical support resources include step-by-step YouTube tutorials, a user community and one-on-one online help which ease the learning curve. Limitations for some buyers include the relatively small hoop sizes compared with pro machines and a basic feature set aimed at hobbyists rather than advanced users, so it is not meant for heavy production or very large designs. For a first machine, it balances simplicity and useful built-in content well.
Best for: Buyers seeking an affordable, no-frills first embroidery machine who want easy setup, built-in designs, and guided learning resources for home craft and gift projects.
Less Ideal for: People who need large-format embroidery, heavy production throughput, or advanced editing and hardware features should consider higher-end machines.
- Beginner-oriented Institch interface makes design selection and basic edits simple
- Two hoop sizes (4×4 and 4×9.25) provide flexibility for common home projects
- 130 built-in designs and 8 fonts let you start personalizing immediately
- WiFi design transfer and free software allow easy custom pattern uploads
- Starter kit and included accessories let you begin projects right away
- Hoop sizes are small for larger embroidery or commercial use
- Feature set is basic compared with advanced or production machines
Verdict: A budget-friendly starter machine that gets beginners stitching quickly with built-in designs, WiFi transfers, and bundled accessories.
Smartstitch S-1001 Embroidery Machine

| Needles | 10 |
|---|---|
| Max speed | 1200 SPM |
| Embroidery area | 9.5 x 14.2 inch |
| Screen | 7" LCD touchscreen |
| Power source | Corded Electric |
The Smartstitch S-1001 is a 10-needle embroidery machine built for higher-throughput hobbyists and small businesses who want a dependable, production-style setup without industrial scale. It handles flatwork and caps and accepts DST/DSB files via USB or Wi-Fi, and the 7" touchscreen and physical control buttons make file selection and on-machine edits straightforward. Key convenience features include auto thread trimming, auto color changing, thread break detection, a self-lubrication system, and laser positioning which speed setup and reduce manual fiddling. The machine ships with a starter pack of hoops, stabilizers, bobbin thread and a stand, plus training videos and available live support which help beginners shorten the learning curve. At the same time the S-1001 is sizable and heavier than home single-needle units, and it requires a dedicated workspace and some basic maintenance knowledge to keep it running reliably. For a buyer prioritizing reliability and repeatable results, the S-1001 feels more like a small production machine than a toy, but it is more machine than occasional users need.
Best for: Buyers who want a reliable, production-style embroidery machine to grow skills or run small-batch projects and who value uptime, automated threading features, and vendor support.
Less Ideal for: If you only want an occasional, space-saving hobby machine or a simple single-needle starter, this heavier multi-needle unit and its setup demands are overkill.
- 10-needle head and auto color changing for faster multi-color embroidery
- Auto thread trimming and thread break detection reduce downtime during runs
- Self-lubrication system and stable frame designed for quieter, consistent operation
- 7" touchscreen plus physical buttons and USB/Wi‑Fi file transfer for flexible workflow
- Includes starter pack, stand, and training resources to help beginners get started
- Large and heavy unit that needs a dedicated workspace and stronger support surface
- Not as compact or simple as single-needle beginner machines for infrequent hobby use
Verdict: Choose the S-1001 if you want a reliable, small-production embroidery machine that automates threading and color changes to deliver consistent results as you learn and scale projects.
Brother PE535 Embroidery Machine
| Built-in designs | 80 |
|---|---|
| Fonts | 9 built-in font styles |
| Hoop size | 4" x 4" |
| Screen | 3.2" LCD color touchscreen |
| Power | Corded Electric, 120 volts |
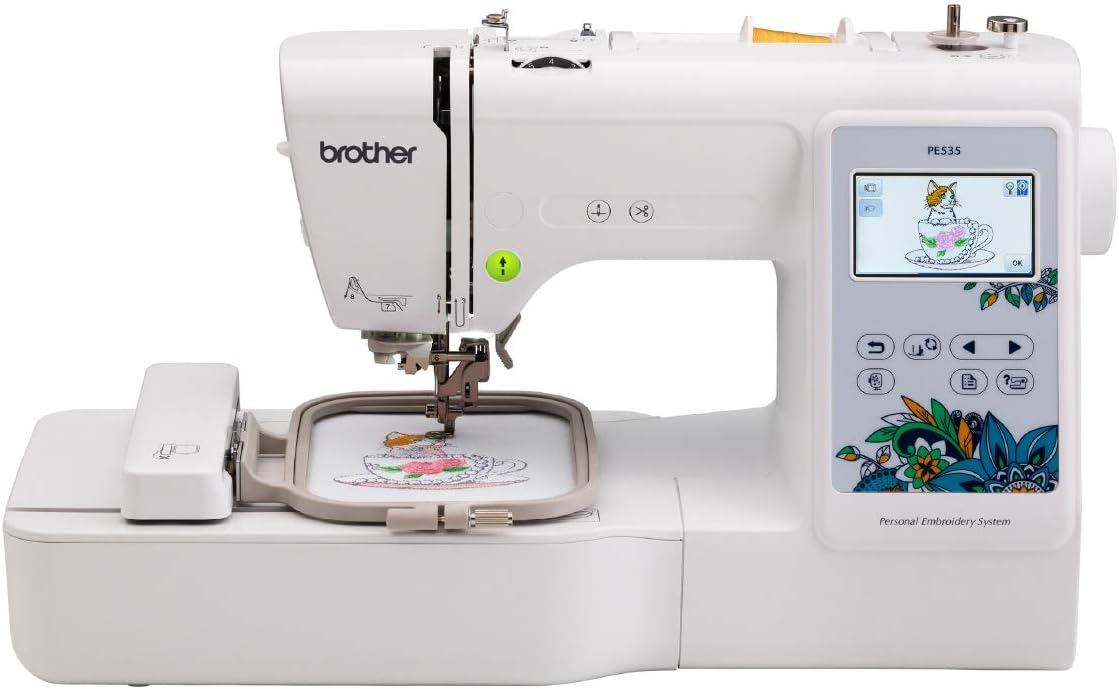
The Brother PE535 is a beginner-friendly computerized embroidery machine designed to make personalizing garments and home goods simple. It stitches within a 4" x 4" hoop and includes 80 built-in designs, 10 frame patterns, and nine font styles for lettering and monograms, with an easy drag-and-drop interface on the 3.2" color touchscreen so you can preview and position designs before stitching. The machine accepts external designs via the USB port and stores them in internal memory, and features an automatic needle threader to reduce setup frustration. Practical benefits for new users include step-by-step tutorials on the display, a straightforward hoop and arm setup, and lifetime phone support plus a long limited warranty. Limitations include the small hoop area, which restricts larger projects, and the unit is embroidery-only so it will not sew normal seams or larger sewing tasks. For stitchers starting with patches, personalization, and small decorative projects, the PE535 balances useful automation and a shallow learning curve.
Best for: New stitchers who want a straightforward, guided embroidery experience for monograms, patches, and small personalized projects and who value built-in tutorials and easy design import.
Less Ideal for: People who need to stitch large designs, do full sewing and garment construction, or require a larger hoop for big projects.
- Beginner-friendly touchscreen with drag-and-drop design positioning
- Includes 80 built-in designs and nine fonts for quick personalization
- USB port and built-in memory let you import and store custom designs
- Automatic needle threader and on-screen tutorials reduce setup frustration
- Small 4" x 4" embroidery field limits larger designs and projects
- Embroidery-only machine so it cannot perform general sewing tasks
Verdict: The PE535 is a dependable, easy-to-use starter embroidery machine that helps beginners create polished small projects quickly.
Choosing the Right Embroidery Sewing Machine for Beginners: Key Factors to Consider
Ease of Setup and Learning Curve
Beginners benefit most from machines that reduce initial friction. Clear threading paths, labeled tension dials, and straightforward bobbin systems shorten the time between unboxing and stitching. A steep learning curve can frustrate new stitchers and increase the chance they abandon projects.
Look for built-in tutorials, color-coded guides, and simple on-machine prompts. Machines with automatic needle threading and one-step bobbin insertion are especially helpful when you are getting started. These conveniences let you focus on embroidery technique instead of mechanical basics.
Hoop Compatibility and Registration Accuracy
Proper hooping determines how designs align and how consistent stitches appear. For beginners, hoops that are easy to mount, have clear alignment marks, and secure clamps reduce rehooping and design skew. Smaller hoops are simpler for practice work, while a modestly larger hoop expands project options without adding complexity.
Consider how the machine conveys center points and whether it offers transparent or magnetic templates to help position fabric. Machines with reliable registration tools make it easier to layer designs or repeat motifs with consistent placement.
Stitch Quality and Design Fidelity
Quality embroidery output depends on consistent needle timing, stable feed systems, and precise stitch control. For hobbyists, even and dense satin stitches and clean fill areas define professional-looking results. Beginners should prioritize machines that deliver predictable stitch density and smooth transitions between stitch types.
Check whether a machine handles common fabric types like cotton, linen, and lightweight denim without frequent thread breaks. A forgiving tension system that recovers after minor adjustments helps maintain stitch quality when you are still learning to fine-tune settings.
User Interface and Onboard Tools
An accessible control panel and readable display shorten the learning curve. Touchscreens or well-labeled keypads that clearly show hoop size, design orientation, and stitch count allow beginners to make confident adjustments. Onboard tools such as basic editing, mirroring, and resizing support quick tweaks without external software.
Consider whether the interface uses plain language and icons you can interpret at a glance. Machines that offer helpful error messages and simple prompts for routine tasks reduce downtime and frustration.
Thread Management and Tension Forgiveness
Loose or overly tight thread paths cause common beginner issues like loops, thread breaks, and inconsistent tension. Machines with guided thread paths, convenient thread cutters, and stable top tension assemblies are easier to keep running smoothly. A tension system that tolerates minor user errors will minimize rework and wasted materials.
Also consider built-in thread sensors that pause when spools run low and easy-access areas for cleaning lint and bobbin debris. Good thread management supports uninterrupted practice sessions and better final results.
Support, Documentation, and Community Resources
Comprehensive manuals, video walkthroughs, and active user communities are vital for beginner success. Clear documentation that covers setup, routine maintenance, and troubleshooting shortens the learning curve and reduces uncertainty. Video guides showing hooping, stabilizer selection, and basic design editing can be especially valuable.
Access to community forums or user groups provides ready answers to common questions and inspiration for project ideas. Machines with abundant learning resources help stitchers progress confidently from simple designs to more complex projects.
Choosing the Right Hoop Size
Hoop size affects what you can embroider and how easy it is to manage fabric. Smaller hoops are ideal for practice patches, monograms, and tight placements on garments. Larger hoops let you tackle full-front designs or bigger home-decor pieces but require steadier hooping technique.
As a beginner, start with a medium or small hoop so you can focus on stitching fundamentals and accurate placement. Practice centering and clamping until you can rehoop consistently before moving to larger formats.
- Small hoops: easier alignment, ideal for initials and small logos
- Medium hoops: versatile for most hobby projects
- Large hoops: expand project scope but increase hooping complexity
Stabilizers and Fabric Prep
Selecting the right stabilizer and preparing fabric are essential skills that affect stitch appearance. Lightweight stabilizers work for linens and fine cottons, while heavier or tear-away stabilizers support denser designs and stretchier fabrics. Proper hooping with adequate tension prevents puckering.
Begin by testing stabilizer types with sample designs on the fabrics you plan to use. Mark hoop centers and baste when necessary to secure slippery fabrics before embroidering.
- Tear-away stabilizers: good for stable woven fabrics
- Cut-away stabilizers: preferred for stretchy or knitted materials
- Water-soluble: useful for delicate overlays and freestanding lace
Basic Design Editing Without Extra Software
Many beginner machines include basic on-board editing such as resizing, mirroring, and simple lettering support. These features let you adjust design size and orientation without transferring files to a computer or learning dedicated editing suites. Small edits often solve common alignment issues and tailor designs to project dimensions.
Learn to use on-machine editing for quick fixes, but avoid making large size changes that can distort stitch density. When you need advanced digitizing, consider learning or outsourcing that work, but beginners will usually be well served by modest on-board tools.
- Use on-machine resizing sparingly to avoid density problems
- Mirror and rotate functions help fit designs to garment seams
- Simple monogram tools can speed up personalization projects
Maintenance and Simple Troubleshooting
Routine maintenance keeps machines running smoothly. Regular cleaning of lint and thread debris near the bobbin and feed dog area prevents skipped stitches. Periodic oiling where the manual specifies maintains smooth motion and reduces noise.
Learn to recognize and resolve common issues like tension imbalance, needle blowouts, and thread nests. A small toolkit with spare needles, tweezers, and a lint brush is useful for at-home fixes that keep practice sessions productive.
- Clean bobbin area after several hours of stitching
- Replace needles regularly to avoid dullness-related issues
- Keep a maintenance log to track service and part replacements
Planning Beginner-Friendly Projects
Start with low-stakes projects that teach core skills. Monograms, simple patches, and small home accessories let you practice hooping, thread selection, and stabilizer choice without large material commitments. Choose designs with modest stitch counts and evenly distributed fills to reduce the chance of puckering.
As confidence grows, experiment with layered designs and varied thread types. Keep notes on settings that worked for specific fabrics so you can reproduce successful outcomes on future projects.
- Begin with single-color, low-density designs
- Move to multi-color projects after mastering hooping
- Record successful setups for fabrics and stabilizers
How We Chose the Best Embroidery Sewing Machine for Beginners
We focused on machines that lower the learning curve without sacrificing embroidery quality. Important evaluation dimensions included ease of setup and learning curve, because intuitive threading paths, clear controls, and straightforward hoop alignment matter most to new users. We also weighed stitch quality and design fidelity by looking at how reliably a machine produces even, consistent satin and fill stitches across a range of common fabrics. Hooping and registration accuracy were critical since beginners often struggle with design placement. We favored machines with predictable hoop clamps, visible alignment guides, and simple ways to center designs. Durability and day-to-day reliability were considered so a machine will keep working through practice projects and small commissions. Thread management and tension systems were assessed for how forgiving they are when users are still learning adjustments. We excluded industrial or commercial-level embroidery systems that require advanced setup or professional maintenance. Machines that demanded specialized external software or complex network setups were not included. Our shortlist emphasizes models that combine approachable operation with the core embroidery capabilities beginners need to grow their skills.
Our full evaluation process is outlined in our review methodology.
FAQ
Do I need embroidery software to start?
Not always. Many beginner machines have on-board editing that covers basic resizing, mirroring, and lettering. Software becomes useful when you want custom digitizing or complex edits, but it is not required to learn the basics.
What hoop size should a beginner buy first?
Start with a small to medium hoop to practice alignment and reduce handling complexity. A medium hoop offers versatility for stitching several common project types without overwhelming hooping technique.
How often should I change needles when learning?
Change needles regularly, roughly after every 6 to 8 hours of stitching or sooner if you notice skipped stitches or thread fraying. Fresh needles reduce skipped stitches and protect fabric appearance.
Can I embroider on stretchy fabrics as a beginner?
You can, but it requires appropriate stabilizers and careful hooping. Cut-away stabilizers and light baste techniques help control stretch. Practice on scraps before working on finished garments.
How important is thread type for embroidery results?
Thread type matters. Polyester embroidery thread is common for its strength and sheen, while rayon offers a softer shine. Thread weight and quality affect how dense stitches look and how often you need to adjust tension.
Final Verdict
For beginners, prioritize machines that simplify setup, provide dependable hooping, and deliver consistent stitch quality. Expect tradeoffs between feature breadth and ease of use: more onboard functions help as you progress, but overly complex systems can slow initial learning. Choose a machine that matches the projects you plan to do, and favor forgiving tension systems, clear user interfaces, and good documentation. With the right starter machine and steady practice, you will develop the technique and confidence to take on larger or more detailed embroidery projects.