
Note: This article contains affiliate links. If you click on these links and make a purchase, we may earn a small commission at no extra cost to you. This helps support our research and content. Read our full affiliate disclosure here.
If you want to start 3D printing without overspending, choosing the right FDM 3D printer on a budget matters. A cost-conscious machine can still deliver usable part accuracy, dependable first layers, and a sane build volume for everyday projects. Poor choices lead to hours troubleshooting or parts that are unusable for functional prototypes. This guide shortlists six accessible FDM 3D printers that balance print quality, ease of setup, and maintenance costs. We evaluated machines on specific, practical criteria you care about, then condensed those findings into clear pros and cons to help you pick the best fit. Read on for the selection rationale and the buying factors that matter most for budget-minded builders.
Top Picks at a Glance
| Best Overall The best all-around choice for most situations | Anycubic Kobra X |  |
| Best Value The sweet spot between price and what you get | ELEGOO Neptune 3 Pro |  |
| Best Budget The cheapest option that still gets the job done reliably | Oxxggkao Entry-Level 3D Printer |  |
| Top Rated A top-rated pick with lots of positive feedback | Bambu Lab A1 3D Printer |  |
| Most Popular A crowd favorite that many people choose with confidence | Creality Ender 3 V3 SE |  |
| Best Seller A high-volume bestseller chosen again and again | FLASHFORGE Adventurer 5M |  |
Anycubic Kobra X

| Print volume | 260×260×260mm³ |
|---|---|
| Supported materials | PLA, PETG, TPU, PVA, ABS |
| Nozzle temperature | Up to 300C |
| Auto leveling | LeviQ 3.0 49-point |
| Camera | 720P with AI monitoring |
The Anycubic Kobra X is an approachable, feature-rich FDM printer aimed at hobbyists and educators who want multicolor capability without a huge learning curve. It ships with LeviQ 3.0 automatic 49-point bed leveling, filament run-out and power-loss recovery, and an ACE multicolor system that supports native 4-color printing and expansion up to 19 colors with additional modules. The machine targets speed, advertising up to 600 mm/s with vibration compensation and a tuned OS to keep detail sharp even at faster print rates. Practical benefits include broad material compatibility (PLA, PETG, TPU, PVA, ABS) and a hardened steel nozzle rated to 300C, plus a 720p camera and AI monitoring for error detection during long prints. For a budget-conscious buyer the plug-and-play setup and strong safety/monitoring features reduce the fiddly setup time that often comes with multicolor printing. Trade-offs to expect are that extreme top speeds are rarely used routinely for high-detail parts and adding the hardware needed for full 19-color output increases complexity and cost compared with single-extruder setups.
Best for: Buyers looking for a budget-friendly, ready-to-use FDM printer that balances ease of setup, multicolor capability, and reliable monitoring for classroom, hobby, or prototyping use.
Less Ideal for: Users who need turnkey ultra-high-resolution prints at slow speeds or those who want a simple single-extruder printer without any multicolor hardware complexity.
- Native multicolor printing (4 colors) with expandability up to 19 colors using additional ACE modules
- LeviQ 3.0 49-point auto bed leveling for consistent first layers out of the box
- Broad material support including PLA, PETG, TPU, PVA, and ABS with a hardened steel nozzle to 300C
- Built-in camera and AI monitoring with spaghetti detection and object skip to protect long prints
- Achieving full 19-color printing requires extra filament hubs and modules, adding cost and setup complexity
- Real-world high-speed prints sacrifice some fine-detail fidelity compared with slower settings
Verdict: The Kobra X delivers a rare combination of beginner-friendly setup, native multicolor printing, and intelligent monitoring that makes multicolor FDM practical on a budget.
ELEGOO Neptune 3 Pro

| Build volume | 225×225×280 mm (8.85×8.85×11 in) |
|---|---|
| Extruder type | Dual-gear direct drive |
| Bed leveling | 36-point auto bed leveling |
| Noise level | 47 dB |
| Filament diameter | 1.75 mm |
The ELEGOO Neptune 3 Pro is a budget-minded FDM printer built for reliable everyday printing. It ships with most major mechanical parts pre-assembled and a toolkit so you can be printing quickly on the 225×225×280 mm build plate. The dual-gear direct-drive extruder and upgraded nozzle assembly (titanium throat tube and brass nozzle) improve filament feeding and reduce clogs, which helps when running flexible or abrasive materials. Electronics include an STM32 board and silent stepper motors that keep operation quiet, while dual lead screws and POM V-guide wheels stabilize the Z axis for finer layer consistency. Practical features like 36-point auto bed leveling, a filament runout sensor, and power-loss resume reduce failed prints and setup headaches. It is not a large-format or industrial machine, so it will be limited for very big models or high-speed production runs, and advanced users may want more open firmware or connectivity options. For its price and included hardware, it delivers consistent, user-friendly performance for hobbyists and makers focused on dependable prints rather than cutting-edge speed or massive build volume.
Best for: A practical builder who wants a reliable, low-fuss FDM printer for everyday projects and mixed filaments, prioritizing consistent prints and easy setup over maximum build size or industrial features.
Less Ideal for: Users needing very large build volume, full-enclosure high-temperature printing, or advanced open-source firmware customization should consider other options.
- Dual-gear direct-drive extruder improves filament grip and reduces clogs with flexible materials
- 36-point auto bed leveling simplifies first-layer setup and reduces tuning time
- Filament detection sensor and power-loss resume protect long prints from interruptions
- Dual lead screws and POM V-guide wheels provide stable Z-axis motion for consistent layers
- Quiet stepper motors and STM32 board make operation noticeably quieter than older budget machines
- Build volume is modest compared with larger hobbyist printers
- No mention of advanced connectivity features or enclosed heated chamber for high-temp materials
Verdict: A compact, user-friendly FDM printer that prioritizes reliable, low-maintenance printing for budget-conscious makers.
Oxxggkao Entry-Level 3D Printer

| Nozzle diameter | 0.4 mm |
|---|---|
| Layer thickness | 0.1–0.4 mm |
| Filament diameter | 1.75 mm |
| Extruder temperature | 180–230 ℃ |
| Printing size | 100 x 100 x 100 mm |
This small FDM printer is built for first-time users and hobbyists who want a straightforward way into 3D printing. It prints 1.75 mm filament through a single 0.4 mm nozzle, supports layer heights from 0.1 to 0.4 mm, and offers printing speeds in the 10–40 mm/s range, which favors reliability over speed. The unit is described as quiet and lightweight and uses bundled Easyware slicing with automatic slicing to simplify workflow; a simple button/touch control surface makes starting prints easy without a steep learning curve. Practical limits are the modest 100 x 100 x 100 mm build volume and the need to supply your own 12V, ≥2A USB-C power adapter, which adds an extra step before use. Temperatures top out around 230°C so it will handle common PLA and some PETG but not high-temperature specialty filaments. Overall, it is a compact, no-frills desktop printer that prioritizes ease of use and affordability for home education and hobby projects, while sacrificing build size and advanced material support.
Best for: Budget-minded newcomers, hobbyists, and home educators who want an easy-to-use, compact printer for small projects and learning without a steep setup process.
Less Ideal for: Makers who need large build volumes, professional prototyping, or frequent printing with high-temperature specialty filaments should look at larger or higher-temperature models.
- Beginners-friendly Easyware slicer with automatic slicing simplifies setup and print preparation.
- Quiet, lightweight design suited for small home or classroom use.
- Simple button/touch controls make starting prints quick without complex menus.
- Reasonable nozzle and layer specifications (0.4 mm nozzle, 0.1–0.4 mm layers) for standard hobby printing.
- Very small 100 x 100 x 100 mm build volume limits larger projects.
- No power adapter included; requires a 12V ≥2A USB-C supply purchased separately.
- Top extruder temperature (230°C) restricts use of some high-temp filaments.
Verdict: A compact, wallet-friendly entry-level FDM printer that delivers simple, quiet operation and easy slicing for beginners who want to learn and print small projects.
Bambu Lab A1 3D Printer

| Build volume | 256×256×256 mm |
|---|---|
| Max acceleration | 10 m/s² |
| Ideal supported filaments | PLA, PETG, TPU, PVA |
| Item weight | 22 pounds |
The Bambu Lab A1 is a ready-to-use FDM desktop printer designed to make reliable prints with minimal fiddling. It automates Z-offset, bed leveling, vibration resonance tuning, and nozzle pressure so you can start prints with one click instead of manual calibration, and it includes active flow-rate compensation to maintain consistent extrusion. The A1 supports multi-color printing when paired with the optional AMS lite and offers a comparatively large 256×256×256 mm build volume for its class. Hardware choices like low-drag linear rails, accelerometers, a nozzle pressure sensor, and a capable motion controller let the unit run at high speed while preserving precision, and active motor noise canceling keeps noise levels low during long jobs. Practical benefits are strong: quick setup for beginners, dependable first-layer performance, and good throughput when you need faster prints. Limits to consider are that multi-color capability requires the AMS accessory and advanced users who want extensive firmware tuning may find the closed ecosystem restrictive compared with fully open hobby machines.
Best for: Buyers who prioritize a dependable, low-fuss printing experience and want a machine that works well out of the box for prototyping, hobby projects, and rapid iteration.
Less Ideal for: If you plan to heavily modify firmware, require built-in multi-material printing without add-ons, or need extreme open-source customization, look at more hackable platforms instead.
- Full-auto calibration removes most manual setup and speeds first prints
- Active flow rate compensation for more consistent extrusion and surface quality
- 256×256×256 mm build volume is roomy for an entry-level desktop printer
- High-speed capable motion system with sensors improves reliability at faster print speeds
- Quiet operation with active motor noise canceling makes long prints less intrusive
- Multi-color printing requires purchasing the AMS lite accessory separately
- Less suited to users who want fully open, deeply customizable firmware or hardware hacking
Verdict: Choose the A1 if you want a fast, quiet FDM printer that reliably produces good results with almost no manual calibration.
Creality Ender 3 V3 SE

| Print speed | Up to 250 mm/s |
|---|---|
| Extruder type | Sprite direct extruder |
| Auto-leveling | CR Touch with strain sensor |
| Mainboard | 32-bit silent mainboard |
| Build plate | PC spring steel flexible plate |
The Creality Ender 3 V3 SE is an entry-focused FDM printer that aims to speed up hobby and small-project prints while reducing setup friction. It prints up to 250 mm/s with high acceleration, and includes a CR Touch auto-leveling system plus a strain sensor for automatic Z offset, which helps get a correct first layer without fiddly manual adjustments. The Sprite direct extruder supports PLA, PETG and flexible filaments and is proven in volume, while a dual Z-axis and dual 8 mm Y-axis shafts improve rigidity and reduce wobble for cleaner tall prints. Practical touches like one-tap auto filament load/unload, a PC spring steel flexible build plate and a 32-bit silent mainboard make daily use quieter and easier. Limitations include a relatively small build volume compared with larger hobby printers and the need for occasional tuning to reach best print quality at high speeds; advanced users may still want to tweak firmware or mechanical components for demanding prints.
Best for: Buyers who want a budget-friendly FDM printer that reduces setup time and speeds through prints while still handling common filaments reliably.
Less Ideal for: Those who need large build volume for single-part printing or who prefer a fully out-of-the-box industrial-grade finish without any tuning.
- Fast maximum print speed and high acceleration for quicker job turnaround
- CR Touch auto-leveling and strain sensor simplify first-layer setup
- Sprite direct extruder handles PLA, PETG and TPU reliably
- Rigid dual Z-axis and steel Y-axis shafts reduce wobble for more stable printing
- PC spring steel flexible build plate and one-tap filament load/unload streamline workflow
- Smaller build volume compared with many midrange printers
- High-speed printing may require tuning to optimize surface quality
Verdict: A fast, easy-to-start budget FDM printer that minimizes setup pain and reliably handles common filaments for hobbyists and makers.
FLASHFORGE Adventurer 5M
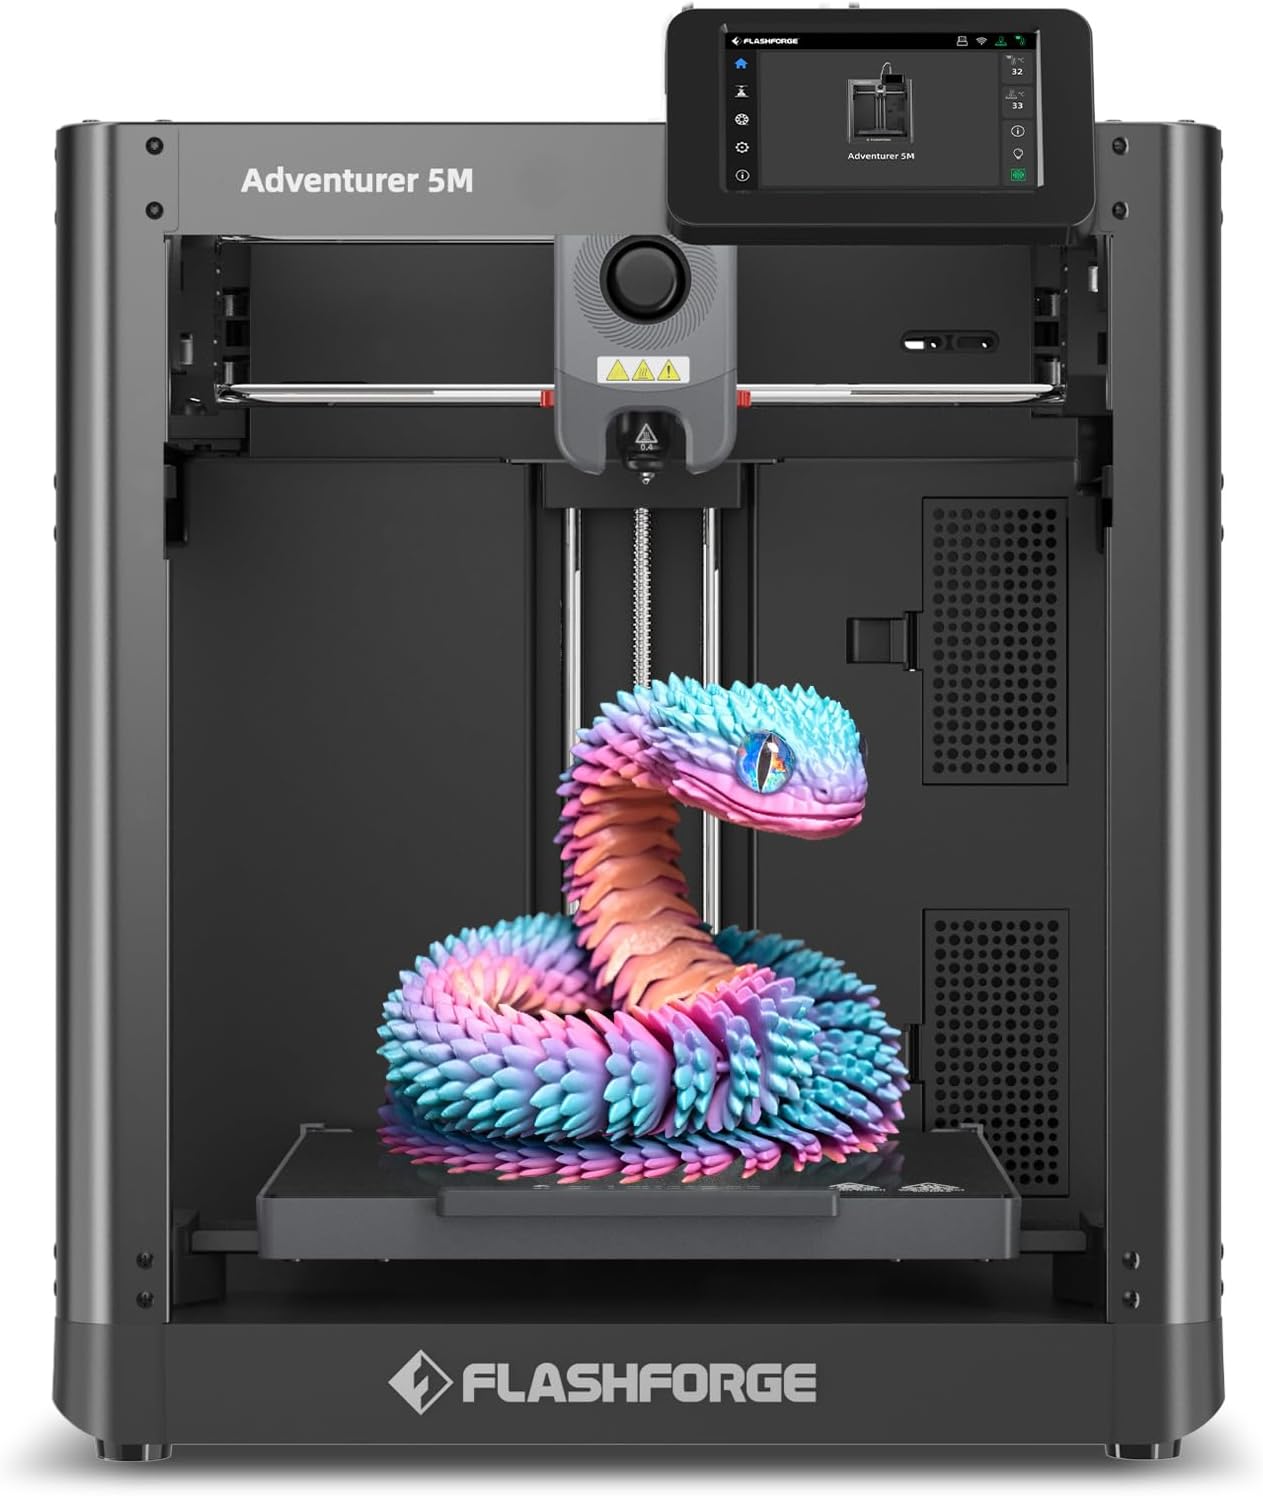
| Build Volume | 220 x 220 x 220 mm |
|---|---|
| Max Nozzle Temp | 280°C |
| Travel Speed | 600 mm/s |
| Leveling Type | One-Button Auto Leveling |
| Platform Type | Double-Sided PEI Platform |
The Adventurer 5M is a CoreXY FDM printer designed to speed up prototyping without sacrificing print quality. It uses one-button automatic bed leveling and a double-sided PEI platform to make first-layer adhesion and part removal easier, and a 280°C direct extruder with interchangeable nozzles for flexible material support. Flashforge highlights a high travel speed (600 mm/s) and aggressive acceleration for short print cycles, plus a 32 mm3/s high-flow nozzle and quick 35-second warm-up to 200°C, which lowers wait times. The sealed metal CoreXY frame improves rigidity for finer detail at speed, and the mobile app and optional camera give basic remote monitoring. Limitations to note are that ultra-high speeds may require tuned settings and premium filament to avoid ringing or quality loss, and some advanced materials need higher nozzle temps than the base spec. For buyers who prefer simple setup, routine maintenance like nozzle and platform cleaning is necessary to keep consistent results.
Best for: Buyers who want a relatively turnkey desktop FDM printer that prioritizes fast prototyping and reliable first layers with minimal manual leveling.
Less Ideal for: If you need an industrial-volume printer or frequently print exotic materials requiring much higher temperatures, this compact model will feel limited.
- One-button automatic bed leveling simplifies first prints and reduces setup time
- CoreXY all-metal structure for improved rigidity and more consistent high-speed prints
- High travel speed and acceleration designed to cut print time for prototypes
- 280°C direct extruder and multiple nozzle sizes increase material and resolution flexibility
- Double-sided PEI platform allows easy part removal and reliable adhesion
- Very high advertised speeds may require calibration and quality filament to avoid print artifacts
- Some engineering or high-temperature materials may demand higher nozzle temperature than listed
Verdict: A risk-averse buyer looking for fast, easy-to-start FDM prototyping should consider the Adventurer 5M for its auto-leveling, rigid CoreXY design, and high-speed focus.
Choosing the Right FDM 3D Printer on a Budget: Key Factors to Consider
Print Quality & Accuracy
Print quality determines whether parts are usable for fit-and-function projects or only decorative items. Look for printers with stable motion systems, minimal frame wobble, and a decent minimum layer height. Layer adhesion, nozzle precision, and consistent extrusion all influence final tolerances.
On budget models, small differences in mechanical design or calibration can make a big difference. Expect to spend some time dialing in bed leveling and extrusion multiplier, but prefer designs that reduce that tuning burden with rigid frames and reliable bed surfaces.
Ease of Setup and First Print
How quickly you can unpack, assemble, level the bed, and print a calibrated test object affects your early experience. Machines with clear assembly instructions, pre-calibrated firmware, and assisted bed-leveling systems get you printing faster.
Beginner-friendly features such as a guided first-print routine, simple control interfaces, and a compatible slicer profile reduce frustration. Consider how much time you are willing to invest in initial setup when choosing a budget printer.
Build Volume and Bed Type
Build volume determines the maximum part size you can print without splitting models. Choose a bed size that matches the kinds of projects you plan to make, whether small jigs or larger prototypes.
Bed type matters for adhesion and convenience. Heated beds expand material compatibility and reduce warping for ABS and PETG. Removable or flexible build plates simplify part removal but check that the bed surface holds common filaments reliably without excessive prep.
Filament Compatibility and Extruder Design
A versatile extruder and hotend let you experiment with PLA, PETG, TPU, and tougher filaments. Budget printers sometimes ship with simple bowden or single-geared extruders that struggle with flexible materials; look for designs known to handle a range of filament types or accept common upgrade paths.
Consider filament diameter support and whether the machine can be adapted to a different extruder style. Filament compatibility impacts the projects you can tackle and future upgrades you might want.
Software, Firmware, and Workflow
Good slicer compatibility and stable firmware reduce print failures. Check that the printer works with mainstream slicers and that community resources provide reliable start gcode and tuning tips.
Firmware that supports basic safety features and easy parameter adjustments makes ongoing tweaking safer. A machine that exports or accepts standard profiles will save time and let you focus on print settings rather than compatibility issues.
Maintenance, Spare Parts, and Community Support
Cheap printers are cheaper up front but can become time sinks without accessible spare parts or community knowledge. Prioritize machines with readily available replacement belts, nozzles, and thermistors, plus modular parts that are easy to swap.
An active user community or clear documentation shortens troubleshooting cycles. Consider whether you are comfortable performing routine maintenance tasks like belt tensioning, nozzle changes, and firmware updates.
Common Beginner Mistakes and How to Avoid Them
New users often expect perfect prints straight from the box. Budget machines typically need some calibration and tuning. Start with a simple calibration cube and a well-documented slicer profile, then adjust one variable at a time to understand its effect.
Poor bed adhesion, incorrect extrusion temperature, and loose belts are frequent culprits. Regularly check belt tension and ensure the bed is level. Use a single filament type for early tuning to reduce variables and save time.
- Run a first-layer test and adjust Z-offset rather than changing multiple settings at once
- Keep a log of successful print temperatures and speeds for your filament brand
- Inspect belts, lead screws, and pulleys for play before long prints
Upgrades That Actually Help
Not all upgrades deliver equal value. Start with improvements that reduce daily friction: a better bed surface or a more reliable filament path can cut failed prints dramatically. A quality nozzle and easier part removal often yield the biggest practical benefits.
Firmware tweaks that add thermal protection and simplified menus improve safety and usability. More advanced upgrades like all-metal hotends or direct-drive extruders are useful only if you plan to print flexible or high-temperature filaments regularly.
- Consider a magnetic or flexible build plate for easier part removal
- Swap to a hardened steel nozzle only if you plan to print abrasive filaments
- Upgrade belts or bearings if you see ghosting or mechanical looseness
Setting Realistic Expectations for Budget Machines
A budget FDM printer on a budget can produce functional prototypes and hobby parts, but it will not match the repeatable tolerance of higher-end machines. Expect to perform regular maintenance and invest time in calibration to reach the best results.
Accept that large or highly detailed parts may require slower speeds or sliced-up models. If you need consistent high precision for engineering parts, plan for incremental upgrades or a professional-level machine in the future.
- Short prints are ideal while tuning; long prints magnify small alignment issues
- Fine details require slower speeds and smaller layer heights
- Plan print runs around the printer's strengths rather than forcing unsuitable jobs
Workspace, Safety, and Ventilation
Where you place the printer affects print quality and safety. A stable table, away from drafts and direct sunlight, helps maintain consistent temperatures. Heated beds and enclosures benefit high-temperature filaments but add complexity.
Ensure adequate ventilation, especially when printing materials that emit fumes at higher temperatures. Basic smoke detectors and a small fire extinguisher are sensible precautions in any workspace that runs long prints unattended.
- Avoid placing the printer near open windows or air vents
- Use an enclosure or partial cover for ABS and other warp-prone materials
- Keep tools and spare parts organized to speed maintenance
Materials and Common Use Cases
PLA is the most forgiving filament and ideal for most beginners. PETG offers better strength and heat resistance for functional parts, while TPU lets you print flexible components. Choose materials that match the mechanical demands of your projects.
For hobby prototyping, consider how parts will be used. Cosmetic pieces can be printed quickly and at lower resolutions. Functional parts may need higher infill and thicker walls to survive mechanical stress.
- Print test samples in each filament type to establish go-to temperature and speed
- Increase perimeters and infill percentage for load-bearing parts
- Sand and post-process PLA for smoother finishes when needed
How We Chose the Best FDM 3D Printer on a Budget
We shortlisted models that deliver consistent, usable prints without expensive add-ons. Our evaluation prioritized real-world usability over specs-only claims by focusing on features that affect first prints, ongoing reliability, and operating cost. Concrete criteria included build volume and bed type because they determine what you can print and how reliably parts adhere. Motion and frame design were assessed to gauge dimensional accuracy and vibration resistance. Extruder and hotend configuration were examined for filament compatibility and clog resistance. Ease of setup and software support were weighted heavily since beginners and hobbyists benefit most from straightforward assembly and clear slicer workflows. Finally, maintenance accessibility and parts availability were considered because inexpensive printers can become costly if common repair parts are hard to source. We excluded machines that required extensive community-driven modification to be usable or that lacked basic safety features. We also filtered out closed systems that restrict filament choices. The result is a list focused on printers that work well out of the box, scale up with modest upgrades, and keep ongoing costs predictable.
Our full evaluation process is outlined in our review methodology.
FAQ
How much assembly should I expect with a budget FDM 3D printer?
Many budget printers come partially assembled and require straightforward mechanical assembly and belt tensioning. Expect to spend a few hours on setup and initial calibration, depending on your experience.
Can a budget FDM printer handle flexible filaments like TPU?
Some budget printers can print flexible filaments, but success often depends on the extruder design and filament path. Direct-drive setups generally work better for TPU than long bowden paths.
What routine maintenance is necessary to keep prints consistent?
Routine tasks include checking belt tension, cleaning the nozzle, ensuring the bed surface is clean, and verifying firmware and slicer settings. Replacing wear parts like nozzles and PTFE tubes periodically keeps performance stable.
Is a heated bed necessary for reliable prints?
A heated bed improves adhesion and reduces warping for materials like PETG and ABS. For PLA you can often get good results without one, but a heated bed expands your material options.
How can I improve first-layer adhesion on a tight budget?
Start with a clean bed and proper leveling, print slower on the first layer, and use familiar adhesion helpers such as blue tape, glue stick, or a textured build surface. Adjusting the Z-offset precisely often fixes most first-layer issues.
Final Verdict
When choosing an FDM 3D printer on a budget, prioritize machines that minimize setup friction and offer reliable part adhesion. Balance your desired build volume against the time you are willing to spend on calibration and maintenance. Focus on printers with straightforward assembly, stable motion systems, and easy access to spare parts. Accept tradeoffs in top-end precision in exchange for low operating cost and upgradeability, and select the machine that matches the projects you plan to print most often.