
Note: This article contains affiliate links. If you click on these links and make a purchase, we may earn a small commission at no extra cost to you. This helps support our research and content. Read our full affiliate disclosure here.
If you spend more time fighting bed level than printing, a self-leveling 3D printer can change your workflow. These machines automate the bed-tramming process so you get consistent first layers, fewer failed prints, and less time spent on manual shimming. This guide covers seven shortlisted self-leveling 3D printers that represent reliable choices for hobbyists and makers who want smoother setup and better print consistency. We evaluated each unit on the quality of its bed-leveling system, how it affects adhesion and first-layer reliability, and practical factors like ease of maintenance and firmware support. Read on for our top picks and the key criteria to consider before buying.
Top Picks at a Glance
| Best Overall The best all-around choice for most situations | Creality K1C 3D Printer |  |
| Best Quality Built to a higher standard if you want something more solid | FLASHFORGE Creator 5 Pro |  |
| Best Value The sweet spot between price and what you get | ELEGOO Neptune 3 Pro |  |
| Best Budget The cheapest option that still gets the job done reliably | Entina Tina2C Mini 3D Printer |  |
| Top Rated A top-rated pick with lots of positive feedback | Bambu Lab P1S Combo |  |
| Most Popular A crowd favorite that many people choose with confidence | Creality Ender 3 V3 SE |  |
| Best Seller A high-volume bestseller chosen again and again | FLASHFORGE Adventurer 5M |  |
Creality K1C 3D Printer

| Printing system | CoreXY |
|---|---|
| Top speed | 600mm/s |
| Acceleration | 20000mm/s² |
| Filament capability | Carbon fiber and high-temperature materials |
| Monitoring | Built-in AI camera |
The Creality K1C is a CoreXY desktop printer built for speed and convenience, combining a 600mm/s top speed and high acceleration with a one-tap auto calibration system to simplify setup. It uses a clog-resistant direct extruder and a tri-metal nozzle to handle higher-temperature filaments including carbon fiber blends, and its dynamically balanced fans reduce vibration to improve surface finish. The integrated AI camera provides live monitoring and time-lapse capture while the activated carbon filtration and a silent mode keep odors and noise down during long prints. Practical benefits include quicker print turnaround for prototypes, easier first-layer leveling for less manual tinkering, and safer indoor use thanks to filtration and monitoring. Important limitations are that extreme top speeds will still require tuned slicer profiles and robust cooling to maintain print quality, and the unit is relatively heavy which affects portability. For a buyer wanting a balanced mix of speed, convenience, and materials capability, the K1C delivers a strong set of factory-quality features.
Best for: A balanced maker or small workshop that values faster print turnaround, easy bed leveling, and the ability to print tougher filaments without spending extra time on manual setup.
Less Ideal for: Users who need an ultra-portable machine for frequent transport or beginners who want the simplest, lowest-cost entry-level printer without advanced speed or high-temperature material needs.
- CoreXY mechanics with high acceleration and 600mm/s capable motion for faster print times
- One-tap auto leveling reduces setup time and helps achieve reliable first layers
- Clog-resistant direct extruder and tri-metal nozzle support high-temperature and carbon fiber filaments
- Built-in AI camera enables real-time monitoring and time-lapse recording
- Effective activated carbon filtration and silent mode lower odors and noise during operation
- Maximum advertised speeds require careful tuning and may reduce print quality without profile optimization
- Heavy unit weight makes it less convenient to move between workspaces
Verdict: If you want a fast, self-leveling CoreXY printer that also handles high-temp filaments and offers real-time camera monitoring, the Creality K1C is a well-rounded choice.
FLASHFORGE Creator 5 Pro

| Extruder Quantity | 4 Independent Toolhead |
|---|---|
| Travel Speed | 600mm/s and 30,000mm/s² |
| Build Volume | 256 x 256 x 256 mm |
| Chamber Temperature | 65°C Heating Chamber |
| Filtration | Active Carbon+Hepa 13 |
The Creator 5 Pro targets users who need fast, reliable multi-material and multicolor printing for engineering parts. It uses a CoreXY motion system, precision linear rails, and high-torque belts to reach travel speeds up to 600mm/s while retaining accuracy, and its four independent toolheads plus a 7-second FlashSwap changer let you switch nozzles without flushing filament to minimize purge waste. The enclosed frame and active heated chamber (up to 65°C) reduce warping on ABS, PC, and nylon, and the dual HEPA13 plus activated carbon circulation helps control fumes and ultrafine particles during long prints. Built-in automated calibration, vibration compensation, dynamic flow tuning, and an HD chamber camera simplify setup and monitoring, and remote control via Flash Studio enables headless production. Expect a heavier, more industrial machine that will need space and proper ventilation despite the filtration, and advanced filaments and high-speed settings may require tuning to balance surface finish versus throughput.
Best for: Engineers, product developers, and experienced makers who prioritize fast throughput, multi-material capability, and robust parts for functional prototypes or small-batch production.
Less Ideal for: Casual hobbyists or users needing a compact desktop machine for occasional PLA prints should consider simpler, smaller printers with lower setup complexity.
- Four independent toolheads with rapid FlashSwap changer to enable near-zero purge multicolor and multi-material prints
- Enclosed, actively heated chamber up to 65°C for stable high-temperature material printing
- CoreXY structure with precision rails and high-torque belts for high-speed, low-vibration motion
- Dual HEPA13 and activated carbon filtration to reduce fumes and ultrafine particles during prints
- Automated calibration, vibration compensation, and built-in camera for easier setup and remote monitoring
- Large, industrial footprint and substantial weight require a dedicated workspace
- High-speed and high-temperature printing can need fine tuning to optimize surface finish
Verdict: Choose the Creator 5 Pro if you need a factory-capable, high-speed enclosed printer that delivers reliable multi-material and multicolor engineering prints.
ELEGOO Neptune 3 Pro

| Build volume | 225×225×280 mm |
|---|---|
| Noise level | 47 dB (claimed) |
| Extruder | Dual‑gear direct drive |
| Bed surface | PEI magnetic removable platform |
| Auto leveling | 36‑point one‑click |
The ELEGOO Neptune 3 Pro is a user‑friendly FDM 3D printer aimed at hobbyists and makers who want reliable, hands‑on printing without a steep setup curve. It ships with main parts preassembled, a PEI magnetic removable build plate and a 225×225×280 mm build area suitable for small to medium projects. The machine uses a dual‑gear stainless steel direct‑drive extruder and a titanium throat plus brass nozzle with an enlarged aluminum heat sink to reduce clogs and improve filament feeding for materials like PLA, TPU, PETG and ABS. Smart features include 36‑point auto bed leveling, filament runout detection and power‑loss resume, which together cut down failed prints and rework. Motion is driven by an STM32 board, quiet stepper motors (about 47 dB) and dual Z lead screws for vertical stability. Practical users will appreciate the toolkit, removable touchscreen, and resume capabilities, though the printer is not enclosed so printing ABS or very temperature‑sensitive materials may require an enclosure and tuning. Assembly is quick but getting the best surface finish still benefits from dialing slicer settings and filament choice.
Best for: Buyers who want a practical, mostly ready‑to‑print machine with reliable self‑leveling and fewer interruptions for weekend projects and prototyping.
Less Ideal for: People who need a fully enclosed, high‑temperature production printer for heavy ABS or industrial materials should consider an enclosed machine instead.
- One‑click 36‑point auto bed leveling for consistent first layers
- Dual‑gear direct‑drive extruder reduces clogs and improves flexible filament handling
- Filament runout sensor and power‑loss resume lower failed print risk
- PEI magnetic removable platform makes part removal easier
- Dual lead screws and quiet motors give stable, relatively quiet motion
- Open frame design means ABS and other heat‑sensitive filaments may need an external enclosure or extra tuning
- Some fine print quality improvements require manual slicer tuning and calibration
Verdict: If you want a practical, self‑leveling desktop 3D printer that minimizes failed prints and simplifies filament handling, the Neptune 3 Pro is a strong choice.
Entina Tina2C Mini 3D Printer

| Print volume | 3.9 × 3.9 × 3.9 inches |
|---|---|
| Connectivity | 2.4G WiFi, TF card, app control |
| Printing technology | FDM |
| Compatibility | Windows, macOS, Linux, Chromebook; Cura and Simplify3D |
The Entina Tina2C is a fully assembled mini FDM printer built for first-time users and kids, designed to get you printing quickly via the Poloprint Cloud app and onboard WiFi or TF card. Setup is guided in-app so novices can be ready in minutes, and automatic bed leveling plus power-loss recovery help reduce failed prints. The machine emphasizes ease of use with a flexible magnetic build plate for simple part removal, a quick-swap printhead for straightforward maintenance, and a self-cleaning style nozzle to improve consistency. It also includes AI-assisted model search and STEM-oriented modules to support learning. Because the printable volume is very small, the Tina2C is best suited to toys, classroom demonstrators, and small prototypes rather than full-size functional parts. Its compact, low-noise design makes it suitable for home or school use, but advanced users will find limited build size and fewer advanced controls compared with larger hobbyist printers.
Best for: Buyers seeking an affordable, kid-friendly, plug-and-play self-leveling printer for classroom projects, STEM learning, or quick small prints will appreciate its guided app workflow and safety-minded design.
Less Ideal for: Those who need to print larger functional parts or who want deep firmware and slicing control should consider larger hobbyist printers instead.
- App-guided setup and WiFi printing make first prints fast and simple
- Auto-leveling and power-loss recovery increase first-layer success and resume prints after interruptions
- Flexible magnetic build plate and quick-swap printhead simplify post-print removal and maintenance
- Includes AI features and STEM-oriented modules that help teach kids and beginners about 3D design and printing
- Very small 3.9 × 3.9 × 3.9 inch build volume limits part size
- Not aimed at advanced users who need larger beds or more granular firmware control
Verdict: If you want an inexpensive, self-leveling, kid-friendly 3D printer that gets beginners printing quickly and reliably, the Tina2C is a strong choice.
Bambu Lab P1S Combo

| Build Volume | 256×256×256 mm³ |
|---|---|
| Max Speed | 500 mm/s |
| Max Acceleration | 20 m/s² |
| Supported Filaments | PLA, PETG, TPU, PVA, PET, ABS, ASA |
The P1S Combo pairs Bambu Lab's P1S CoreXY printer with the AMS multi-feeding system to deliver fast, complex, and largely hands-off printing. It is built around a fully enclosed frame, a direct-drive extruder for broader material compatibility, and automatic bed leveling to reduce calibration fiddling. The printer targets speed with published top travel and acceleration figures, and a 256×256×256 mm build volume that fits many desktop projects. In practice the enclosure and bed leveling help produce reliable first layers with materials like PLA, PETG, TPU and standard engineering filaments, and the direct-drive setup makes flexible filaments easier to use. Multi-color or multi-material prints require connecting the AMS, which expands creative options but is a separate dependency. Setup is reported quick and the built-in camera supports timelapse monitoring, yet advanced materials like PA or PC may need extra tuning and highly abrasive composites are not recommended. If you prioritize rapid prints with consistent bed adhesion and less manual leveling, the P1S Combo makes that straightforward.
Best for: Buyers who want a reliable, fast desktop printer that minimizes manual bed tramming and delivers consistent first layers for everyday functional and hobby parts.
Less Ideal for: Those who need out-of-the-box multi-color printing without additional accessories or who plan heavy use of abrasive fiber-filled filaments without upgrading extrusion components.
- Enclosed CoreXY design improves temperature stability for consistent layers
- Automatic bed leveling reduces setup and calibration time
- Direct-drive extruder broadens usable filament types including TPU
- High top speed and acceleration for shorter print times
- Supports multi-color/multi-material printing when paired with the AMS
- Multi-color capability requires the separate AMS accessory to be connected
- Not recommended for highly abrasive composite filaments without additional hardware
Verdict: If you want a fast, self-leveling desktop printer that reliably produces first layers and scales to multi-color work with AMS, the P1S Combo is a solid pick.
Creality Ender 3 V3 SE

| Printing speed | up to 250 mm/s |
|---|---|
| Acceleration | 2500 mm/s² |
| Build plate | PC spring steel flexible plate |
| Mainboard | 32-bit silent mainboard |
The Ender 3 V3 SE is a budget-friendly FDM printer designed to make getting prints started simple while still offering decent speed and quality. It uses a CR Touch auto-leveling sensor and strain-sensing auto Z offset so first-layer setup is much faster than manual leveling, and the updated UI shows the leveling progress. The Sprite direct extruder handles PLA, PETG and flexible filaments with smoother feeding and the printer supports one-tap auto filament load and unload, which helps when swapping materials. A dual Z-axis with synchronized drive and dual Y-axis linear shafts improve frame stability for taller prints, and a 32-bit silent board reduces noise during operation. The removable PC spring steel build plate sticks well during printing and lets you pop finished parts off by flexing the sheet. Limitations to note are modest build volume for larger projects and while advertised top speeds are high, sustained top-speed prints may require tuning to retain consistent surface quality.
Best for: Buyers who want a self-leveling printer that reduces setup friction and reliably handles standard and flexible filaments for hobby projects and prototyping with strong community backing.
Less Ideal for: Those who need a large build area for big parts or who expect out-of-the-box ultra-fast production speeds without tuning should consider other options.
- CR Touch auto-leveling and strain-sensing auto Z offset simplify first-layer setup
- Sprite direct extruder supports PLA, PETG and TPU-friendly flexible filaments
- Dual Z-axis and sturdy Y-axis shafts increase stability for more accurate tall prints
- 32-bit silent mainboard for quieter operation
- PC spring steel build plate makes part removal easier
- Build volume is relatively small compared with larger hobby printers
- Achieving advertised top speeds may require calibration and tuning
Verdict: Choose the Ender 3 V3 SE if you want a compact, self-leveling printer that makes first-layer setup and switching filaments easy while supporting a range of common filaments.
FLASHFORGE Adventurer 5M
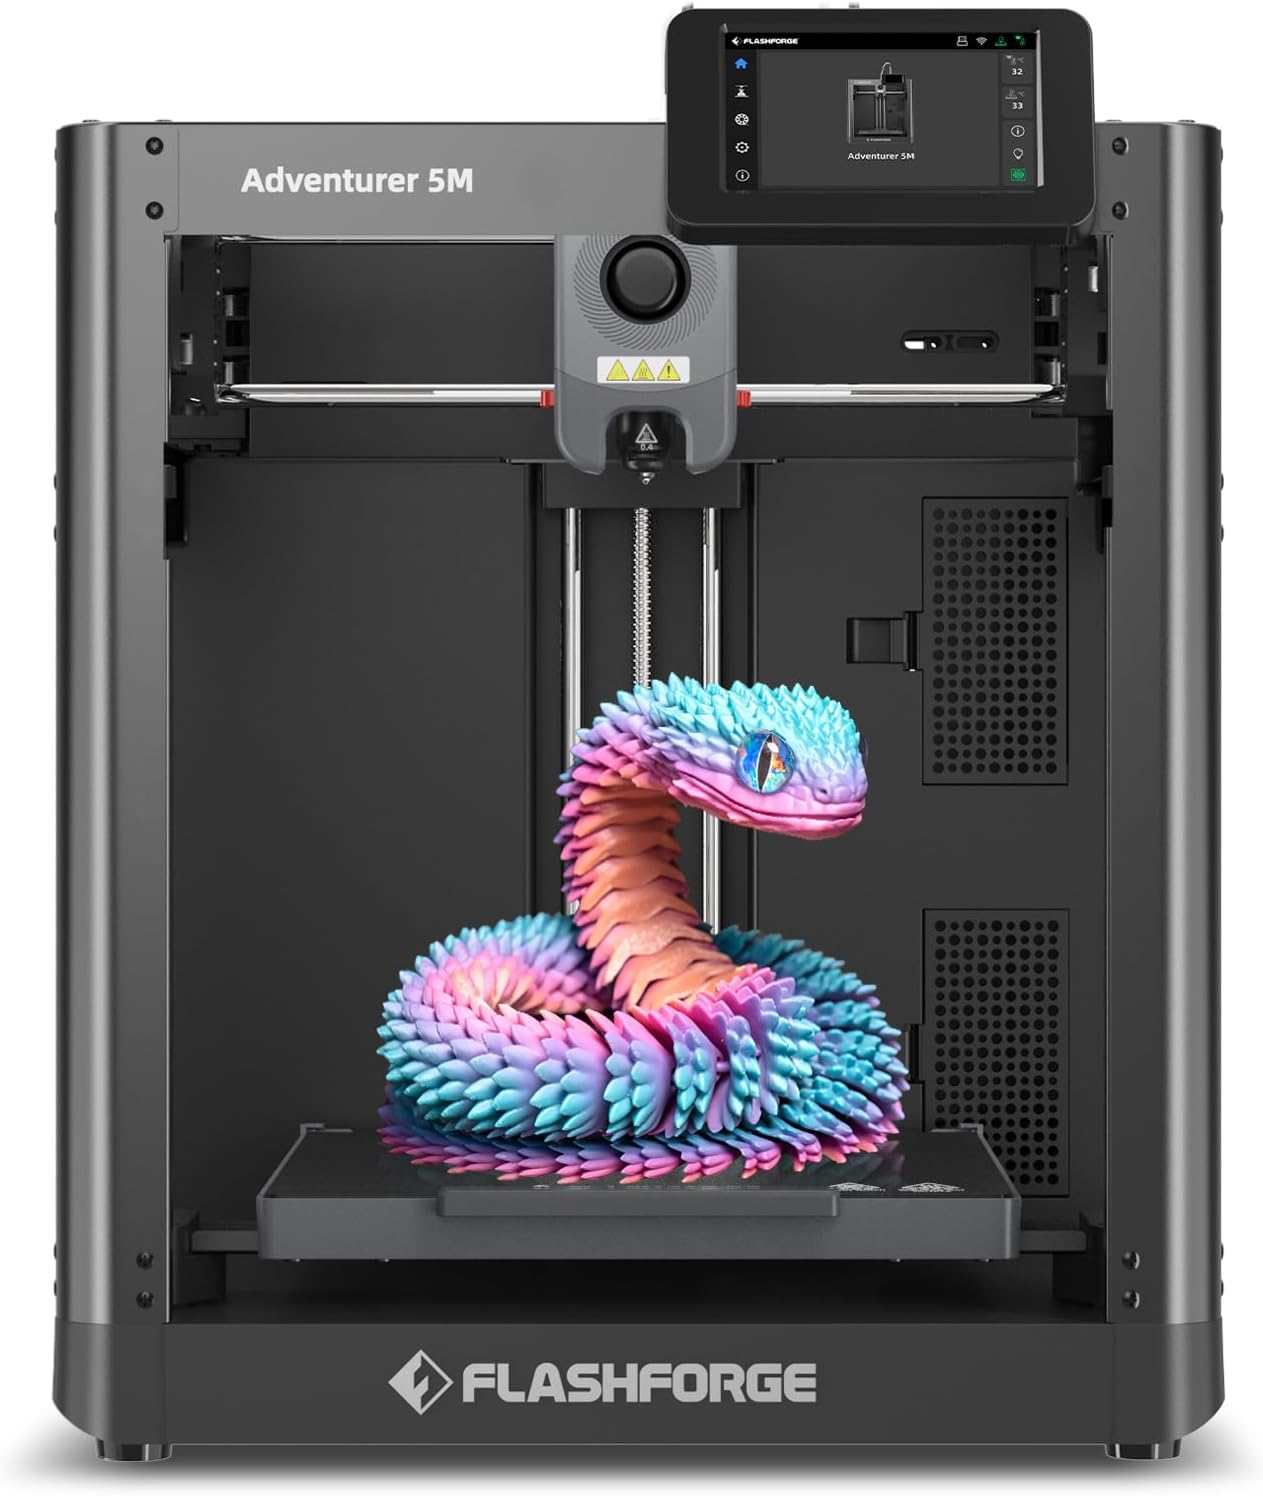
| Build Volume | 220 x 220 x 220 mm |
|---|---|
| Extruder Max Temp | 280°C Direct Drive |
| Travel Speed | 600 mm/s |
| Platform | Double-Sided PEI Platform |
| Structure | All-metal Core XY Structure |
The FLASHFORGE Adventurer 5M is a CoreXY desktop printer designed for faster, reliable printing with automatic bed leveling and a high-flow direct extruder. It is typically used for rapid prototyping, small production runs, and hobby projects where speed and consistent first layers matter. Notable features include one-button auto leveling, a 280°C-capable direct drive extruder, quick 3-second detachable nozzles, a double-sided PEI platform for easier part removal, and a CoreXY all-metal structure that supports high travel speeds (up to 600 mm/s) and high acceleration. In practice the auto-leveling and removable nozzle reduce setup time and maintenance, while the PEI surface simplifies print removal. The printer supports common filaments including PLA, ABS, PETG, TPU and carbon-fiber blends, so it handles both everyday and engineering materials. Important limitations are that the stated high travel speeds are most meaningful with tuned firmware and careful print settings, and achieving top-quality results with exotic filaments still requires post-calibration and good ventilation for ABS/ASA. For buyers who want straightforward, self-leveling performance, the AD5M balances speed and convenience, but expect to spend some time tuning prints for the fastest settings.
Best for: Buyers who prioritize a self-leveling, low-touch printer that shortens setup time and supports a range of common and engineering filaments for prototyping or consistent hobby work.
Less Ideal for: Users who need out-of-the-box ultra-fine detail at top speeds without tuning or those who require a very large build volume for oversized parts.
- One-button automatic bed leveling for consistent first layers and less setup time
- CoreXY all-metal structure that enables high travel speed and stable movement
- 280°C direct-drive extruder and quick-change nozzle for flexible filament choices and fast maintenance
- Double-sided PEI platform for easier adhesion and tool-free part removal
- Supports common engineering filaments including PLA, ABS, PETG and carbon-fiber blends
- Top advertised travel speeds require careful tuning and may not produce highest-quality prints at maximum speed
- Enclosed printing or added ventilation may be needed for high-temp/abrasive filaments to control fumes and part warping
Verdict: If you want a self-leveling, CoreXY desktop printer that prioritizes faster prototyping with flexible filament support, the Adventurer 5M is a practical choice.
Choosing the Right Self-Leveling 3D Printer: Key Factors to Consider
Bed-Leveling System Type
Different probes and sensing systems behave differently in real prints. Contact probes, proximity sensors, and inductive or capacitive sensors each have tradeoffs for accuracy, speed, and sensitivity to bed materials.
A good leveling system reduces the need for manual adjustments and compensates for minor surface irregularities. Consider how the sensor performs with the bed surface you plan to use, and whether the printer supports mesh or bilinear leveling to map larger surface deviations.
First-Layer Adhesion
Consistent first-layer adhesion is the practical end result of good leveling, but other factors intervene. Heated bed uniformity, nozzle-to-bed distance stability, and whether the machine offers adjustable first-layer flow and speed settings all influence adhesion.
Look for printers that make first-layer tuning accessible through firmware or UI settings and offer reliable bed heating. A stable frame and minimal bed wobble help maintain the precise nozzle gap required for strong initial layers.
Probe Compatibility With Bed Surfaces
Some sensing methods are affected by bed material. For example, inductive sensors respond to metal build plates, while capacitive sensors detect dielectric changes and can be sensitive to coatings.
If you plan to use glass, PEI, magnetic flexible plates, or other specialty surfaces, verify that the printer's leveling probe works reliably with that material, or that the system allows easy offset calibration for the build surface you prefer.
Firmware Features And Update Path
The firmware controls how probing data is interpreted and applied. Features like mesh bed leveling, baby-stepping, and stored probe offsets make on-the-fly corrections simpler and more accurate.
A clear update path and active community or manufacturer support are important because firmware updates often improve probe behavior and add useful calibration utilities. Confirm that the printer exposes sensible tuning parameters and that documentation covers the leveling workflow.
Build Volume And Intended Use
Bigger build plates are attractive, but larger beds magnify the impact of surface flatness and thermal gradients. If you print small detailed parts, a compact build area with a very stable bed may be preferable.
Match the machine size to your projects. Larger volumes require more robust leveling routines and may demand more frequent mesh calibrations. Consider the tradeoff between print area and consistency for the parts you will produce.
Maintenance And Accessibility
Ease of access to the bed, probe, and extruder affects how quickly you can service or replace components. A design that allows quick removal of the build plate or easy probe repositioning reduces downtime.
Also evaluate how simple it is to calibrate or replace the probe, swap springs or clips, and reach common wear parts. Machines that minimize tool requirements for routine upkeep keep your printing workflow moving.
How Self-Leveling Works
Self-leveling systems automate the measurement of the nozzle-to-bed distance at multiple points and apply corrections to ensure the first layer is consistent. The printer probes the surface grid, the firmware calculates a correction map, and the next prints use that map to compensate for tilt or warping.
Understanding the workflow helps when tuning prints. For example, a mesh bed leveling routine will not fix large mechanical issues such as a loose bed or warped carriage, but it will reduce the need for frequent manual tramming.
- Probe action: what triggers a touch or sensing event
- Mapping: how many points are measured and how the grid is interpolated
- Compensation: whether corrections are applied per-layer or in real time
Common Installation And Setup Steps
Most self-leveling printers require an initial probe-offset calibration to account for nozzle length and build-surface thickness. Follow the guided probe setup in the firmware or UI to store an accurate offset before running a mesh routine.
After the offset is set, run the bed probe sequence and then print a simple first-layer test. Use small adjustments like baby-stepping or first-layer height tweaks to fine-tune adhesion without changing the probe configuration.
- Set nozzle and bed to recommended preheat temperatures before probing
- Verify probe height with a single-point test then run full mesh
- Save mesh or leveling data to persistent storage if available
Troubleshooting Leveling Problems
If first layers show variance across the bed, verify that the bed is mechanically secure and free of debris. A loose spring or uneven clips can cause the probe to record misleading points. Check the probe mount for play and tighten relevant fasteners.
When the probe gives inconsistent readings, isolate variables by testing with and without the build surface in place, and by trying a different bed temperature. Inconsistent firmware behavior can sometimes be corrected with an update or by recalibrating the probe offset.
- Loose bed fasteners or warped build plates cause systematic errors
- Probe sensitivity can drift with temperature or after hardware changes
- Firmware recalibration often resolves sudden inconsistencies
Upgrading Or Replacing Probes
Some users choose to upgrade sensing hardware for improved repeatability or compatibility with a preferred build surface. When considering an upgrade, confirm mechanical fit, wiring compatibility, and firmware support so the new probe reads correctly.
Document the original probe offsets and behavior before changing hardware. That record makes it easier to compare results and revert if necessary.
- Verify physical clearance between probe and parts during homing
- Check wiring and voltage requirements to avoid damage
- Test thoroughly with simple calibration prints after any change
Practical Tips For Better First Layers
Beyond leveling, adjust printing parameters that influence the first layer. Slower first-layer speeds, slightly higher extrusion multiplier for the first layer, and ensuring the bed is at a stable temperature can improve adhesion dramatically.
Use a repeatable test print that covers several bed zones to validate the mesh. Keep maintenance tasks like cleaning the bed surface and checking nozzle height as part of your pre-print checklist to avoid common failures.
- Reduce first-layer speed to allow filament to flatten and bond
- Clean the build surface regularly to remove oils and residue
- Use simple grid test prints to check uniform adhesion
How We Chose the Best Self-Leveling 3D Printer
To assemble this list we applied practical, maker-focused filters that matter for everyday printing. Primary evaluation criteria included bed-leveling reliability, measured by probe accuracy and consistency across the build surface; first-layer adhesion performance with common filaments; and the quality of the motion and extrusion systems that affect print repeatability. We also considered build volume options to suit desktop and larger-format projects, firmware and community support for troubleshooting and upgrades, and user-focused features such as touchscreen usability and accessible bed access. Ease of maintenance and replacement-part availability were included because downtime affects hobbyists and small workshops alike. Excluded items were machines that require persistent manual tramming or have only rudimentary probing systems, and units lacking firmware or community support that prevent practical calibration workflows. The scoring leaned on measurable, repeatable characteristics rather than marketing claims, prioritizing consistent first-layer results, robust leveling hardware and clear update paths for firmware and parts.
Our full evaluation process is outlined in our review methodology.
FAQ
Will a self-leveling system eliminate all bed calibration?
No. Self-leveling reduces how often you need to manually tram the bed but does not remove the need for initial probe offset calibration or occasional checks. Mechanical issues like loose mounts or warped plates still require manual correction.
Are probes compatible with every build surface?
It depends. Some probes, such as inductive sensors, work best with metal surfaces, while capacitive sensors and BLTouch-style probes behave differently with coatings. Verify compatibility with your intended build plate or plan for offset calibration.
How often should I re-run mesh leveling?
Frequency depends on use and machine stability. For a well-built printer, running a mesh after major changes or periodic checks is sufficient, while machines that experience temperature swings or frequent bed removals may need more frequent recalibration.
Does firmware affect leveling quality?
Yes. Firmware interprets probe data and applies corrections, so features like mesh interpolation method, baby-stepping, and stored offsets influence final results. Regular firmware updates and good documentation improve calibration workflows.
Can I use a self-leveling printer for fine detail prints?
Often yes. A reliable leveling system helps produce consistent first layers, which is fundamental for detailed prints. However, frame rigidity, extrusion quality, and nozzle precision also matter for very fine features.
Final Verdict
Prioritize a proven bed-leveling approach and a probe that is compatible with the build surface you plan to use. Balance build volume against the additional calibration demands of larger beds, and favor machines that expose useful firmware controls for mesh leveling and first-layer tuning. Focus on consistent first-layer results, accessible maintenance, and firmware support when choosing a self-leveling 3D printer. Those tradeoffs will help you pick a printer that minimizes setup headaches and produces reliable prints over time.