
Note: This article contains affiliate links. If you click on these links and make a purchase, we may earn a small commission at no extra cost to you. This helps support our research and content. Read our full affiliate disclosure here.
Picking the right 3D printer for beginners matters more than you might think. A well-chosen machine reduces frustration, helps you learn faster, and produces repeatable parts so you can iterate on designs rather than troubleshoot hardware. This guide covers the top beginner-friendly 3D printers shortlisted for straightforward setup, dependable print results, and sensible upgrade paths. We evaluated machines across practical criteria like print quality, usability, and safety to create a concise list of best picks. Read on to see which options suit your shop, learning style, and first projects.
Top Picks at a Glance
| Best Quality Built to a higher standard if you want something more solid | Bambu Lab P2S 3D Printer |  |
| Best Value The sweet spot between price and what you get | Anycubic Kobra X 3D Printer |  |
| Best Budget The cheapest option that still gets the job done reliably | Creality K2 Plus Combo |  |
| Top Rated A top-rated pick with lots of positive feedback | Creality Ender 3 V3 SE |  |
| Most Popular A crowd favorite that many people choose with confidence | FLASHFORGE AD5X 3D Printer | 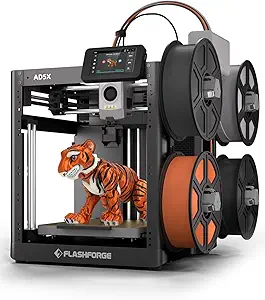 |
| Best Seller A high-volume bestseller chosen again and again | Bambu Lab P1S Combo |  |
Bambu Lab P2S 3D Printer

| Printing technology | FDM CoreXY |
|---|---|
| Max print speed | 600 mm/s |
| Extruder | PMSM servo extruder |
| Failure detection | AI error detection |
| Chamber control | Adaptive Airflow System with carbon filter |
The Bambu Lab P2S is a high-speed CoreXY FDM printer aimed at buyers who want reliable, detailed prints with minimal fuss. It can reach up to 600 mm/s while using a PMSM servo extruder and active flowrate compensation to keep layers consistent and corners sharp. Setup is quick—automatic calibration, quick-swap nozzles, and AI failure detection let you be printing in minutes, and the included workflow tools and MakerWorld library simplify finding and preparing models. The Adaptive Airflow System and carbon filter let you tune cooling and maintain a warm chamber for tougher filaments, and the optional AMS 2 Pro adds multi-material capability with filament drying when required. Practical limits include the fact that multi-color printing requires the combo/version with AMS rather than the base unit, and achieving the top speeds may require tuning and appropriate filament. For beginners who prioritize print performance and a guided experience, the P2S balances speed, automation, and print quality well.
Best for: Beginners who want a performance-first printer that reduces setup friction and delivers professional-quality prints without a steep learning curve.
Less Ideal for: Hobbyists who need built-in multi-color printing out of the box or those who prefer simpler, very low-cost entry models.
- Very high top print speeds up to 600 mm/s for rapid prototyping
- Servo-driven extruder with flowrate compensation for consistent layer quality
- Fast, user-friendly setup with automatic calibration and AI failure detection
- Adaptive Airflow System and carbon filter support a range of filaments and cleaner printing environment
- Access to MakerWorld and integrated software streamlines model sourcing and workflow
- Multi-color/multi-material printing requires purchasing the AMS 2 Pro combo rather than the base P2S
- Reaching maximum advertised speeds may need profile tuning and specific filament choices
Verdict: If you want a beginner-friendly printer that prioritizes speed and automated, reliable performance, the Bambu Lab P2S is a strong choice.
Anycubic Kobra X 3D Printer

| Build volume | 260 x 260 x 260 mm |
|---|---|
| Nozzle max temperature | 300℃ |
| Connectivity | 2.4G/5G Wi‑Fi and LAN |
| Supported filaments | PLA, PETG, TPU, PVA, ASA |
The Anycubic Kobra X is a beginner-friendly FDM printer built for fast, multicolor prints and straightforward setup. It ships with four built-in ACE 2 Pro extruders and can expand its palette up to 19 colors, letting you print multicolor parts without complex post-processing. The printer emphasizes speed and efficiency with a claimed top travel rate up to 600 mm/s and features a hardened steel nozzle plus vibration compensation for cleaner layers at higher speeds. LeviQ 3.0 auto bed leveling (49-point calibration) simplifies getting a reliable first layer, and built-in recovery and detection features help avoid failed prints. Connectivity includes dual-band Wi-Fi and LAN with app monitoring and an AI camera for live observation. Practical limits include needing to manage multicolor setups and filament choices for mixed-material prints, and real-world multicolor results still depend on tuning and slicer settings. For new users the Kobra X reduces hands-on fiddling but expects basic willingness to learn slicing and maintenance to get the best multicolor results.
Best for: Buyers who want a practical, time-saving first printer that emphasizes multicolor capability and fast output while still being approachable for newcomers.
Less Ideal for: Users who need out-of-the-box, maintenance-free single-color printing or who prefer completely plug-and-play appliances with no learning curve should consider simpler single-extruder models.
- Native multicolor printing with four ACE 2 Pro units and expandability up to 19 colors
- High claimed print speed (up to 600 mm/s) and vibration compensation for faster workflows
- LeviQ 3.0 49-point auto bed leveling for reliable first layers
- Dual-band Wi-Fi and LAN plus app/AI camera monitoring for remote control and oversight
- Multicolor printing increases setup complexity and requires slicer tuning to avoid color artifacts
- Top speeds are marketing figures and achieving them while keeping print quality may require careful calibration
Verdict: The Kobra X is the best pick for beginners who want a practical, fast multicolor-capable printer that reduces setup time while still offering room to learn tuning and slicing.
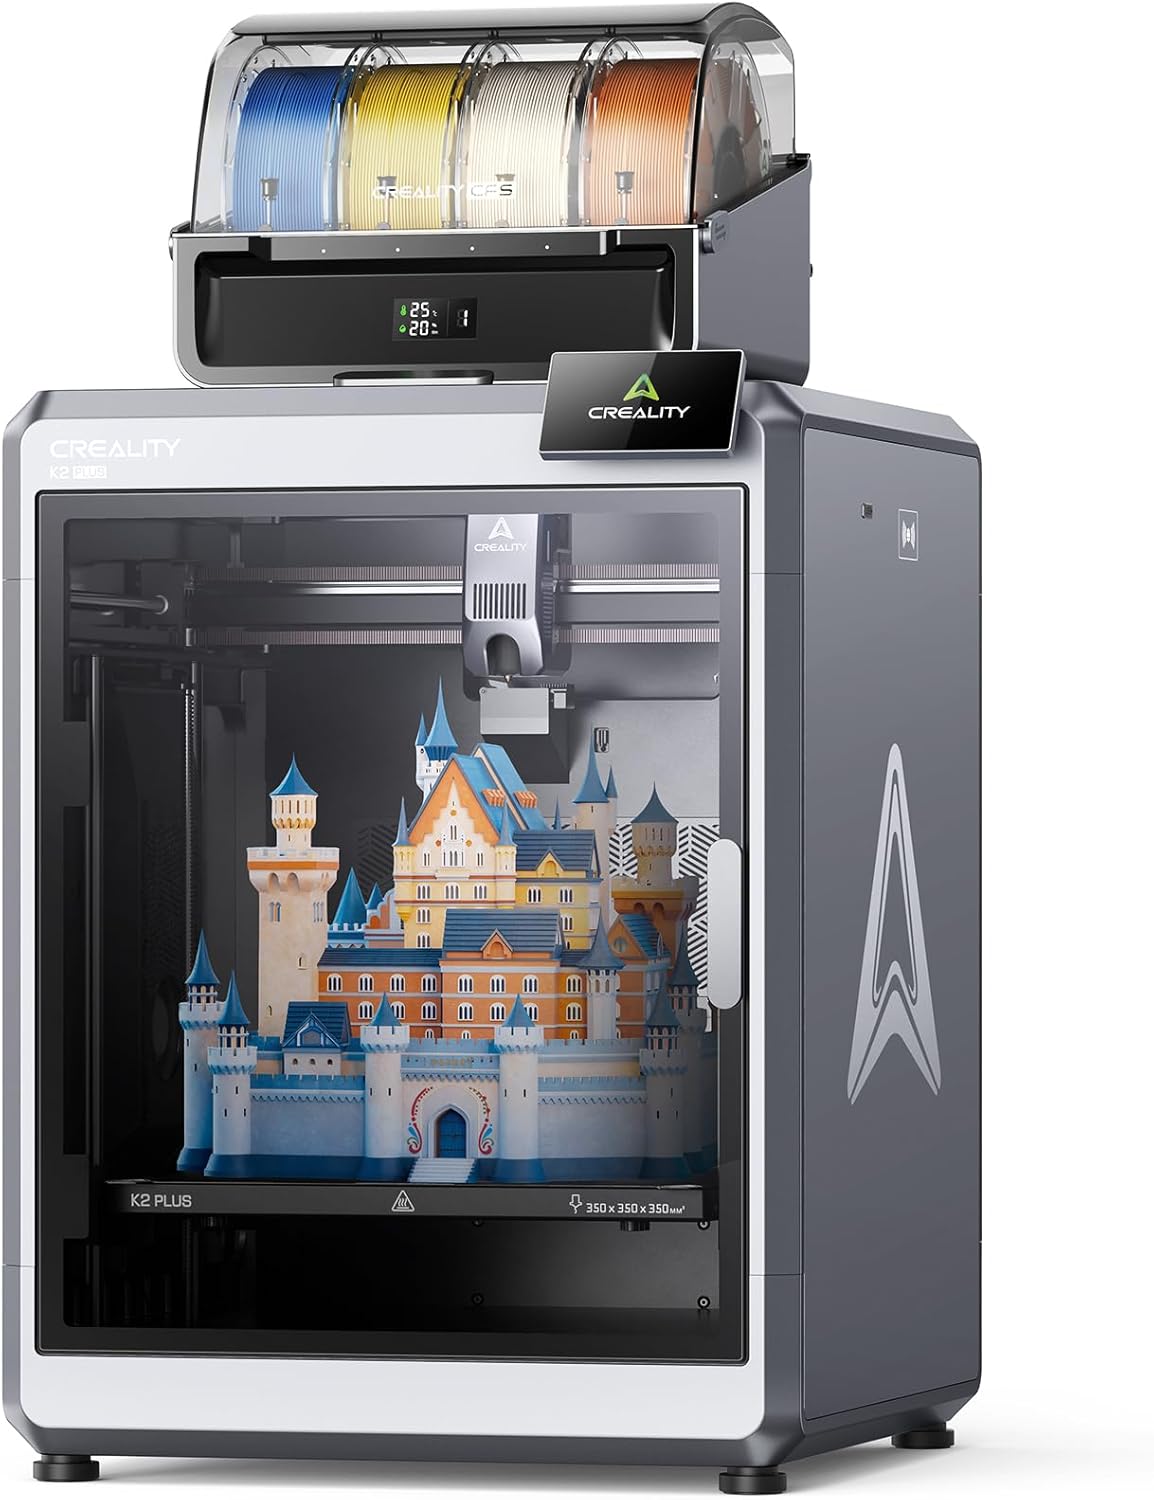
Creality K2 Plus Combo
| Build volume | 350×350×350 mm |
|---|---|
| Max nozzle temperature | 350°C |
| Max chamber temperature | 60°C |
| Top printing speed | 600 mm/s |
The Creality K2 Plus Combo is a feature-rich desktop 3D printer aimed at makers who want large builds, fast print speeds, and multi-color output without extensive tinkering. It uses four linked CFS units to deliver up to 16-color prints with automatic filament selection and relays, and a next-gen direct drive/hardened high-temp nozzle that supports filament temperatures up to 350°C for engineering materials. The machine combines a rigid matrix frame, dual Z motors with four linear rods, and industry-grade step‑servo motors to push acceleration and travel for quicker prints while reducing vibration. Automated systems—18 sensors plus dual AI cameras—help detect failures, manage flow, and simplify bed compensation and leveling. Practical benefits include the ability to print larger parts in one piece, easier multi-color workflows, and better success with high‑temperature materials. Trade-offs for beginners are the printer's physical size and weight, a relatively high price bracket compared with entry-level kits, and the learning curve when first using advanced multi‑filament features and high-temp filaments.
Best for: Beginners who plan to grow quickly into advanced printing—those willing to invest in a capable machine upfront to avoid upgrades and who want to experiment with large builds, multi-color prints, or engineering filaments.
Less Ideal for: Absolute hobbyists on a tight budget or users who need a compact, plug-and-play starter printer for simple PLA parts without high-speed or multi-filament needs.
- Large 350×350×350 mm build volume suitable for single-piece large models or batch prints
- Multi-color CFS system with automatic filament selection and relay for up to 16 colors
- High-speed step‑servo motors delivering up to 600 mm/s top speed and fast acceleration
- Hardened high-temp nozzle and 350°C max hotend for printing engineering filaments
- Extensive automation with 18 sensors and dual AI cameras to monitor prints and assist leveling
- Physically large and heavy, making it harder to place in small workspaces
- Higher price range than typical beginner printers
- Advanced multi-filament and high-temp features add setup and learning complexity for novices
Verdict: For beginners who want a future‑proof step up, the K2 Plus Combo delivers large-format, multi-color, high‑temperature printing with automation that grows with your skills.
Creality Ender 3 V3 SE

| Print speed | Up to 250 mm/s |
|---|---|
| Extruder type | Sprite direct extruder |
| Auto leveling | CR Touch |
| Mainboard | 32-bit silent mainboard |
The Ender 3 V3 SE is a beginner-oriented FDM 3D printer that combines a Sprite direct extruder, CR Touch auto bed leveling, and an auto filament load/unload function to simplify setup and basic use. It arrives as a partially DIY kit that the manufacturer says can be assembled in about 20 minutes, and the intuitive UI shows leveling progress and basic status so new users can follow along. The Sprite direct extruder handles PLA, PETG, and flexible filaments more reliably than a Bowden setup, while the dual Z-axis timing belt and dual 8 mm Y-axis shafts improve stability and reduce Z wobble for cleaner layers. A 32-bit silent mainboard and advanced stepper drivers keep noise down during prints, and the spring steel build plate makes part removal easier. Limits include a modest build area and the usual beginner learning curve for tuning print profiles; advanced users may find the stock firmware and hardware restrictive for high-end modifications. For someone focused on dependable first prints and low-friction setup, this model covers the essentials well.
Best for: Someone who values a reliable out-of-box printing experience and quick setup, especially a beginner who wants fewer manual leveling and filament-loading hassles.
Less Ideal for: Users who need a very large build volume or who want a highly moddable platform for advanced experimental upgrades should consider other models.
- Auto bed leveling with CR Touch simplifies first-layer setup
- Sprite direct extruder supports PLA, PETG, and TPU for reliable filament feeding
- Dual Z-axis and robust Y-axis shafts reduce wobble and improve dimensional stability
- Auto filament load/unload and an intuitive UI speed up routine operations
- 32-bit silent mainboard reduces printing noise
- Build volume is relatively small compared with larger hobby printers
- Stock firmware and hardware offer limited advanced customization out of the box
Verdict: A beginner-focused printer that prioritizes dependable first prints and easy setup with auto-leveling and a reliable direct extruder.
FLASHFORGE AD5X 3D Printer

| Build volume | 220×220×220mm |
|---|---|
| Extruder max temp | 300°C |
| Structure | Open, Core XY |
| Max travel speed | 600mm/s |
| Filament types | PLA/ABS/PETG/TPU/CF/etc. |
The FLASHFORGE AD5X is a CoreXY FDM printer designed for faster desktop printing and multi-color work. It prints on a 220×220×220mm build area using a 300°C direct-drive extruder and supports up to four colors simultaneously, which is handy for small multi-material or multi-color models. The printer includes one-click auto bed leveling, quick-detach nozzle removal, automatic filament feed/retract, resume-after-power-loss, and an intelligent filament system that simplifies setup for newcomers. High travel speed (up to 600mm/s) and strong acceleration make it well suited for rapid prototyping and batch runs, while multiple nozzle sizes let you pick finer detail or faster fills. Practical limits include an open-frame design that may struggle with temperature-sensitive filaments for precision parts, and achieving top quality at extreme speeds will still require tuning. Flash Maker app remote control and optional camera/lighting add convenience but are not core to print performance. For beginners who want a fast, feature-rich machine with multi-color ability, the AD5X balances usability with performance while expecting some learning for optimal high-speed results.
Best for: A beginner who values fast print turnaround and wants easy multi-color capability with helpful automation features to shorten the learning curve.
Less Ideal for: Users needing a fully enclosed, temperature-controlled chamber for demanding engineering materials or those who want plug-and-play perfection without any tuning.
- Supports up to four-color simultaneous printing for more complex visible parts
- 300°C direct-drive extruder handles a wide range of filaments including PETG and TPU
- One-click auto bed leveling and automatic filament feed reduce setup friction for beginners
- High travel speed and acceleration enable much faster print turnaround than typical hobby printers
- Open CoreXY frame can limit temperature control for advanced engineering filaments
- Achieving best print quality at maximum speeds requires careful calibration and tuning
Verdict: Choose the AD5X if you want a beginner-friendly CoreXY printer that combines rapid printing and built-in automation with multi-color capability.
Bambu Lab P1S Combo

| Build Volume | 256*256*256 mm³ |
|---|---|
| Max Speed | 500 mm/s |
| Max Acceleration | 20 m/s² |
| Supported Filaments | PLA, PETG, TPU, PVA, PET, ABS, ASA |
The Bambu Lab P1S Combo pairs a compact enclosed CoreXY printer with an AMS to enable multi-color and multi-material prints while keeping setup simple. It supports a wide range of common filaments such as PLA, PETG and TPU and adds automatic bed leveling and an enclosed build volume to improve first-layer adhesion and success with more advanced materials. The system is designed for fast output, listing top travel speeds up to 500 mm/s and very high acceleration, which will cut print times on small to medium parts. For beginners the quick 15-minute setup, included MakerWorld model library, and camera for time-lapse make getting started less intimidating. Important limits are that highly abrasive fiber-filled filaments are not recommended and the AMS is required for multi-color capability, so some workflows need that accessory to reach full feature potential. Overall it balances speed and ease of use for new users who want room to grow into multi-material projects.
Best for: Beginners who want an easy entry into faster, higher-quality prints and the option to experiment with multi-color or multi-material projects as they learn.
Less Ideal for: Users whose primary need is frequent printing with abrasive, fiber-filled composites or those who want the cheapest possible starter printer without accessory requirements.
- Fast CoreXY motion system with high top speed and acceleration reduces print times
- Enclosed design and auto bed leveling improve print reliability with a range of filaments
- AMS support enables multi-color and multi-material printing up to 16 colors
- Beginner-friendly setup and included model library make first prints easier
- Not recommended for carbon or glass fiber reinforced filaments
- Multi-color printing requires connecting the AMS accessory
Verdict: A fast, beginner-friendly enclosed CoreXY printer with an AMS option that lets new users grow into reliable multi-color and multi-material printing.
Choosing the Right 3D Printer for Beginners: Key Factors to Consider
Ease of Setup and Calibration
A beginner-friendly printer should have a short, well-documented setup process and automated or guided calibration steps. This reduces the chance of early frustration and keeps the first prints on track. Automatic bed leveling, preassembled frames, and clear startup wizards in the interface speed learning and let you focus on modeling and slicing rather than mechanical tweaks.
If setup is complex, new users often skip critical steps or misadjust components, which leads to adhesion failures and poor first impressions. Prioritize machines that clearly explain steps and include helpful debug menus, test prints, or calibration tools.
Print Quality and Material Compatibility
Consistent dimensional accuracy and surface finish matter for functional parts and display models. For beginners, performance with PLA is most important because it prints at lower temperatures and is less prone to warping. However, the ability to handle tougher materials like PETG and ABS without extensive tuning increases the printer's usefulness as skills progress.
Consider nozzle size, achievable layer heights, and the printer's thermal stability. A stable heated bed and a well-controlled hot end translate to fewer failed prints and less time diagnosing issues related to extrusion and adhesion.
Reliability and Maintenance
A machine that prints reliably day after day saves beginners time and discouragement. Look for robust frame designs, easily sourced consumables, and simple access to wear components like nozzles and belts. Features that reduce routine maintenance, such as guided nozzle cleaning, modular hot ends, and accessible electronics, make it easier to keep the printer in working order.
Routine tasks like bed surface replacement, filament path checks, and belt tensioning should not require specialized tools or deep disassembly. Good documentation for maintenance procedures is a major plus.
Safety Features and Enclosure
Safety matters when a printer will be operated in a home or classroom environment. Enclosures help with high-temperature prints by reducing drafts and improving temperature stability, which also minimizes warping. Additionally, physical guards around moving parts, covered power supplies, and secure filament holders reduce accident risk.
Filament runout detection and thermal protections prevent prints from continuing when materials run out or temperatures behave unexpectedly. For younger users or shared spaces, consider models with quieter fans and lower-noise motion systems to avoid constant disruption.
Software, Slicing, and User Interface
A clear, well-supported software ecosystem reduces confusion and removes a common barrier for new users. Intuitive on-device menus, helpful preconfigured slicing profiles, and compatibility with mainstream slicing programs speed up the path from model to finished print. Cloud-based or app-driven workflows can simplify some tasks but ensure local control is available for offline setups.
Documentation, tutorials, and preset profiles for common materials are especially helpful. Check that the printer's firmware and slicing software are updated regularly and that the vendor or community provides accessible guidance for common issues.
Community Support and Upgrade Path
An active user community provides shared profiles, troubleshooting tips, and upgrade guides that extend a beginner machine's lifespan. Community support often includes step-by-step fixes for common problems, curated print settings, and recommended improvements that are accessible even to novices.
Also consider whether the printer has a clear upgrade path, such as available spare parts, add-on enclosures, or supported higher-temperature hot ends. Upgradability allows the machine to grow with the user's skills rather than forcing an early replacement.
First Projects That Teach Core Skills
Start with small, achievable prints that demonstrate adhesion, bridging, and overhang handling. Calibration cubes, benchy boats, and simple mechanical parts teach you how layer height, print speed, and temperature settings affect final results.
Progress to slightly more complex assemblies that require tolerances and fit, such as snap-fit enclosures or hinge joints. These projects reveal whether your dimensional accuracy is acceptable and whether you need to tune steps per millimeter or re-evaluate slicer settings.
- Calibration cube for dimensional checks
- Benchy or similar benchmark model for surface quality
- Simple snap-fit box to test tolerances
- Bracket or hinge to evaluate strength and fit
Basic Maintenance Routines Beginners Should Learn
Establish a short maintenance routine to keep prints reliable: check belt tension weekly, clean the build surface before prints, and inspect the filament path for dust or tangles. Regular nozzle checks and occasional cold pulls help prevent clogs before they ruin a print.
Record basic measurements after any mechanical adjustments so you can reverse changes if needed. Simple preventative care extends the machine's life and reduces the frequency of failed prints that slow learning.
- Bed surface cleaning and re-leveling
- Nozzle inspection and cold pulls
- Lubricating rods and checking belts
- Keeping firmware and slicer profiles updated
Safety Best Practices for Home or Classroom Use
Ensure the printer is placed on a stable, nonflammable surface with adequate ventilation. Keep an eye on the first few layers of any print and avoid leaving the machine unattended for long prints unless you have reliable remote monitoring or enclosure safety features.
Teach household members or students basic emergency steps such as powering down the unit and unplugging it if a fire or electrical smell is detected. Use enclosures and part cooling strategies appropriate for the material to reduce fumes and improve print quality.
- Use enclosures for high-temp materials
- Install smoke detectors in shared workspaces
- Practice safe spool storage to avoid moisture
- Limit access to moving parts while powered
Choosing Filament for Early Success
Begin with PLA since it is easy to print, minimally prone to warping, and widely available. Once you are comfortable, try PETG for tougher parts or TPU for flexible prints. Each filament requires small changes in temperature, cooling, and print speed, so change one variable at a time when experimenting.
Store filament properly to avoid moisture uptake, which can cause poor print quality and filament brittleness. Use airtight containers with desiccant packs when possible, and dry spools that show signs of popping or steam during extrusion.
- Start with PLA for its forgiving nature
- Use PETG for strength and chemical resistance
- Try TPU for soft, flexible parts
- Dry and store spools to prevent moisture issues
When to Consider Upgrades
Common early upgrades include better nozzles, improved build surfaces, and quieter fans. Only upgrade when you understand the limitation you are trying to fix. For example, swap to a hardened nozzle if you print abrasive filaments, or add enclosure panels when warping becomes a problem.
Firmware and software profile improvements are often the most cost effective. Custom slicer profiles tailored to your machine and filament typically yield larger improvements than many hardware tweaks for beginners.
- Prioritize firmware and slicing improvements first
- Choose hardware upgrades that solve a specific problem
- Keep spare parts like nozzles and belts handy
- Document any changes so you can revert if needed
How We Chose the Best 3D Printer for Beginners
We selected machines that lower the initial learning curve while still producing usable prints. Primary evaluation criteria included out-of-the-box usability, print consistency across common filament types, and the clarity and accessibility of setup documentation and software. We also measured safety and convenience features that matter for beginners, such as enclosed builds, filament runout detection, and reliable bed leveling. Other practical dimensions we used were expandability and community support, because an active user base and upgrade path reduce long-term friction and make troubleshooting easier. Finally, build quality and parts accessibility were considered to ensure repairs and maintenance are manageable for new users. Excluded from our list were specialty industrial systems, large-format machines intended for advanced workshops, and printers that require extensive manual tuning before first use. The goal was to highlight devices that get beginners printing quickly with minimal trial-and-error.
Our full evaluation process is outlined in our review methodology.
FAQ
What is the easiest filament for a beginner to start with?
PLA is the easiest filament for beginners because it prints at lower temperatures, has minimal warping, and adheres well to common build surfaces. It is suitable for most introductory projects and helps you learn basic settings without frequent failures.
Do I need an enclosed printer as a beginner?
An enclosure is helpful but not strictly necessary for printing PLA. Enclosures become important when you plan to print ABS or other high-temp materials that are prone to warping. They also improve safety and reduce drafts in variable environments.
How important is automatic bed leveling for new users?
Automatic bed leveling greatly reduces setup time and the chance of first-layer failures, making it a valuable feature for new users. However, a stable manual leveling system with clear adjustment points can also work well if the printer provides good guidance.
How much space should I allocate for a beginner 3D printer?
Allocate a stable surface with at least a foot of clearance around the printer for airflow and access. Consider additional space for filament spools, tools, and finished parts. A dedicated table or bench near a power outlet simplifies setup and maintenance.
How do I avoid common first-print failures?
Ensure the bed is clean and leveled, use an adhesion helper like a brim for large first layers, and verify filament path and extruder feeding. Start with small test prints to confirm extrusion and bed adhesion before attempting larger or more complex models.
Final Verdict
Choose a beginner 3D printer that prioritizes straightforward setup and consistent print results. Focus on models with helpful documentation, accessible maintenance, and stable print performance for PLA, since these attributes shorten the learning curve and reduce wasted time. Balance safety features and upgradeability against immediate ease of use. With the right starter machine and basic routines for maintenance and filament handling, you can progress quickly from simple test prints to reliable functional parts.