
Note: This article contains affiliate links. If you click on these links and make a purchase, we may earn a small commission at no extra cost to you. This helps support our research and content. Read our full affiliate disclosure here.
If you plan to print full-size helmet shells or large helmet components, the right 3D printer makes the difference between a usable, safe part and wasted time. Helmets require consistent dimensional accuracy, good layer adhesion, and access to materials that can meet impact and heat requirements when post-processed or used in prototyping. This guide covers the top shortlisted 3D printers for helmets, focusing on machines with the build volume, material compatibility, and reliability needed for large-format prints. Below you will find our top picks and a clear explanation of the performance and usability factors we evaluated to help you pick the best 3D printer for helmet projects.
Top Picks at a Glance
| Best Overall The best all-around choice for most situations | FLASHFORGE AD5X 3D Printer |  |
| Best Quality Built to a higher standard if you want something more solid | Bambu Lab P1S Combo |  |
| Best Value The sweet spot between price and what you get | Anycubic Kobra X |  |
| Best Budget The cheapest option that still gets the job done reliably | ELEGOO Neptune 3 Pro |  |
| Top Rated A top-rated pick with lots of positive feedback | Bambu Lab A1 3D Printer |  |
| Most Popular A crowd favorite that many people choose with confidence | Creality K1C 3D Printer |  |
| Best Seller A high-volume bestseller chosen again and again | FLASHFORGE Adventurer 5M |  |
FLASHFORGE AD5X 3D Printer

| Build volume | 220×220×220mm |
|---|---|
| Nozzle max temp | 300°C |
| Motion system | CoreXY |
| Touchscreen | 4.3-inch color |
| Max travel speed | 600mm/s |
The Flashforge AD5X is a CoreXY desktop printer built for fast, multicolor production and higher-temperature materials. It uses a four-toolhead changer and an intelligent filament system to run up to four filaments without frequent manual swaps, and a 300°C direct extruder plus large-flow hotend lets you print TPU, carbon-fiber blends, PETG and PLA variants. The printer targets speed and stability with a metal CoreXY frame, claimed travel speeds up to 600mm/s and features that improve print success like auto bed leveling, resume-printing after interruptions, filament detection and vibration compensation. A 4.3-inch color touchscreen and remote management via Flash Maker/Orca-Flashforge make job control and monitoring easier for multiple machines. For helmet prototyping that needs multicolor parts or functional blends, the AD5X gives flexible material support and faster turnarounds, but buyers should expect to tune profiles for abrasive composite filaments and verify safety/fit with heavier reinforced materials since the machine prioritizes speed and versatility rather than specialized industrial certification.
Best for: Designers and small-scale fabricators who need a versatile desktop printer that can produce multicolor and multi-material helmet prototypes quickly while offering remote management and features to reduce failed prints.
Less Ideal for: Large-scale industrial manufacturers requiring certified production workflows or users who need a purpose-built, heavy-duty industrial printer for very large helmet shells.
- Four-toolhead changer and intelligent filament system for up to 4-color/multi-material prints
- 300°C high-temp direct extruder and large-flow hotend for TPU, PETG and carbon-fiber blends
- CoreXY all-metal design aimed at stable, high-speed motion
- Auto bed leveling, filament detection, resume printing and vibration compensation improve print success
- Remote management and a color touchscreen simplify monitoring and job control
- High advertised speeds will require careful tuning to maintain accuracy on large helmet prints
- Composite or abrasive filaments may need hardened nozzles and extra maintenance
Verdict: If you want a fast, flexible desktop printer for multicolor and multi-material helmet prototyping, the AD5X packs the features and remote tools to move from concept to usable prototypes quickly.
Bambu Lab P1S Combo

| Build Volume | 256×256×256 mm³ |
|---|---|
| Max Speed | 500 mm/s |
| Max Acceleration | 20 m/s² |
| Supported Filaments | PLA, PETG, TPU, PVA, PET, ABS, ASA; capable: PA, PC |
The P1S Combo pairs a CoreXY motion system with an integrated AMS to enable fast, multi-color and multi-material prints inside an enclosed build chamber. It is designed for high-speed work with advertised top speeds of 500 mm/s and very high acceleration, which helps cut print times on large helmet components and detailed parts alike. The enclosed frame and auto bed leveling improve first-layer reliability when you run tougher filaments such as ABS or ASA, and the direct-drive extruder broadens material compatibility for flexible and engineering plastics. Setup is intended to be quick so you can move from unboxing to printing in a short time. Important limits to note are filament restrictions—carbon or glass fiber reinforced filaments are not recommended—and the printer still requires correct tuning and slicing to realize peak speeds without sacrificing surface finish. For helmet-sized parts you may also need to plan prints in sections to fit the 256×256×256 mm build volume.
Best for: Performance-focused makers and small-scale fabricators who need fast turnaround and reliable multi-color capability for large, complex parts like helmet components.
Less Ideal for: Hobbyists who need a very large single-piece build volume or who plan to print with carbon/glass-reinforced filaments as primary materials.
- Very high top speed and acceleration for faster print throughput
- Enclosed build chamber improves reliability with temperature-sensitive filaments
- Supports up to 16-color multi-material printing with the AMS
- Direct-drive extruder increases compatibility with flexible and abrasive filaments
- Auto bed leveling simplifies setup and improves first-layer success
- Build volume (256×256×256 mm) may require sectional printing for full-size helmets
- Not recommended for carbon or glass fiber reinforced filaments
Verdict: If you need fast, reliable multi-color prints for helmet parts in a compact, enclosed machine, the P1S Combo delivers the speed and material flexibility to get the job done.
Anycubic Kobra X

| Print volume | 260×260×260 mm³ |
|---|---|
| Recommended print speed | 300 mm/s (up to 600 mm/s claimed) |
| Materials | PLA, PETG, TPU, PVA, ABS |
| Auto leveling | LeviQ 3.0 49-point |
The Anycubic Kobra X is a user-focused FDM printer built around fast, multicolor capability and convenience features that suit practical makers. It supports native multicolor printing (4 colors, expandable up to 19 with additional accessories) and a hardened steel nozzle that handles common filaments including PLA, PETG, TPU, PVA and ABS. Key usability touches include LeviQ 3.0 49-point automatic bed leveling, filament run-out and power-loss recovery, and a 720p camera with AI monitoring for spaghetti and object detection. High-speed mechanics and Kobra OS claim up to 600 mm/s potential, which can shorten print cycles for large parts like helmet shells, while vibration compensation aims to preserve surface detail. Trade-offs to expect are that very high speeds require careful tuning and suitable slicing settings to keep dimensional accuracy, and achieving 19-color prints needs multiple ACE 2 Pro hubs sold separately, which adds complexity and cost. Noise is kept low at under 48 dB, making it acceptable for home or classroom environments.
Best for: A practical builder who prioritizes efficient, repeatable production of large or colorful parts and wants features that minimize setup and failed prints.
Less Ideal for: Buyers who need out-of-the-box industrial-level accuracy at very high speeds or who prefer single-vendor turnkey multicolor systems without add-on hubs.
- Supports multicolor printing out of the box and expandable to many colors with accessory hubs
- LeviQ 3.0 49-point auto bed leveling reduces setup time and improves first-layer consistency
- Hardened steel hotend and support for common filaments including TPU and PETG
- Filament run-out sensor, power-loss recovery and AI camera monitoring protect long prints
- High-speed mechanics and vibration compensation reduce print time for large parts
- Achieving reliable prints at extreme speeds requires careful tuning and can affect dimensional accuracy
- Full multicolor capability (up to 19 colors) requires additional ACE 2 Pro hubs sold separately
Verdict: If you want a fast, beginner-friendly FDM printer that speeds up production of large colorful parts while minimizing setup time, the Kobra X is a practical choice.
ELEGOO Neptune 3 Pro

| Build volume | 225 × 225 × 280 mm |
|---|---|
| Extruder type | Dual-gear direct drive |
| Filament diameter | 1.75 mm |
| Noise level | 47 dB |
| Bed surface | PEI magnetic platform |
The ELEGOO Neptune 3 Pro is a ready-to-use FDM printer aimed at hobbyists who want a capable machine without a lot of setup. It ships with most major subassemblies pre-installed and a toolkit so you can start printing within minutes; the 225 × 225 × 280 mm build area covers many helmet prototypes and smaller parts. The dual-gear direct drive extruder and widened heat sink improve filament feeding for flexible materials like TPU while the titanium throat and brass nozzle help reduce clogging. A 36-point auto bed leveling system plus a PEI magnetic removable build plate make first-layer tuning and part removal straightforward. Safety and reliability features such as filament runout detection and power-loss resume reduce failed long prints. Expect quiet operation thanks to silent stepper motors, and stable Z-axis motion from dual lead screws. Limitations: the open-frame design offers less thermal control for large ABS prints and the machine is sized for single-piece helmet tests or modular components rather than full-scale large helmets.
Best for: Buyers on a budget who want a mostly ready-to-print machine that handles PLA, TPU, and PETG well and can produce helmet prototypes or modular helmet parts without a steep learning curve.
Less Ideal for: Users who need to print full-size helmets in one piece, produce high-temperature engineering materials frequently, or require a fully enclosed, climate-controlled chamber.
- Pre-assembled main parts and toolkit let you start printing quickly
- Dual-gear direct drive extruder provides reliable feeding for TPU and other flexible filaments
- 36-point auto bed leveling and PEI magnetic plate simplify first-layer setup and part removal
- Filament runout sensor and power-loss resume protect long prints from interruptions
- Quiet stepper motors and stable dual-lead-screw Z-axis reduce vibration and noise
- Open-frame design limits temperature control for large ABS or professional composite prints
- Build volume is modest for printing full-size helmets in one piece
Verdict: A budget-friendly, easy-to-start FDM printer that reliably prints helmet prototypes and modular helmet components with flexible filament support.
Bambu Lab A1 3D Printer

| Build volume | 256 × 256 × 256 mm |
|---|---|
| Max acceleration | 10 m/s² |
| Supported filaments | PLA, PETG, TPU, PVA |
| Noise level | ≤48 dB |
The Bambu Lab A1 is a ready-to-use FDM printer designed to make reliable, large-format printing approachable for beginners while still offering features useful to experienced users. It handles full-auto calibration for Z-offset, bed leveling, vibration resonance, and nozzle pressure so you rarely need to tune settings manually, and active flow rate compensation helps produce consistent extrusion across long prints. The 256 × 256 × 256 mm build volume gives enough room to print helmets or other large one-piece parts, and the A1 supports high-speed motion control backed by sensors and accelerometers to keep prints accurate at faster speeds. The printer can be used as a standalone device or connected through Bambu Cloud or LAN-only mode for privacy-conscious workflows. Practical limitations include the need to buy the AMS lite separately for multi-color automatic filament changes and that some advanced users may still prefer an enclosed chamber for temperature-sensitive materials. For reliability-focused buyers making single-piece helmet prints, the A1 balances ease of use with robust monitoring and compensation systems.
Best for: Buyers who prioritize dependable, low-friction printing for large parts and want a machine that automates calibration and monitoring to minimize failed prints during long helmet prints.
Less Ideal for: Users who need built-in multi-material automatic swapping or who require a heated enclosed chamber for consistently printing high-temperature engineering plastics.
- Full-auto calibration handles Z-offset, bed leveling, resonance, and nozzle pressure for consistent first layers.
- Active flow rate compensation improves extrusion consistency over long prints.
- 256 × 256 × 256 mm build volume accommodates large single-piece prints like helmets.
- Comprehensive print monitoring and sensors reduce failed prints and improve reliability.
- Quiet operation with motor noise canceling makes longer prints less disruptive.
- Automatic multi-color printing requires purchasing AMS lite separately.
- Open-frame design is not ideal for printing temperature-sensitive materials like ABS without enclosure.
Verdict: If you want a beginner-friendly printer that reliably handles large single-piece prints like helmets with automated calibration and active extrusion control, the Bambu Lab A1 is a top practical choice.
Creality K1C 3D Printer

| Print speed | 600 mm/s (max advertised) |
|---|---|
| Supported materials | PLA, PLA-CF, PET-CF, ASA, ABS, TPU |
| Hotend temperature | 300 ℃ |
| Build volume | 8.66 x 8.66 x 9.84 inch |
The Creality K1C is a plug-and-play FDM printer aimed at fast, reliable prototyping and hobby use. It ships mostly assembled so you can power up and start printing within minutes; the machine includes auto Z offset and auto bed leveling plus input-shaping checks that cut down setup time. The touted 600 mm/s top speed and high acceleration make it one of the quicker desktop machines, which helps when iterating helmet parts or other larger prototypes, while upgraded cooling and a three-fan layout improve overhangs and layer bonding. The direct, clog-resistant extruder with a steel-tipped copper nozzle and titanium-alloy heat break supports higher-temperature filaments and carbon-fiber blends useful for stronger functional parts. Built-in AI camera gives real-time monitoring and failure detection, which is handy for long helmet prints. Important limitations: the stated maximum speed is aggressive and real-world quality requires tuning, and the listed build volume is modest for full-size helmets so larger designs may need to be split or scaled. Still, for rapid iterations and printing higher-strength filaments, the K1C is a practical choice.
Best for: Buyers who want to prototype helmet components quickly and test stronger filaments will appreciate a mostly ready-to-run machine with fast throughput and built-in monitoring.
Less Ideal for: Those who need to print full-size, single-piece helmets or very large parts without splitting models should consider a larger-format machine instead.
- Ready-to-print out of the box with auto-leveling and auto Z offset for fast setup
- Very high advertised printing speed and acceleration for quicker prototype turnaround
- Clog-resistant direct extruder and high-temp capable nozzle for carbon-fiber and engineering filaments
- Three-part cooling system that improves overhangs, bridging, and surface finish
- AI camera for real-time monitoring and time-lapse recording of long prints
- Build volume is relatively small for single-piece full-size helmets
- Top speeds require careful tuning; quality at maximum speed may vary
Verdict: Choose the K1C when you need fast iteration and the ability to print higher-strength filaments for helmet prototypes in a compact, mostly preassembled desktop package.
FLASHFORGE Adventurer 5M
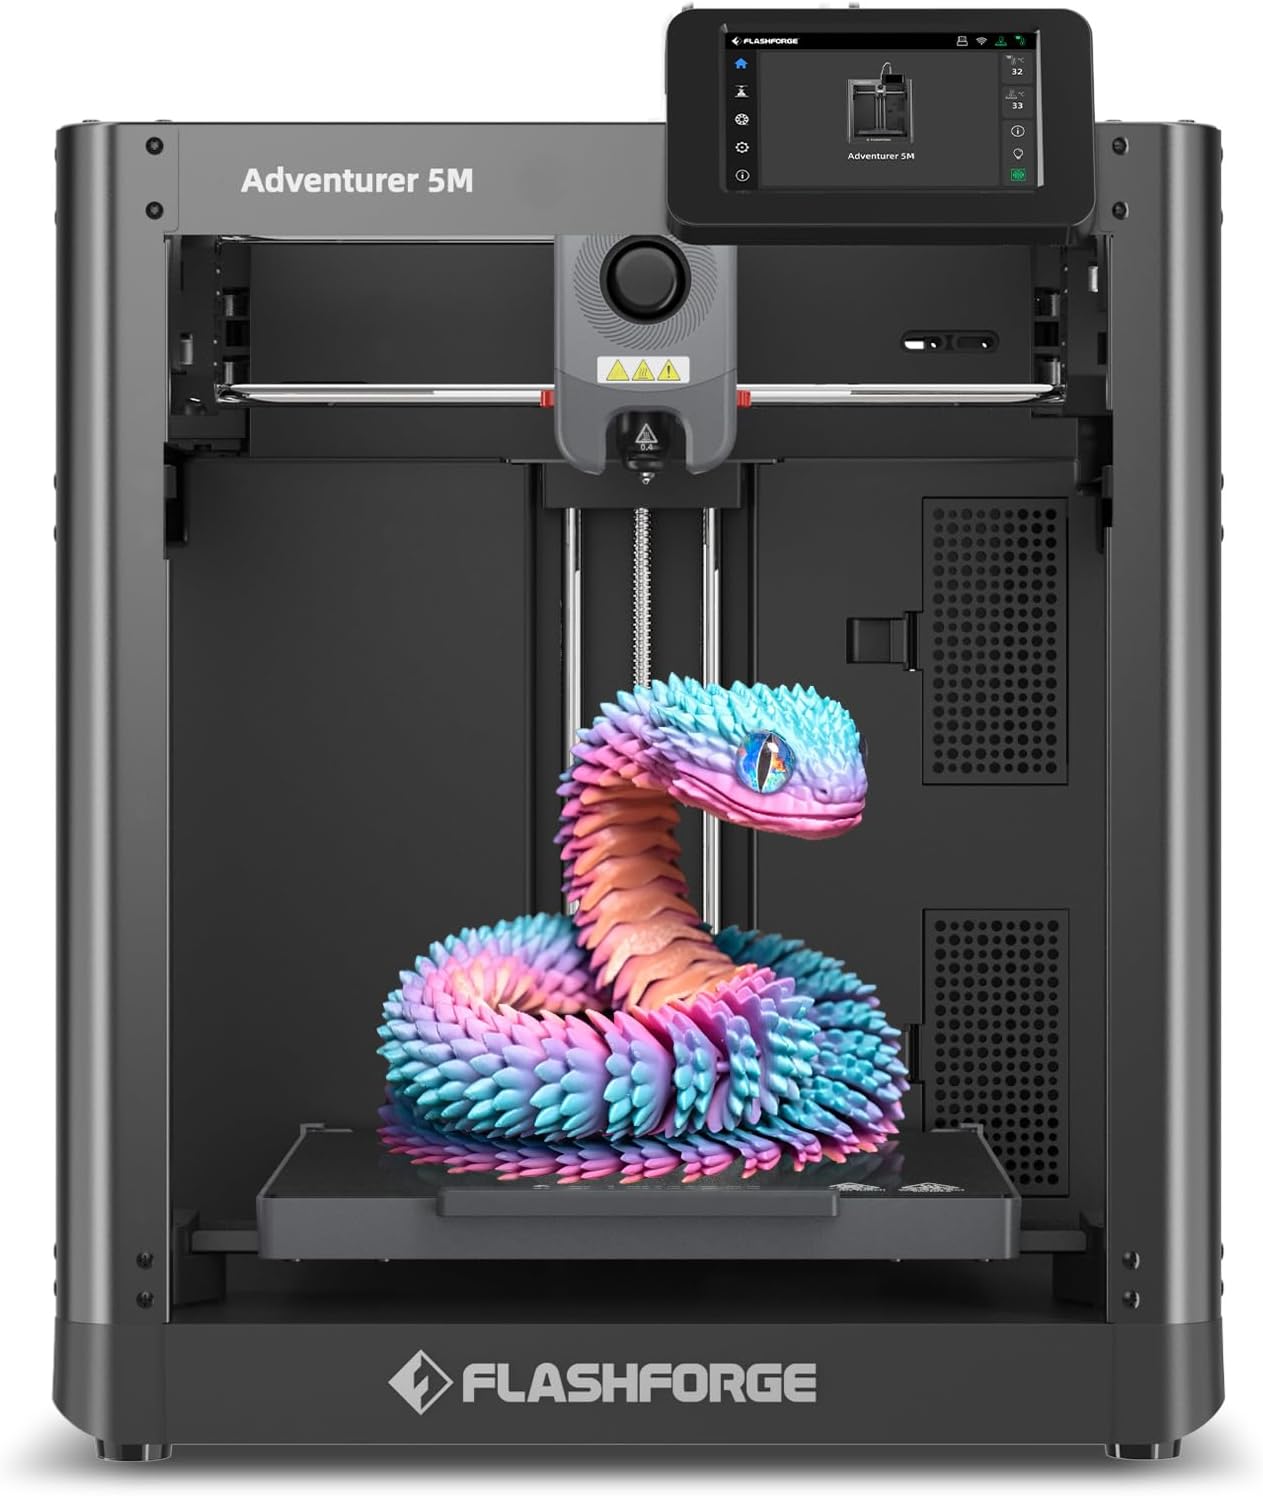
| Build Volume | 220 x 220 x 220 mm |
|---|---|
| Max Extruder Temp | 280°C |
| Travel Speed | 600 mm/s |
| Platform Type | Double-Sided PEI Platform |
| Structure | All-metal Core XY Structure |
The Adventurer 5M is a CoreXY desktop printer aimed at faster prototyping while keeping user setup simple. It uses one-button automatic bed leveling and a double-sided PEI platform to help parts stick reliably and remove cleanly, and the 280°C direct-drive extruder plus multiple nozzle sizes makes it compatible with common engineering filaments like PLA, PETG and TPU. Its CoreXY all-metal structure and quoted 600 mm/s travel with high acceleration prioritize speed for reduced print cycles, while features such as quick 3-second nozzle changes, a high-flow nozzle, dual-fan cooling and mobile app monitoring add convenience for continuous runs. For helmet-sized prints the 220 mm cubic build area limits single-piece prints to smaller shells or mandates splitting models and post-assembly, but the printer's speed and ability to handle tougher materials are useful for producing strong segments and prototypes. Expect routine maintenance like nozzle and bed cleaning and be aware that achieving the best quality at top speeds will require calibration and tuned slicer settings.
Best for: Buyers who want a relatively user-friendly, fast CoreXY printer that handles common engineering filaments and simplifies setup through automated leveling and app monitoring.
Less Ideal for: Those who need to print full-size helmet shells in one piece or who prefer an out-of-the-box solution that requires no tuning for high-speed prints.
- Automatic one-button bed leveling simplifies first-layer setup
- CoreXY all-metal structure and high travel speeds reduce print time
- 280°C direct-drive extruder and multiple nozzle sizes support a range of filaments
- Double-sided PEI platform enables easier part removal and good adhesion
- Quick nozzle changes and mobile app monitoring improve workflow and remote oversight
- 220×220×220 mm build volume restricts printing large helmet shells in a single piece
- High-speed printing requires careful slicer tuning and regular maintenance to maintain consistent quality
Verdict: If you want a speedy, engineering-capable CoreXY desktop printer for strong helmet segments and rapid prototyping, the Adventurer 5M balances performance with user-friendly features.
Choosing the Right 3D Printer for Helmets: Key Factors to Consider
Build Volume and Bed Geometry
Helmet printing often requires single-piece shells or large halves that fit without excessive seams. Larger build volume reduces the need to split models into many pieces and simplifies alignment during post-processing.
Beyond raw volume, bed geometry and usable print area matter. A flat, well-leveled bed with consistent temperature across its surface helps avoid warping on large prints. Consider whether the printer supports vertical versus horizontal orientation options for your helmet models, and whether rotating or removable plates are available for easier part removal on large beds.
Material Support and High-Temperature Filaments
Not all filaments behave the same at scale. For helmets you may need tougher plastics, engineering-grade filaments, or filament blends with better impact resistance. A printer that can reach and hold higher nozzle and bed temperatures widens your material choices.
Also consider whether the machine supports hardened nozzles and an all-metal hotend for abrasive or composite filaments. Enclosure compatibility is important for temperature-sensitive materials to reduce layer delamination and warping during long, large prints.
Dimensional Accuracy and Repeatability
A helmet must fit the wearer and mate with internal padding and fixtures. Dimensional accuracy and repeatability across long prints ensure that shell halves align properly and that mounting points are reliable.
Look for printers with precise motion systems, quality lead screws or belt drives, and software features such as microstepping and linear advance that reduce inconsistencies. Calibration routines, bed-mapping, and fine Z-offset control are helpful for maintaining tolerances across multiple prints.
Mechanical Rigidity and Vibration Control
Large prints amplify any flex or vibration in the frame, which can produce visible layer artifacts and dimensional errors. A rigid gantry, well-supported Z axis, and minimal play in bearings and couplers make a big difference for helmet-scale parts.
Consider machines with reinforced frames, dual Z leads, or closed-box designs that help suppress resonance. Vibration damping and sturdy print surface mounts also reduce the chance of print failure on long runs.
Print Time, Cooling, and Thermal Management
Helmet components are large and can require many hours or even days to print. Efficient thermal management keeps long prints consistent; that includes reliable part cooling for bridging and overhangs, and stable bed temperature control to prevent warping.
Look for printers with controllable fan profiles, good part-cooling ducts that can be adjusted or disabled for heat-sensitive materials, and robust power delivery to sustain multi-day prints without thermal drift.
Ease of Use, Software, and Maintenance
Large-format building increases the cost of failed prints, so user-friendly calibration, simple maintenance, and solid software integration reduce risk. Clear leveling procedures, quick nozzle and bed access, and accessible parts for maintenance speed up troubleshooting.
Software support for large models, including slicing settings optimized for shell printing, seam control, and multi-part alignment tools, helps you get consistent results faster. Consider community and documentation quality, since good resources shorten the learning curve.
Planning Helmet Prints: Model Preparation Strategies
Preparing helmet models for printing reduces fitment headaches and material waste. Decide early whether you will print the helmet in one piece, as two shell halves, or in multiple segments. For single-piece prints you need a truly large build area and confidence in long-run reliability.
When splitting models, design robust alignment features such as dowel holes, tongue-and-groove joints, or overlapping flanges to simplify assembly and finish work. Add generous chamfers around mounting points and consider printed or embedded inserts for hardware to prevent thread stripping in thin sections.
- Use model splitting that keeps seams in low-stress areas
- Include alignment pins or dovetail joints for accurate reassembly
- Add adequate thickness and radiused edges to reduce stress concentrations
Finishing Techniques for Structural Integrity
Post-processing transforms printed shells into structurally reliable components. Sanding and epoxy coating can improve surface finish, seal layer lines, and increase impact resistance when done correctly. Several thin coats of epoxy followed by sanding yields a uniform, strong shell suitable for additional treatments.
For stronger bonds between segments, use mechanical fasteners combined with adhesive bonding where appropriate. Reinforcing internal rib structures or adding a lightweight foam core can raise impact performance without excessive weight penalty.
- Apply thin epoxy layers rather than a single thick coat
- Use stainless inserts or captive nuts for repeated hardware use
- Consider internal ribs or foam cores to improve stiffness
Safety Considerations and Testing
Printed helmets used for demonstration or prototyping should be treated differently from certified protective gear. Understand the limitations of printed materials and the lack of standardized certification when assessing safety. If a helmet is intended for protective use, follow applicable testing protocols and consult material specifications to determine impact and energy absorption behavior.
When testing prototypes, perform controlled drop tests, impact spot checks, and fit trials. Use multiple samples and document results to spot inconsistencies caused by print orientation, infill patterns, or layer bonding issues.
- Do not rely on untested printed helmets for certified protection
- Run repeatable tests to validate print orientation and infill choices
- Document failures to refine design and material choices
Material Choices for Different Helmet Uses
Choice of filament depends on the helmet's intended role. For visual prototypes, PLA or PLA blends give easy printing and good detail. For tougher applications you may prefer high-impact filaments or semi-flexible blends that absorb shock better. For heat-prone environments, choose materials with higher glass transition temperatures and consider post-curing or coatings.
Composite filaments with fiber or mineral fillers can increase stiffness, but they often require hardened nozzles and tuned print temperatures. Balance the need for rigidity, toughness, and finish quality when selecting materials for final prototypes or test heads.
- PLA and blends for visual models and low-stress parts
- Engineering-grade filaments for stronger prototypes
- Composite or reinforced filaments for higher stiffness
Workflow for Large-Format Prints
Establish a workflow that minimizes the risk of multi-day failures. Break large models into logical segments that are tolerant of small dimensional variation, and run smaller test prints of critical mounting features before committing to full shells. Keep the printer environment stable and reduce drafts or temperature swings that can cause layer separation.
Plan for filament consumption and have spare spools and replacement parts ready. Monitor long prints periodically and use filament runout sensors and power-failure recovery features when available to avoid wasting hours of build time.
- Print test coupons of critical features first
- Stabilize the print environment to control warping
- Prepare spares and monitoring to avoid long-run failures
How We Chose the Best 3D Printer for Helmets
We evaluated printers that can reliably produce helmet-sized parts by focusing on dimensions, material support, and print consistency. First, we screened machines by achievable build volume and usable XY/Z accuracy to ensure single-piece or multi-piece helmet shells are practical without excessive seams. Next, we considered material compatibility, including the ability to print higher-strength filaments and composite blends commonly used in reinforced helmet prototypes. We also analyzed mechanical stability and frame rigidity since large prints exaggerate vibration and Z-wobble issues. Ease of setup and repeatability were weighed to reflect real-world shop workflows where long prints must finish successfully. Finally, we checked out accessory and extrusion options such as hardened nozzles and enclosure support that matter for printing engineering-grade filaments. Excluded from this list were tiny desktop machines with insufficient build volume, hobby-only printers lacking material versatility, and devices with persistent reliability problems in large-format printing. The result is a set of printers chosen for volume-capable, material-flexible, and repeatable helmet fabrication.
Our full evaluation process is outlined in our review methodology.
FAQ
Can I print a full helmet in one piece?
That depends on your printer's build volume and the helmet design. Some large-format printers can handle single-piece shells, but many users print halves or segments and assemble them to avoid extreme print times and reduce failure risk.
What filament is best for a functional helmet prototype?
Functional prototypes usually benefit from engineering filaments with higher impact resistance and heat tolerance. The specific choice depends on the required toughness, temperature exposure, and whether you plan post-processing or reinforcement.
How do I prevent warping on large helmet parts?
Control bed and ambient temperatures, use an enclosure when printing heat-sensitive materials, ensure good bed adhesion with appropriate surface treatments, and design parts with fillets and adequate thickness to minimize stress concentrations that lead to warping.
Are printed helmets safe to use as protective gear?
Printed helmets are generally suitable for prototyping and demonstration, but they rarely meet certification standards out of the printer. If protection is required, you must follow certification procedures, use validated materials, and perform standardized testing to confirm safety.
How should I join printed helmet segments for best strength?
Use a combination of mechanical interlocks, through-fasteners, and adhesives. Alignment dowels and overlapping flanges distribute load and simplify assembly. Reinforcing seams with internal ribs or bonded composite strips increases strength at joins.
Final Verdict
For helmet projects prioritize machines with generous build volume, stable mechanical platforms, and support for engineering materials. Be realistic about tradeoffs: single-piece shells reduce assembly work but increase print time and the potential cost of a failed run. Material compatibility and thermal control are the other critical factors because they determine whether a printed part will perform acceptably after finishing. Choose a printer that matches the largest helmet geometry you plan to produce, and accept that some finishing and reinforcement is usually required to reach usable strength. Focus on accuracy, repeatability, and a workflow that reduces the chance of long-run failures to make consistent, safe prototypes.