
Note: This article contains affiliate links. If you click on these links and make a purchase, we may earn a small commission at no extra cost to you. This helps support our research and content. Read our full affiliate disclosure here.
When you need to move from idea to testable prototype quickly, the right 3D printer for prototyping makes a big difference. Prototyping-focused printers prioritize repeatable dimensional accuracy, consistent surface finish, and materials that match functional requirements. Whether you are validating fit, testing mechanics, or checking ergonomics, a suitable machine shortens development cycles and lowers the cost of iteration. This guide highlights the top shortlisted 3D printers for prototyping across common workflows. We evaluate each option on the most relevant technical and practical criteria so you can pick a machine that fits your part sizes, material needs, and throughput expectations.
Top Picks at a Glance
| Best Overall The best all-around choice for most situations | Bambu Lab P1S 3D Printer |  |
| Best Quality Built to a higher standard if you want something more solid | Original Prusa XL 2-Toolhead |  |
| Best Value The sweet spot between price and what you get | Bambu Lab A1 3D Printer |  |
| Best Budget The cheapest option that still gets the job done reliably | ELEGOO Neptune 3 Pro |  |
| Top Rated A top-rated pick with lots of positive feedback | Creality K1C 3D Printer |  |
| Most Popular A crowd favorite that many people choose with confidence | Creality Ender 3 V3 SE |  |
| Best Seller A high-volume bestseller chosen again and again | FLASHFORGE AD5X 3D Printer | 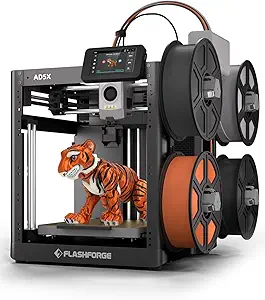 |
Bambu Lab P1S 3D Printer
| Build Volume | 256×256×256 mm³ |
|---|---|
| Max Speed | 500 mm/s |
| Max Acceleration | 20 m/s² |
| Supported Filaments | PLA, PETG, TPU, PVA, PET, ABS, ASA; capable: PA, PC |
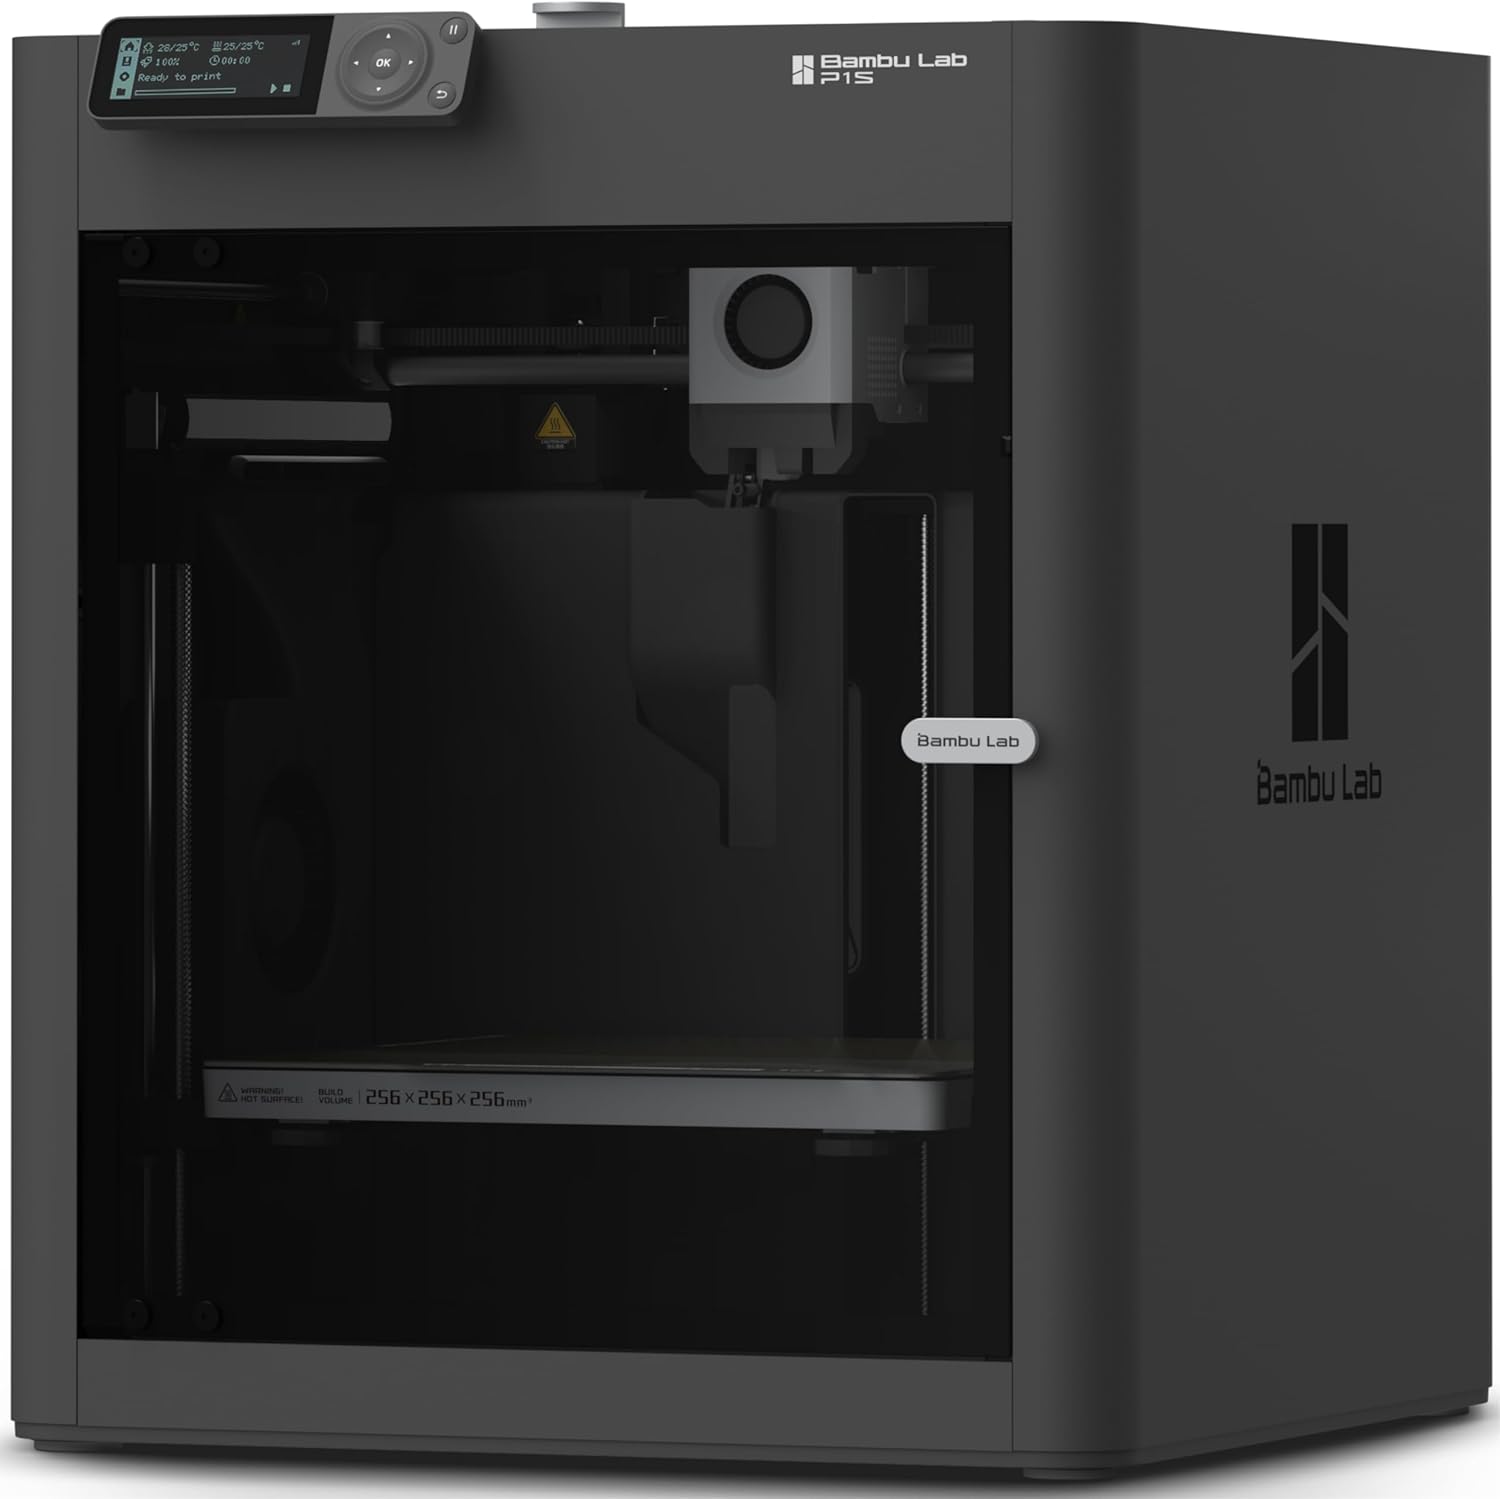
The Bambu Lab P1S is an enclosed CoreXY FDM printer aimed at fast, reliable prototyping out of the box. It offers a 256×256×256 mm build volume, direct-drive extruder for a wider range of materials, and automatic bed leveling to reduce setup headaches, which helps get prints started quickly. The P1S emphasizes speed with up to 500 mm/s travel and high acceleration, so prints and iterations finish sooner than on typical hobby machines. Its enclosed frame improves consistency for temperature-sensitive filaments and the onboard camera makes time-lapse and remote monitoring simple. It supports common prototyping materials such as PLA, PETG, TPU and is capable with more demanding filaments like PA and PC, though reinforced fiber composites are not recommended. Practical limitations include the need to add Bambu Lab AMS hardware for multi-color printing and the usual trade-offs of very high speed, which can require tuning to avoid ringing on detailed parts. For builders who value quick turnarounds and a polished, beginner-accessible workflow, the P1S is a strong choice.
Best for: Buyers who need a fast, dependable desktop printer for prototyping and iterative design work and who prefer a machine that minimizes setup time and material limitations.
Less Ideal for: Users who need factory multi-color/multi-material printing out of the box or those prioritizing the absolute lowest-cost entry-level machine should consider alternatives.
- Enclosed CoreXY design for steadier prints with temperature-sensitive materials
- High-speed motion (up to 500 mm/s) and high acceleration to shorten print times
- Direct-drive extruder expands usable filament types including TPU and engineering plastics
- Automatic bed leveling and quick setup that reduce time to first print
- Onboard camera for time-lapse and remote monitoring
- Multi-color printing requires purchasing and connecting the AMS accessory
- Very high speeds may need tuning to avoid visible ringing on fine details
Verdict: The P1S is a fast, enclosed CoreXY printer that gets prototypes printed quickly with broad material support and minimal setup.
Original Prusa XL 2-Toolhead

| Build volume | 14.17×14.17×14.17 in |
|---|---|
| Tooling | 2-tool multi-material system |
| Motion system | CoreXY |
| Included filament | 1 kg Prusament PLA |
The Original Prusa XL 2-Toolhead is built for high-speed, high-precision prototyping with a CoreXY motion system, a next-generation Nextruder and a Loadcell sensor that help ensure consistent first-layer adhesion across a 14.17×14.17×14.17 in build volume. Its dual-tool multi-material system lets you switch between materials and soluble supports mid-print while minimizing purge waste, which is useful for functional prototypes and detailed assemblies. The segmented heated bed improves large-print reliability by reducing warping and saving energy in idle zones, and native support for Input Shaper and Pressure Advance boosts print speed without sacrificing dimensional accuracy. Prusa ships the machine ready to print with a Satin sheet and a 1 kg spool of PLA, and it integrates with PrusaSlicer and Printables.com for straightforward workflow and slicing. This is a professional-focused machine that prioritizes accuracy and material flexibility, though its size and industrial target mean it requires a dedicated workspace and some assembly of packed components after delivery.
Best for: Engineers, design studios, and advanced makers who prioritize speed, dimensional accuracy, and multi-material capability for professional prototyping workflows.
Less Ideal for: Hobbyists with limited space or casual users who want a plug-and-play desktop printer without assembly or a large work area.
- Dual-tool multi-material system enables seamless material and soluble-support switching for complex prototypes
- CoreXY mechanics with Input Shaper and Pressure Advance support higher-speed printing with maintained accuracy
- Segmented heated bed reduces warping on large prints and improves first-layer consistency across the platform
- Includes Satin print sheet and 1 kg spool of Prusament PLA so you can begin printing quickly
- Large footprint and industrial orientation require significant workspace and setup
- Some fragile parts are shipped separately and must be installed after delivery
Verdict: Choose the Prusa XL 2-Toolhead when you need a fast, accurate large-format printer that handles multi-material prototypes with professional workflow support.
Bambu Lab A1 3D Printer

| Build volume | 256×256×256 mm³ |
|---|---|
| Acceleration | 10,000 mm/s² |
| Supported filaments | PLA, PETG, TPU, PVA |
| Noise level | ≤48 dB |
The Bambu Lab A1 is a user-friendly FDM printer aimed at smoothing the prototyping workflow with automation and speed. It handles full-auto calibration for Z-offset, bed leveling, vibration resonance and nozzle pressure so you spend less time tuning and more time printing. The A1 supports high-speed motion control and active flow-rate compensation for consistent extrusion, and it can be paired with the AMS lite accessory for reliable multi-color prints. Practical touches include a touchscreen interface, 1-clip quick-swap nozzle for faster maintenance, and active motor noise canceling that keeps operation under typical workshop noise levels. Its 256 mm cube build volume gives room for larger prototypes, and LAN/cloud connectivity lets you start and monitor prints remotely while preserving privacy with LAN-only mode. Limitations to note are that multi-color printing requires the AMS lite accessory (sold separately unless buying a combo) and the unit is an open-frame design, which may affect printing of high-temperature engineering plastics that benefit from an enclosed build chamber.
Best for: Engineers and small design teams who prioritize speed, repeatability, and minimal setup time when iterating prototypes and want a printer that automates calibration and print monitoring.
Less Ideal for: Those who need an enclosed heated chamber for printing high-temperature engineering plastics or who require multi-color printing without adding accessories should look elsewhere.
- Full-auto calibration reduces setup and tuning time for repeatable prints
- High-speed motion system with flow-rate compensation for consistent, faster prototyping
- 256×256×256 mm build volume accommodates larger prototype parts
- Touchscreen, quick-swap nozzle, and remote connectivity simplify daily use and maintenance
- Low operational noise thanks to active motor noise canceling
- Multi-color printing requires purchasing AMS lite separately unless bought as a combo
- Open-frame design limits thermal control for high-temperature materials
Verdict: If you want fast, automated, and reliable prototyping with minimal fiddling, the Bambu Lab A1 is built to get prints right and saved engineering time.
ELEGOO Neptune 3 Pro

| Build volume | 225 × 225 × 280 mm |
|---|---|
| Noise level | ≈47 dB |
| Extruder | Dual-gear direct drive |
| Supported filament diameter | 1.75 mm |
The ELEGOO Neptune 3 Pro is a ready-to-use FDM printer that targets everyday prototyping with an 8.85×8.85×11 inch build area and largely pre-assembled parts for quick setup. Its dual-gear direct drive extruder and stainless steel feed path give consistent filament delivery for PLA, TPU, PETG and ABS, while a titanium throat, brass nozzle and improved heatsink reduce clogging during longer runs. The 36-point auto bed leveling and filament runout sensor reduce failed prints and the power-loss resume helps recover larger jobs. Precision Z motion from dual lead screws and dual motors improves layer accuracy for functional parts, and silent stepper motors keep noise down to around 47 dB during prints. Practical limits include the standard hobby-size build volume that may be small for large prototypes and the printer lacks enclosure features for advanced high-temp materials. For budget-conscious prototyping, it balances useful reliability and essential features without pro-level enclosure or very large build capacity.
Best for: Practical buyers who need a reliable, affordable desktop 3D printer for functional prototypes and iterative parts testing without paying for industrial-sized machines.
Less Ideal for: Users who require very large build volumes or who need an enclosed, high-temperature system for advanced engineering materials.
- Direct drive dual-gear extruder for consistent filament feeding and fewer clogs
- 36-point auto bed leveling simplifies first-layer setup
- Filament runout sensor and power-loss resume reduce failed prints on long jobs
- Dual lead screws and dual Z motors for improved layer stability and precision
- Quiet stepper motors make it suitable for workshop or home use
- Build volume is modest for large prototype parts
- No full enclosure, limiting high-temperature material printing
Verdict: A cost-conscious prototyping choice that delivers reliable feeding, auto-leveling, and stable Z motion for dependable small-to-medium functional prints.
Creality K1C 3D Printer

| Printing speed | 600mm/s (peak) |
|---|---|
| Max nozzle temperature | 300°C |
| Supported materials | PLA, ASA, ABS, TPU, PLA-CF, PET-CF |
| Build volume | 8.66 x 8.66 x 9.84 inch |
The Creality K1C is a mostly ready-to-run desktop FDM printer aimed at rapid prototyping and straightforward setup. It ships largely assembled and boots with a smartphone-like guide so you can be printing within minutes, and the machine includes auto Z offset, auto leveling, and input shaping to reduce fiddly calibration. The direct, clog-resistant extruder and steel-tipped copper nozzle with a titanium-alloy heat break let the K1C handle PLA, ABS, TPU and higher-temp carbon-fiber blends up to 300°C, while an upgraded multi-fan cooling system improves layer adhesion and reduces stringing on bridges and overhangs. An onboard AI camera provides real-time monitoring and detects common print failures, which helps avoid wasted prints during long runs. For reliability-focused prototyping the K1C's sturdy frame and automated calibration cut setup time and reduce print failures, but the build volume is modest so larger prototypes require multiple prints and the fast 600mm/s spec is a peak performance figure that depends on tuning and part geometry.
Best for: Engineers and designers who need a dependable, low-fuss printer for rapid prototyping that favors quick setup, automated calibration, and the ability to run abrasive or high-temperature filaments.
Less Ideal for: People who need to print large one-piece prototypes or who prioritize maximum out-of-the-box high-speed throughput without spending time on tuning.
- Mostly preassembled and guided boot-up for quick plug-and-play setup
- Auto Z offset, auto leveling, and input shaping reduce calibration time
- Clog-resistant direct extruder and 300°C nozzle support carbon-fiber and high-temp filaments
- AI camera for real-time monitoring and time-lapse recording
- Upgraded multi-fan cooling improves layer quality and reduces stringing
- Modest build volume limits single-part size for larger prototypes
- Advertised top speeds require careful tuning and depend on model geometry
Verdict: If you want a reliable, largely plug-and-play desktop printer for repeated prototype runs and the option to use carbon-fiber and other high-temp filaments, the Creality K1C is a strong choice.
Creality Ender 3 V3 SE

| Item model number | Ender 3 V3 SE |
|---|---|
| Printing speed | Up to 250 mm/s |
| Acceleration | 2500 mm/s² |
| Extruder type | Sprite direct extruder |
| Mainboard | 32-bit silent mainboard |
The Ender 3 V3 SE is a user-friendly desktop FDM printer built for quicker prototyping and straightforward setup. It ships as a mostly assembled kit that the manufacturer says can be ready in about 20 minutes, and it includes CR Touch auto leveling and a strain sensor for auto Z offset so getting a reliable first layer is easier for newcomers. The Sprite direct extruder supports common filaments such as PLA, PETG, and TPU and offers one-touch auto load/unload, which speeds material changes during iterative prototyping. Mechanical stability comes from a dual Z-axis with synchronized belt drive and twin 8 mm Y-axis shafts, helping reduce Z wobble and keep taller prints accurate. A 32-bit silent mainboard and advanced stepper drivers reduce noise and improve motion control, and the spring steel build plate is sticky yet flexible for simpler part removal. Limitations include a modest build area and a typical hobbyist-level ecosystem that may require tuning for fine industrial tolerances, so professional teams demanding high repeatable precision or large-format parts should plan for calibration and possible upgrades.
Best for: Engineers and makers who need a fast, easy-to-start desktop printer for rapid prototyping and iterative design where assembly speed and reliable first layers matter.
Less Ideal for: Teams who require very large build volumes or out-of-the-box industrial repeatability should consider larger-format or certified industrial machines instead.
- CR Touch auto leveling and strain sensor simplify getting a good first layer
- Sprite direct extruder reliably handles PLA, PETG, and flexible filaments
- Dual Z-axis and twin Y-axis shafts improve stability and reduce Z wobble
- 32-bit silent mainboard with advanced drivers for quieter, smoother motion
- One-tap filament load/unload and flexible spring steel build plate for easier workflow
- Build volume is modest compared with larger prosumer or industrial printers
- Achieving repeatable industrial-grade tolerances may require calibration or upgrades
Verdict: A compact, beginner-friendly printer tuned for quicker prototyping cycles with auto-leveling and a reliable direct extruder.
FLASHFORGE AD5X 3D Printer

| Build volume | 220x220x220mm |
|---|---|
| Maximum nozzle temperature | 300°C |
| Structure | Open, Core XY |
| Multi-color support | Up to 4 colors |
| Travel speed | 600mm/s |
The FLASHFORGE AD5X is a Core XY desktop printer aimed at faster, small-batch prototyping and more detailed multi-color work. It supports up to four filaments simultaneously for multi-color prints and uses a 300°C direct-drive extruder that handles PLA, ABS, PETG, TPU and composite filaments. The machine emphasizes speed and throughput with travel speeds up to 600 mm/s and high acceleration, plus a vibration compensation system and dual-channel cooling to retain quality at higher rates. Practical conveniences include one-click auto leveling, automatic filament feed/retract, resume-on-power-loss, quick-detach nozzles, and a companion app for remote monitoring. Trade-offs for risk-averse buyers are that the AD5X is an open-frame Core XY that may need a controlled workspace for temperature-sensitive materials, and getting the best multi-color results requires time to calibrate and tune. For prototyping, it offers a compelling mix of speed, nozzle flexibility, and user-friendly automation, but expect some setup and tuning to reach consistent, factory-quality results.
Best for: Engineers and small-shop prototypers who need faster turnarounds and multi-color capability but want straightforward automation to reduce daily setup time.
Less Ideal for: Users seeking a fully enclosed, plug-and-play solution for high-temperature engineering plastics or those unwilling to perform routine calibration and tuning.
- Core XY architecture with up to 600 mm/s travel speed and high acceleration for faster prototypes
- Supports up to four-color simultaneous printing for multi-material or multi-color parts
- 300°C direct-drive extruder and quick-detach nozzles (0.25–0.8 mm) for filament versatility and easy swaps
- One-click auto leveling, automatic filament feed/retract, and resume printing simplify everyday operation
- Open-frame Core XY design can be sensitive to ambient temperature for high-temperature filaments
- High-speed printing requires calibration and tuning to avoid quality issues on fine details
Verdict: Choose the AD5X if you want a fast Core XY printer with multi-color capability and user-friendly automation for rapid prototyping.
Choosing the Right 3D Printer for Prototyping: Key Factors to Consider
Dimensional Accuracy and Repeatability
Accurate dimensions are the core requirement for prototyping because you are validating fit, assembly, and mechanical interaction. High positional resolution, well-tuned motion systems, and stable thermal control reduce variation between prints.
Repeatability matters more than single-run precision. A printer that produces the same part within tight tolerances over multiple builds saves time when you are iterating designs. Look for specifications and real-world reports on XY and Z accuracy, and pay attention to features that stabilize thermal expansion and bed adhesion.
Material Versatility and Functional Testing
Prototypes often need to approximate final part properties, so support for engineering materials is important. Compatibility with materials such as PETG, ABS, nylon, TPU, or composites with higher glass transition temperatures lets you test strength, flexibility, and heat resistance.
Consider whether the printer supports hardened nozzles, higher hotend temperatures, and either enclosed build chambers or heated beds to handle warping-prone materials. The ability to swap extrusion systems or use third-party filaments without major tuning expands the range of functional tests you can run.
Build Volume and Part Orientation
The maximum build envelope determines whether you can print full-size prototypes or must rely on assemblies of multiple printed segments. Larger volumes give design freedom but may increase print time and the risk of warping.
Also think about usable build volume versus advertised size. Consider how part orientation affects strength and surface finish, and whether the printer supports fixturing or removable plates that simplify handling of larger prints.
Print Speed and Development Throughput
Iteration speed affects product development cadence. Faster printers or those optimized for reliable high-speed printing reduce wait times between design changes. However, speed should not compromise accuracy; evaluate machines that offer tunable speed profiles and high-acceleration motion systems.
Throughput is also influenced by bed change workflow, ease of post-processing, and the need for support structures. Systems that minimize setup time and failed prints increase effective throughput for prototyping teams.
Workflow and Software Integration
Seamless workflow from CAD to printed part accelerates prototyping. Native or compatible slicing software that supports advanced settings, resin or filament profiles, and easy file transfer will reduce setup friction.
Look for printers that integrate with common toolchains, offer networked printing, and support versioned prints or remote monitoring. Good software and connectivity reduce human error and shorten the feedback loop between design changes and physical evaluation.
Maintenance, Serviceability, and Operating Costs
Downtime during development is costly, so maintenance needs and serviceability matter. Machines with accessible belts, modular hotends, and clear user-serviceable parts lower repair time. Consider the availability and durability of wear items like nozzles, build surfaces, and drive components.
Operating costs include common consumables and the frequency of calibration. Machines that require frequent re-tuning or proprietary consumables can slow projects and add recurring expense even if initial setup is straightforward.
Choosing the Right Build Volume
Match the printer's usable envelope to the largest prototypes you expect to produce. If full-size parts are required, prioritize a single large build chamber to avoid the complexity of joining multiple segments. For smaller parts or modular assemblies, a faster, smaller machine may yield better throughput.
Consider how frequently you will need taller prints versus wider prints. Some machines offer taller Z travel at the expense of XY area, which may influence part orientation and print stability.
- Verify usable build plate area, not just maximum travel.
- Check platen flatness and rigidity for larger prints.
- Think about removal method: flexible plates or removable trays speed part extraction.
Enclosures, Temperature Control, and Warping
An enclosed build environment improves success with temperature-sensitive materials by stabilizing chamber temperature and reducing drafts. If you plan to print ABS, nylon, or other engineering plastics, a heated and insulated chamber minimizes warp and layer separation.
Active temperature control and reliable bed heating also improve interlayer adhesion and dimensional consistency across longer prints.
- Look for thermostatic bed control and insulated enclosures.
- Consider optional accessories that add enclosure or HEPA filtration for specific materials.
Nozzle, Hotend, and Extrusion Options
Hotend capability dictates the range of printable materials and affects long-term reliability. Hardened or swappable nozzles let you use abrasive-filled filaments without rapid wear. All-metal hotends that reach higher temperatures are necessary for materials with higher melting points.
Dual extrusion or multi-material setups can speed prototyping by allowing soluble supports or printed assemblies with different material properties, but they add complexity and calibration needs.
- Check maximum hotend temperature and nozzle material.
- Assess filament drive design for consistent extrusion of flexible or composite filaments.
Calibration, Bed Leveling, and First-Layer Success
A reliable first layer is the foundation of a successful prototype print. Automatic bed leveling systems reduce setup time and improve repeatability, especially in environments where the printer may be moved or bumped.
Consider systems that provide live mesh compensation and easy nozzle height adjustment. Accessible bed surfaces and clear leveling procedures reduce failed prints and speed iteration.
- Prioritize printers with proven auto-leveling or mesh-bed compensation.
- Look for detailed leveling diagnostics and easy-to-replace build surfaces.
Post-Processing and Finishing for Functional Parts
Post-processing affects how closely a printed prototype represents a final product. Sanding, vapor smoothing, or applying coatings can improve surface finish and functional interfaces. Consider how easy it is to remove supports cleanly and whether the part geometry requires specialized finishing.
For parts used in mechanical testing, minor finishing steps can correct small dimensional deviations and improve assembly fit without reprinting.
- Plan for common finishing steps based on your chosen material.
- Evaluate support strategy options and soluble support workflows.
How We Chose the Best 3D Printer for Prototyping
We evaluated candidates using criteria that matter for prototyping workflows. Primary filters included print precision and repeatability, material compatibility for functional testing, build volume and dimensional stability, and workflow features that reduce failed prints. We also considered speed and throughput for tight iteration schedules and the reliability of core subsystems such as motion hardware and hotends. Excluded units that target only hobbyist appearance prints or are limited to single narrow filament types that cannot produce functional parts. We prioritized machines that support a range of engineering materials or interchangeable extrusion systems and that offer consistent results across multiple prints. Practical considerations included ease of leveling and calibration, available slicing and workflow tools, and the accessibility of maintenance tasks that affect uptime. The final list reflects a balance between accuracy, material versatility, and day-to-day usability for prototype development.
Our full evaluation process is outlined in our review methodology.
FAQ
What materials should I prioritize for functional prototyping?
It depends on the functional requirements. For strength and heat resistance, consider nylon or high-temperature filaments. PETG and ASA are good for toughness and weather resistance. Flexible TPU is useful for compliant parts. Choose materials that reproduce the mechanical traits you need to test.
How do I balance speed and accuracy when prototyping?
Start with conservative settings for critical dimensions, then gradually increase speed where tolerances allow. Use higher layer heights for quick fit checks and finer layers for final dimensional validation. Reliable motion hardware helps maintain accuracy even at higher speeds.
Is an enclosed printer necessary for prototyping with engineering plastics?
Often, yes. An enclosure stabilizes the build environment, which reduces warping and layer delamination with materials like ABS and nylon. For low-temperature filaments such as PLA, an enclosure is less critical but can still improve consistency.
How often should I recalibrate a prototyping 3D printer?
Frequency depends on usage and handling. For continuous daily production, check bed level and extrusion calibration weekly. For lighter use, monthly checks may suffice. Recalibrate after any hardware changes or if prints show dimensional drift.
Can I use composite or filled filaments for prototypes?
Yes, composites like carbon-fiber-filled filaments can provide stiffness and a closer match to end-use parts. They are abrasive on standard nozzles, so hardened nozzles and compatible feeders are recommended to avoid premature wear.
Final Verdict
Prioritize dimensional accuracy, material compatibility, and reliable uptime when choosing a 3D printer for prototyping. Decide first whether you need larger single-piece builds or faster small-part throughput, then match features such as enclosure, hotend capability, and leveling systems to that workflow. Tradeoffs between speed and precision are normal, so choose a machine whose strengths align with the most common tests you will run. With the right balance of accuracy, materials, and consistent operation, you will shorten development cycles and produce functional prototypes that meaningfully validate your designs.