
Note: This article contains affiliate links. If you click on these links and make a purchase, we may earn a small commission at no extra cost to you. This helps support our research and content. Read our full affiliate disclosure here.
Buying a 3D printer for serious prototyping or low-volume production is an investment in speed, repeatability, and material flexibility. When you have a budget up to $10,000 you can expect industrial-grade features without stepping into full factory equipment. This guide focuses on machines that deliver consistent dimensional accuracy, a broad range of compatible materials, and manageable maintenance demands. Below you will find a curated shortlist of top picks that meet those goals. We evaluated each option on print quality, material support, reliability, and total cost of ownership so you can match a machine to your workflow. Read on for the criteria we used and practical advice to help you pick the best 3D printer for your needs.
Top Picks at a Glance
| Best Overall The best all-around choice for most situations | Bambu Lab P2S Combo |  |
| Best Quality Built to a higher standard if you want something more solid | Original Prusa XL 5-Toolhead |  |
| Best Value The sweet spot between price and what you get | Anycubic Kobra X |  |
| Best Budget The cheapest option that still gets the job done reliably | Entina Tina2C Mini 3D Printer |  |
| Top Rated A top-rated pick with lots of positive feedback | Snapmaker U1 3D Printer |  |
| Most Popular A crowd favorite that many people choose with confidence | Creality Ender 3 V3 SE |  |
| Best Seller A high-volume bestseller chosen again and again | Bambu Lab P1S 3D Printer |  |
Bambu Lab P2S Combo

| Print speed | Up to 600 mm/s |
|---|---|
| Filament drying | AMS 2 Pro drying to 65 °C |
| Extruder | PMSM servo extruder |
| Chamber control | Adaptive airflow with 50 °C capable chamber |
The Bambu Lab P2S Combo bundles a high-speed CoreXY P2S printer with the AMS 2 Pro automatic material system to deliver fast, mostly hands-off 3D printing. The P2S is engineered for speed and precision with a PMSM servo extruder, active flowrate compensation, and quick-swap nozzles that help preserve sharp corners and consistent extrusion even at aggressive print speeds. Setup is straightforward enough to reach a first print in about 15 minutes thanks to automatic calibration and AI failure detection, and the AMS 2 Pro adds multi-spool handling plus built-in filament drying to reduce moisture-related failures. The printer also uses an adaptive airflow system and a filtered chamber to balance cooling for overhangs or maintain elevated chamber temperatures for engineering filaments. Practical benefits are fast throughput for rapid prototyping, minimal filament prep thanks to drying, and a unified software workflow via Bambu Studio and MakerWorld models. Trade-offs include the typical learning curve for tuning high-speed prints and the need to budget desk space for a full combo with AMS attached rather than a compact single-unit solution.
Best for: Buyers who want a fast, production-capable desktop 3D printer that scales from rapid prototyping to multi-color or multi-material runs with minimal filament prep.
Less Ideal for: Casual hobbyists who need a very small, simple printer for occasional single-color prints or users unwilling to invest time in high-speed print tuning.
- Very high maximum print speed up to 600 mm/s for fast prototyping
- PMSM servo extruder and active flowrate compensation for improved dimensional accuracy
- AMS 2 Pro adds multi-spool management and filament drying up to 65 °C
- Automatic calibration and AI failure detection reduce setup time and failed prints
- Adaptive airflow and carbon filtration support a wider range of filaments and keep the chamber cleaner
- High-speed printing increases demand for tuning and may require optimized slicer settings
- Combo configuration requires more bench space and a larger footprint than a single compact printer
Verdict: Choose the P2S Combo if you want one of the fastest desktop CoreXY systems with an integrated multi-spool workflow and filament drying for reliable, high-throughput prints.
Original Prusa XL 5-Toolhead

| Build volume | 14.17 × 14.17 × 14.17 inches |
|---|---|
| Toolheads | Up to 5 |
| Controller | 32-bit with Input Shaper and Pressure Advance |
| Included filament | 1 kg Prusament PLA |
The Original Prusa XL 5-Toolhead is a high-performance CoreXY system built for demanding prototyping and multi-material/color jobs. It uses a next-generation Nextruder with a Loadcell sensor and a 32-bit controller that supports Input Shaper and Pressure Advance for faster, more accurate motion and improved first-layer consistency across the full 14.17 × 14.17 × 14.17-inch build volume. The five-toolhead setup lets you print up to five materials or colors in a single run, and segmented heated bed zones help cut energy use and reduce warping on large prints. Prusa ships the printer ready to print with a Satin sheet and 1 kg of PLA, and the unit integrates with Prusa software and Printables for workflow convenience. Expect a professional feature set and reliable multi-tool handling, though the system is large and includes separately packed fragile components that require straightforward assembly after transport. This is a machine aimed at workshops and small labs that need flexible material combinations and repeatable industrial-style results within a sub-$10,000 budget.
Best for: Buyers who prioritize speed, precision, and multi-material flexibility for professional prototyping or small production runs and want a capable, workshop-ready machine under $10,000.
Less Ideal for: Hobbyists with limited workspace or users who need a compact desktop printer for occasional single-color prints should consider smaller, simpler machines instead.
- Five-tool multi-material/color printing for complex prototypes and full-color models
- 32-bit controller with Input Shaper and Pressure Advance for faster, more accurate prints
- Loadcell-equipped Nextruder improves first-layer consistency across the build plate
- Segmented heated bed reduces warping and improves energy efficiency
- Ships ready to print with a Satin sheet and 1 kg spool of PLA and integrates with Prusa software ecosystem
- Large footprint and weight make it less suitable for cramped workspaces
- Some fragile parts are packed separately and require post-delivery assembly
Verdict: Choose the Prusa XL 5-Toolhead if you need a fast, accurate, multi-material professional printer that delivers industrial-style prototyping power within a sub-$10,000 budget.
Anycubic Kobra X

| Print volume | 260×260×260 mm³ |
|---|---|
| Max nozzle temperature | 300C |
| Multicolor | Native 4-color, expandable to 19 |
| Auto leveling | LeviQ 3.0 49-point |
| Monitoring | 720p camera with AI detection |
The Anycubic Kobra X is a beginner-friendly yet capable FDM 3D printer designed for fast, multicolor and multi-material printing. It ships with LeviQ 3.0 automatic 49-point bed leveling, filament run-out and power-loss recovery, and a 720p camera with AI monitoring to spot print failures. The ACE GEN2 system and optional ACE 2 Pro hubs enable native 4-color printing and expansion up to 19 colors when you add additional filament hubs, which is useful for decorative or educational projects. Anycubic emphasizes speed — the Kobra X can run very high travel speeds and recommends print speeds up to 300 mm/s with peak capability to 600 mm/s — and uses vibration compensation to keep detail acceptable at higher throughput. It handles common filaments (PLA, PETG, TPU, PVA, ABS) and includes a hardened steel nozzle rated to 300C for broader material support. Trade-offs are typical for fast desktop printers: multicolor setups require extra hardware and tuning, the full 19-color workflow is complex and adds cost, and very high-speed prints may need post-processing to match surface-finish expectations of slower, fine-tuned prints.
Best for: Buyers who want a practical, productivity-focused desktop printer that balances ease of use with fast multicolor and multi-material capability for prototyping, classroom projects, or small-batch decorative prints.
Less Ideal for: Users seeking an out-of-the-box, high-fidelity resin-level finish or those who prefer a single-step native multicolor solution without adding accessory hubs should consider alternatives.
- Native multicolor printing with expandability to up to 19 colors using additional ACE hubs
- LeviQ 3.0 49-point automatic bed leveling for reliable first layers
- Fast printing architecture with vibration compensation and a high top speed for quicker turnarounds
- Built-in 720p camera and AI monitoring for remote observation and failure detection
- Supports a wide range of filaments and a hardened steel nozzle rated to 300C
- True multicolor capability requires extra ACE 2 Pro hubs and increases setup complexity
- Very high-speed printing can sacrifice surface finish compared with slower, tuned prints
Verdict: The Kobra X is the best choice here for buyers who need a fast, practical desktop FDM printer with expandable native multicolor capability and reliable auto-leveling.
Entina Tina2C Mini 3D Printer

| Print volume | 3.9 × 3.9 × 3.9 inches |
|---|---|
| Connectivity | 2.4G WiFi, TF card |
| Control app | Poloprint Cloud |
| Compatibility | Windows, macOS, Linux, Chromebook |
The Entina Tina2C is a fully assembled starter 3D printer aimed at kids and first-time users, designed to get you printing quickly via the Poloprint Cloud app and built-in WiFi or TF card printing. Setup is guided in the app so novices can begin a first print in minutes, and features like auto leveling, power-loss recovery, and a flexible magnetic build plate reduce common early frustrations. The printer emphasizes classroom and home use with low-noise operation, integrated LED lighting, and a compact footprint that fits small desks. Maintenance is simplified by a quick-swap printhead and a self-cleaning nozzle design, while compatibility with Cura and Simplify3D gives room to grow into more advanced slicing. Its clear limitations are the very small 3.9 x 3.9 x 3.9 inch print volume and beginner-oriented performance, so it is not intended for large functional parts or high-precision industrial work. For families, educators, or hobbyists who want an easy, safe introduction to FDM printing, the Tina2C provides a low-friction learning experience at a modest investment.
Best for: Buyers seeking an affordable, easy-to-use entry printer for kids, STEM classes, or hobby introductions who value guided app setup and low maintenance over large build capacity.
Less Ideal for: Users needing larger build volume, industrial accuracy, or high-speed production should choose a prosumer or industrial 3D printer instead.
- App-guided setup and one-click printing make first prints fast and simple
- WiFi and TF card support provide flexible printing workflows
- Auto leveling and power-loss recovery improve first-layer success rates
- Compact, quiet design with integrated LED lighting suits home and classroom use
- Very small 3.9 x 3.9 x 3.9 inch build volume limits part size
- Designed for beginners so print speed, resolution, and advanced tuning are limited compared with prosumer machines
Verdict: A compact, budget-friendly starter 3D printer that gets kids and beginners printing quickly with guided app controls and low-maintenance features.
Snapmaker U1 3D Printer

| Build volume | 270 x 270 x 270 mm |
|---|---|
| Max print speed | 500 mm/s |
| Toolheads | 4 independent toolheads with SnapSwap |
| Compatible materials | PLA, PVA, TPU, PETG, PCTG, ABS, ASA, PA, PC |
The Snapmaker U1 is a toolchanger CoreXY 3D printer built around a four independent toolhead system that swaps heads in about five seconds, letting you print multiple colors or materials without long filament purge cycles. It is typically used for multi-color prototypes, mixed-material functional parts and small production runs where minimizing material waste and setup time matters. Notable features include a rigid CoreXY motion system with carbon fiber X-axis rails for high-speed printing up to 500 mm/s, automatic toolhead offset calibration, vibration compensation and fine-tuned extrusion for consistent first layers, plus integrated filament management and AI print monitoring. The SnapSwap approach substantially reduces filament waste and downtime compared with filament-purge color changes, and the locking couplings are engineered for durability. Trade-offs are that the U1 is a larger, heavier desktop machine that benefits from a dedicated workspace and may require familiarity with slicer settings to exploit top speeds and mixed-material prints fully. For buyers prioritizing dependable, repeatable multi-material prints, the U1 focuses on reliability and throughput rather than being a minimalist hobbyist machine.
Best for: Buyers who need a reliable, production-capable desktop printer for multi-color and mixed-material prototypes or small runs and who value reduced material waste and consistent tool swaps.
Less Ideal for: Casual hobbyists looking for a compact, plug-and-play toy printer or buyers who need the smallest possible footprint or lowest upfront complexity.
- Four independent preloaded toolheads with 5-second swap for true multi-color and multi-material prints
- SnapSwap reduces filament waste and downtime compared with purge-based color changes
- Rigid CoreXY motion with carbon fiber rails enables high-speed printing while maintaining stability
- Automatic calibration and vibration compensation simplify setup and improve first-layer reliability
- Large and heavy footprint requires a dedicated workspace
- Achieving peak speeds and reliable mixed-material prints may need slicer tuning and experience
Verdict: If you need a reliable, production-oriented desktop printer that delivers fast, low-waste multi-color and mixed-material prints, the Snapmaker U1 is a practical choice.
Creality Ender 3 V3 SE

| Max print speed | 250 mm/s |
|---|---|
| Build plate | PC spring steel flexible plate |
| Extruder type | Sprite direct extruder |
| Mainboard | 32-bit silent mainboard |
The Ender 3 V3 SE is a user-friendly desktop FDM printer designed for fast, reliable prints. It uses a Sprite direct extruder that handles PLA, PETG and TPU smoothly and includes one-touch auto filament load and unload for quick filament changes. Creality built in CR Touch auto leveling and a strain sensor for automatic Z offset so first-layer setup is simpler, and the UI shows motion-graphic guidance during leveling. A dual Z-axis with synced timing belt plus dual 8 mm Y-axis shafts give a rigid frame that reduces Z wobble and improves detail consistency. The 32-bit silent mainboard and stepper drivers keep operational noise down while providing precise motion control, and the spring steel build plate is flexible for easier part removal. It prints at high speeds up to 250 mm/s with aggressive acceleration settings, which shortens job times but will require tuning for the best surface finish on fine features. Assembly is quick and suitable for beginners, though users seeking industrial enclosed printers, multi-material capability, or larger build volumes will need a different machine.
Best for: Buyers who want a quick-to-assemble, reliable desktop printer that balances faster print speeds with beginner-friendly automation and solid community-tested hardware.
Less Ideal for: Users who need a large build volume, enclosed heated chamber for high-temperature materials, or factory-level multi-material setups should consider other options.
- Sprite direct extruder handles flexible and common filaments reliably
- CR Touch plus strain sensor simplifies bed leveling and first-layer setup
- Dual Z-axis and robust Y-axis shafts improve stability and print accuracy
- 32-bit silent mainboard reduces noise and offers smoother motor control
- One-touch auto filament load/unload and flexible spring steel bed speed up workflow
- High top speeds may require tuning to maintain fine-detail surface quality
- Open-frame design lacks enclosure for controlled-temperature printing
Verdict: Choose the Ender 3 V3 SE if you want an affordable, easy-to-start desktop printer that brings faster print speeds and practical automation for everyday prototyping and hobby use.
Bambu Lab P1S 3D Printer
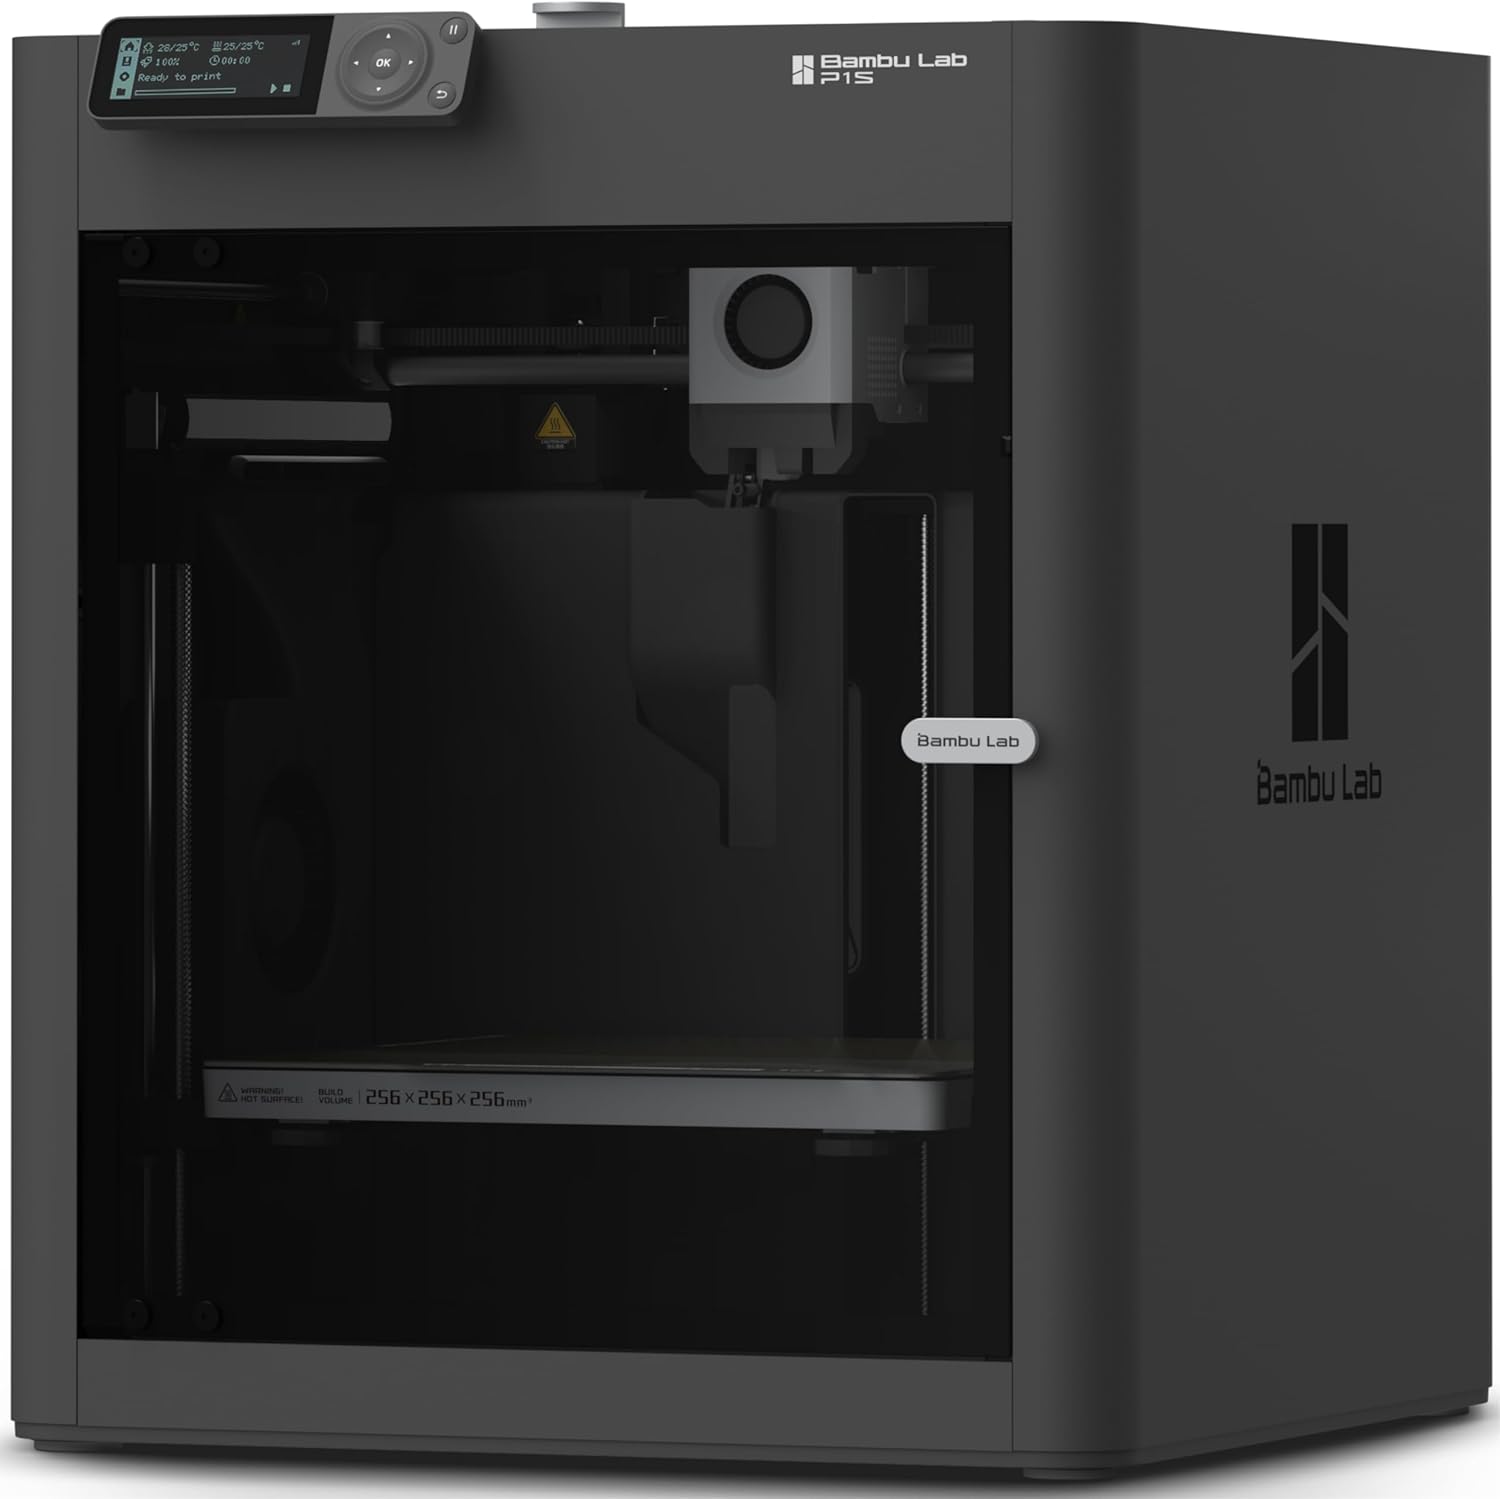
| Build Volume | 256×256×256 mm³ |
|---|---|
| Max Speed | 500 mm/s |
| Max Acceleration | 20 m/s² |
| Supported Filaments | PLA, PETG, TPU, PVA, PET, ABS, ASA (capable: PA, PC) |
The Bambu Lab P1S is a beginner-friendly enclosed CoreXY FDM printer that prioritizes speed and out-of-box usability. It ships configured for fast printing and claims up to 500 mm/s top speeds with high acceleration for rapid production of prototypes and hobby parts, while the enclosed design and support for a wide range of filaments help with consistent results on more demanding materials. Key conveniences include automatic bed leveling, a direct-drive extruder that broadens filament compatibility, and a built-in camera for time-lapse captures. Setup is straightforward and the company positions the machine to be operational in about 15 minutes, which reduces setup friction for less technical users. Practical limitations are that ultra-technical materials like carbon- or glass-filled filaments are not recommended, and reaching the highest advertised speeds requires tuned settings and appropriate part designs. For risk-averse buyers the strong factory-focused features, enclosed chassis, and automatic leveling make reliable first prints more likely, though advanced tuning is still needed for professional results.
Best for: Buyers who want a dependable, easy-to-start desktop 3D printer that delivers fast prints and consistent results with common filaments and minimal initial tinkering.
Less Ideal for: Users needing to print reinforced composite filaments or shops that require factory-certified industrial material compatibility should consider purpose-built industrial machines instead.
- Enclosed CoreXY design improves consistency with temperature-sensitive filaments
- Automatic bed leveling reduces first-time setup errors
- Direct-drive extruder expands compatible filament types including TPU and PETG
- High top speed and acceleration shorten print times for suitable models
- Built-in camera enables time-lapse monitoring and progress checks
- Not recommended for carbon or glass fiber reinforced filaments
- Top speeds require tuning and appropriate print designs to avoid quality loss
Verdict: Choose the P1S if you want a fast, enclosed CoreXY printer that reduces setup headaches and reliably prints common filaments right out of the box.
Choosing the Right 3D Printer: Key Factors to Consider
Print Accuracy and Resolution
Accuracy and resolution determine whether printed parts meet dimensional tolerances and surface requirements. Higher resolution is important for fine details, thin walls, and snap-fit features. Pay attention to XY and Z resolution specs, repeatability figures, and whether the machine uses technologies that reduce artifacts like layer lines or ringing.
For functional prototypes, accuracy affects part fit and assembly. For visual prototypes, surface finish and postprocessing requirements matter. Consider whether the machine offers calibration routines or closed-loop systems that maintain accuracy over long runs.
Material Compatibility and Chemistry
The range of materials a machine can process directly affects the applications it supports. Look for support of engineering-grade thermoplastics, specialty resins, or composite-filled materials depending on your needs. Material chemistry also influences mechanical properties, thermal resistance, and postprocessing steps.
Also consider available filament, resin, or powder suppliers and whether the platform is open or restricted. Open ecosystems provide more material choices, while closed systems may offer certified materials with predictable results. Think about health and safety requirements for certain chemistries and whether your workspace has adequate ventilation or filtration.
Build Volume, Throughput, and Footprint
Build volume sets the maximum part size and the number of parts you can nest in a single print. Throughput depends on both build volume and layer times or curing rates. A larger bed increases capacity but usually requires more floor space and sometimes more powerful environmental controls.
Match build volume to your typical part size to avoid wasted capacity or excessive part slicing. Consider how multiple smaller parts can be printed in a single run and whether the machine supports batch workflows to improve effective throughput.
Reliability, Serviceability, and Uptime
For professional use, downtime translates to missed deadlines. Evaluate a machine's track record for consistent output, availability of replacement parts, and how easy it is to perform routine servicing. Features like modular components, accessible hotend or vat assemblies, and clear diagnostic tools reduce repair time.
Also factor in firmware support and the frequency of software updates. Machines with robust remote diagnostics or active user communities often have faster problem resolution and less unexpected downtime.
Safety and Environmental Requirements
Different printing technologies have different safety profiles. Powder-based systems and some resins require enclosed systems, particulate filtration, and specific handling procedures. Thermoplastic extrusion may emit ultrafine particles or VOCs depending on the polymer.
Confirm whether your workspace can meet ventilation, temperature, and extraction needs. Proper safety measures protect users and can be necessary to comply with workplace regulations. Consider the cost and complexity of adding enclosures or extraction equipment.
Total Cost of Ownership
Beyond the sticker price, consumables, replacement parts, maintenance, and expected service intervals define the real cost of operation. Factor in material yield per part, the price and lifespan of wear parts like nozzles or build platforms, and any required proprietary consumables.
Also consider manpower costs for setup and postprocessing. Machines that reduce manual finishing or simplify material changes can lower ongoing expenses even if they cost more upfront.
Matching Printer Technology to Your Application
Different 3D printing technologies excel at different tasks. Fused filament fabrication is broadly accessible and durable for functional prototypes, while vat photopolymerization produces higher detail for visual models or dental work. Powder-based systems and selective sintering are better for end-use parts with specific mechanical needs.
Choose a technology that aligns with the mechanical, thermal, and surface requirements of your parts. Also factor in downstream steps like post-curing, sintering, or annealing that certain processes require.
- Fused filament methods: good for durable prototypes and thermoplastic testing
- Vat photopolymerization: best for high-detail parts and fine features
- Powder-based systems: chosen for functional end-use parts and complex geometries
Preparing Your Workspace and Ventilation
A professional 3D printer often requires more than a table and power. Consider ventilation, particulate filtration, and stable ambient temperature to ensure consistent output and operator safety. Enclosures and local extraction can significantly reduce exposure to fumes or powders.
Plan for storage of materials, a dedicated postprocessing area, and space for consumables and replacement parts. Proper workflow organization reduces contamination risks and speeds turnaround.
- Assess electrical requirements and dedicated circuits
- Designate areas for material storage, printing, and postprocessing
- Install appropriate local extraction or filtration if using resins or powders
Quality Control and Part Validation
Implement basic quality checks to confirm dimensional accuracy and material properties. Simple gauges, calipers, and test coupons printed regularly help detect drift. For parts that will be assembled or used in downstream processes, establish acceptance criteria and sampling plans.
Document print settings and material batches for traceability. That practice helps identify sources of variation and supports repeatable production.
- Print calibration artifacts weekly to monitor geometry
- Track material lot numbers and curing schedules
- Use go/no-go fixtures for quick functional checks
Workflow Automation and Software Integration
Software plays a central role in efficiency. Look for systems with reliable slicing tools, remote monitoring, and queue management if you will run multiple jobs. Integration with CAD and version control simplifies iterations and reduces setup errors.
Automation features such as automatic bed leveling, filament handling, and job queuing can reduce manual intervention and increase throughput for repeated production runs.
- Prioritize machines with proven workflow tools and remote status reporting
- Consider API or networked options for fleet management
- Seek software that logs job parameters for quality traceability
Postprocessing and Finishing Considerations
Postprocessing varies widely by technology and materially affects turnaround time. Resin prints often need washing and UV postcure, while thermoplastic parts may need support removal and surface smoothing. Factor in the labor and equipment required to reach final part quality.
If appearance matters, plan for sanding, painting, or vapor smoothing. For functional parts, consider any heat treatments or secondary machining needed to meet specifications.
- Estimate postprocessing time per part when planning capacity
- Allocate space and equipment for washing, curing, or thermal processing
- Evaluate how much manual finishing is acceptable for your workflow
How We Chose the Best 3D Printer
We prioritized machines that offer a practical balance of high-resolution output, material compatibility, and reliability for prototyping and small-batch manufacturing. Key evaluation criteria included dimensional accuracy and surface finish, which determine whether parts meet fit-and-function requirements; material ecosystem and chemistry support, since different applications need specific resins, filaments, or powders; and build volume relative to footprint so you can size a machine to your workspace without sacrificing capacity. We also considered long-term operating cost factors such as consumable yield and part throughput, plus the availability of meaningful service, firmware updates, and user-facing controls that reduce downtime. Ease of maintenance and repeatable calibration procedures were weighted heavily for buyers who need consistent results day after day. Excluded from consideration were hobby-grade hobbyist machines lacking robust material certifications or insufficient safety features for continuous professional use. The final shortlist reflects machines that meet minimum thresholds in accuracy, material versatility, and maintainability while staying within the specified budget.
Our full evaluation process is outlined in our review methodology.
FAQ
What maintenance does a professional 3D printer typically require?
Routine maintenance often includes bed leveling checks, nozzle or vat inspections, lubrication of motion components, and replacement of wear parts. Frequency depends on usage intensity and material; high-throughput environments require more frequent servicing. Following the manufacturer maintenance schedule helps prevent unexpected downtime.
How do I choose the right build volume for my projects?
Base the decision on the largest part you expect to print and whether you plan to batch multiple parts. Oversized volume wastes space and energy, while too small a bed forces you to split designs. Consider nesting efficiency and how often you will use the full build area.
Are enclosed printers necessary for professional use?
Enclosures improve thermal stability and can be required for certain materials to achieve consistent results. They also provide a safer environment when printing resins or high-temperature plastics. For powder-based or resin systems, enclosures and extraction are often recommended.
How important is material openness versus certified supplies?
Open material platforms give you more options and potentially lower material costs, while certified supplies reduce the risk of process variability because they are tested with the machine. The best choice depends on whether you prioritize flexibility or guaranteed, repeatable results.
What should I budget for consumables and spare parts?
Consumable budgets vary widely by technology and throughput. Expect recurring costs for materials, replaceable wear parts, and filtration media. Plan for spare parts that affect uptime, such as build surfaces and motion components, especially if you rely on the printer for time-sensitive work.
Final Verdict
Focus on the capabilities that map directly to your parts and workflow. Prioritize printers that deliver the necessary dimensional accuracy, support the materials you need, and can be serviced quickly to minimize downtime. Balance build volume against floor space and plan for postprocessing and safety requirements. The right choice depends on tradeoffs between throughput, material flexibility, and operating cost. By matching technology and features to your use case, you can confidently select a machine that meets performance needs within the stated budget.