
Note: This article contains affiliate links. If you click on these links and make a purchase, we may earn a small commission at no extra cost to you. This helps support our research and content. Read our full affiliate disclosure here.
Picking the right 3D printer under $3,000 matters because this price band covers machines capable of desktop production, detailed prototyping, and functional parts. You want a printer that hits a balance between reliable hardware, fine resolution, and materials versatility so you can complete projects without constant tinkering. This guide shortlists the top machines in the under-$3,000 tier and explains the evaluation criteria used to select them, including print precision, material support, and long-term dependability. Read on to see which features matter most for consistent results and which tradeoffs are typical at this level.
Top Picks at a Glance
| Best Overall The best all-around choice for most situations | Bambu Lab P2S Combo |  |
| Best Quality Built to a higher standard if you want something more solid | Original Prusa MK4S |  |
| Best Value The sweet spot between price and what you get | Anycubic Kobra X |  |
| Best Budget The cheapest option that still gets the job done reliably | SainSmart PrintyGo PrintyGo |  |
| Top Rated A top-rated pick with lots of positive feedback | Snapmaker U1 3D Printer |  |
| Most Popular A crowd favorite that many people choose with confidence | Creality Ender 3 V3 SE |  |
| Best Seller A high-volume bestseller chosen again and again | Bambu Lab P1S 3D Printer |  |
Bambu Lab P2S Combo

| Print speed | up to 600 mm/s |
|---|---|
| Filament drying | up to 65 °C |
| Extruder | PMSM servo extruder |
| Cooling | Adaptive Airflow System |
The Bambu Lab P2S Combo combines a high-speed CoreXY P2S printer with the AMS 2 Pro feeder to deliver fast, accurate, and multi-color capable prints in a single package. The P2S core features a PMSM servo extruder, Active Flowrate Compensation, and an Adaptive Airflow System that together let the machine hit very high travel speeds while keeping layer quality and overhangs clean. The AMS 2 Pro adds automatic filament drying up to 65°C, multi-spool handling, and seamless color/material switching for multi-color or multi-material projects. Setup is straightforward and the package emphasizes a polished workflow through Bambu Studio and MakerWorld, with AI failure detection, quick-swap nozzles, and automatic calibration that reduce fiddling and downtime. Practical benefits include markedly faster print turnaround compared with typical desktop printers and the convenience of integrated drying and filament management for longer sessions. Trade-offs include the Combo's greater complexity compared with single-extruder machines and the fact that multi-color printing requires the AMS unit, not the base P2S alone.
Best for: Buyers who want a fast, production-capable desktop printer with integrated multi-spool handling and streamlined software workflow for frequent prototyping and multi-color projects.
Less Ideal for: Users seeking the simplest, lowest-maintenance entry-level printer or those who only need occasional single-color hobby prints.
- Very high print speeds up to 600 mm/s while maintaining accuracy
- Built-in AI failure detection, automatic calibration, and quick-swap nozzles simplify setup and reduce failed prints
- AMS 2 Pro supports multi-color and multi-material printing with integrated filament drying up to 65°C
- Adaptive Airflow System balances cooling and chamber temperature for better overhangs and engineering materials
- Multi-color capability depends on purchasing and using the AMS 2 Pro rather than the base printer
- Higher system complexity increases learning curve and maintenance compared with simpler single-extruder printers
Verdict: Choose the P2S Combo if you want one of the fastest desktop 3D printing workflows with integrated multi-color feeding and drying for serious prototyping under $3,000.
Original Prusa MK4S

| Print volume | 9.84 x 8.3 x 8.6 in |
|---|---|
| Included filament | 1 kg Prusament PLA Galaxy Black |
| Item model number | MK4S-COM-PEI |
The MK4S targets users who need faster desktop FDM printing without sacrificing surface quality or dimensional accuracy. It ships fully assembled and includes a 1 kg spool of Prusament PLA so you can start printing quickly. Key features such as input shaping reduce ringing and vibration at higher speeds, which helps keep edges crisp when you push throughput. Prusa's ecosystem and open-source design mean firmware updates and hardware upgrades are available as your needs grow, and the machine is built for consistent day-to-day operation in a studio or small production setting. Practical benefits include a respectable build volume for desktop work and professional-grade reliability backed by lifetime technical assistance. Limitations are typical for FDM machines: achieving the best detail still depends on slicer tuning and material choice, and the printer's capabilities are focused on PLA/standard filaments rather than specialized industrial materials out of the box.
Best for: Buyers who prioritize faster, repeatable FDM performance and want a reliable, upgradeable desktop printer that works well for prototyping and small-batch production.
Less Ideal for: Users who need out-of-the-box printing with exotic engineering plastics or those seeking industrial-scale build volumes should consider other specialized machines.
- Fully assembled out of the box for fast setup and first prints
- Input shaping reduces ringing for cleaner edges at higher speeds
- Built on an open-source, upgradeable platform with ongoing firmware support
- Included 1 kg Prusament PLA spool lets you start printing immediately
- Engineered for repeatable day-to-day reliability in workshop or studio use
- Not optimized for specialized high-temperature or engineering-grade materials without additional upgrades
- Best surface detail still relies on proper slicer settings and user tuning
Verdict: For makers focused on speed and consistent, professional-looking FDM prints, the Prusa MK4S delivers an immediately usable, upgradeable platform built for daily production.
Anycubic Kobra X

| Print volume | 260×260×260 mm³ |
|---|---|
| Supported materials | PLA, PETG, TPU, PVA, ABS |
| Max nozzle temperature | 300C |
| Multicolor | Native 4-color, expandable to 19 |
| Onboard camera | 720P with AI detection |
The Anycubic Kobra X is a beginner-friendly yet capable FDM machine that focuses on speed, multicolor printing, and ease of use. It ships mostly preassembled, uses LeviQ 3.0 for 49-point automatic bed leveling, and includes filament run-out and power-loss recovery to protect long prints. Native multicolor hardware supports up to four colors out of the box and can be expanded to a much larger color count with additional ACE 2 Pro hubs, while the ACE GEN2 system reduces filament change time for smoother color swaps. High advertised speeds (up to 600 mm/s) and vibration compensation make it faster than typical hobby printers, and a 720p camera with AI spaghetti and object detection helps catch problems early. Practical limits include the modest 260 mm build cube and reliance on add-on filament hubs for extensive multicolor work, and very high top speeds may require tuning for best surface quality. For a straightforward, mostly plug-and-play printer that balances speed, multicolor capability, and safety features, the Kobra X is a sensible choice.
Best for: Buyers who want a fast, mostly plug-and-play FDM printer that balances easy setup and multicolor experimentation without needing a workshop-level machine.
Less Ideal for: Users who need large single-part prints, turnkey industrial-grade color printing out of the box, or those who prefer absolute maximum surface fidelity at top speeds.
- LeviQ 3.0 automatic 49-point leveling reduces setup and first-layer fuss.
- Native multicolor printing (4 colors) with expandability to many more via ACE hubs.
- Filament run-out, power-loss recovery, and AI camera detection protect long prints.
- High-speed hardware and vibration compensation shorten print times compared with typical hobby printers.
- Build volume is limited to 260×260×260 mm, which restricts large single-part prints.
- Full multicolor capability requires purchasing and installing additional ACE 2 Pro hubs.
- Maximum advertised speeds may require tuning to maintain fine surface detail.
Verdict: The Kobra X is a fast, user-friendly FDM printer ideal for hobbyists who want reliable plug-and-play multicolor printing and smart safeguards for long runs.
SainSmart PrintyGo PrintyGo
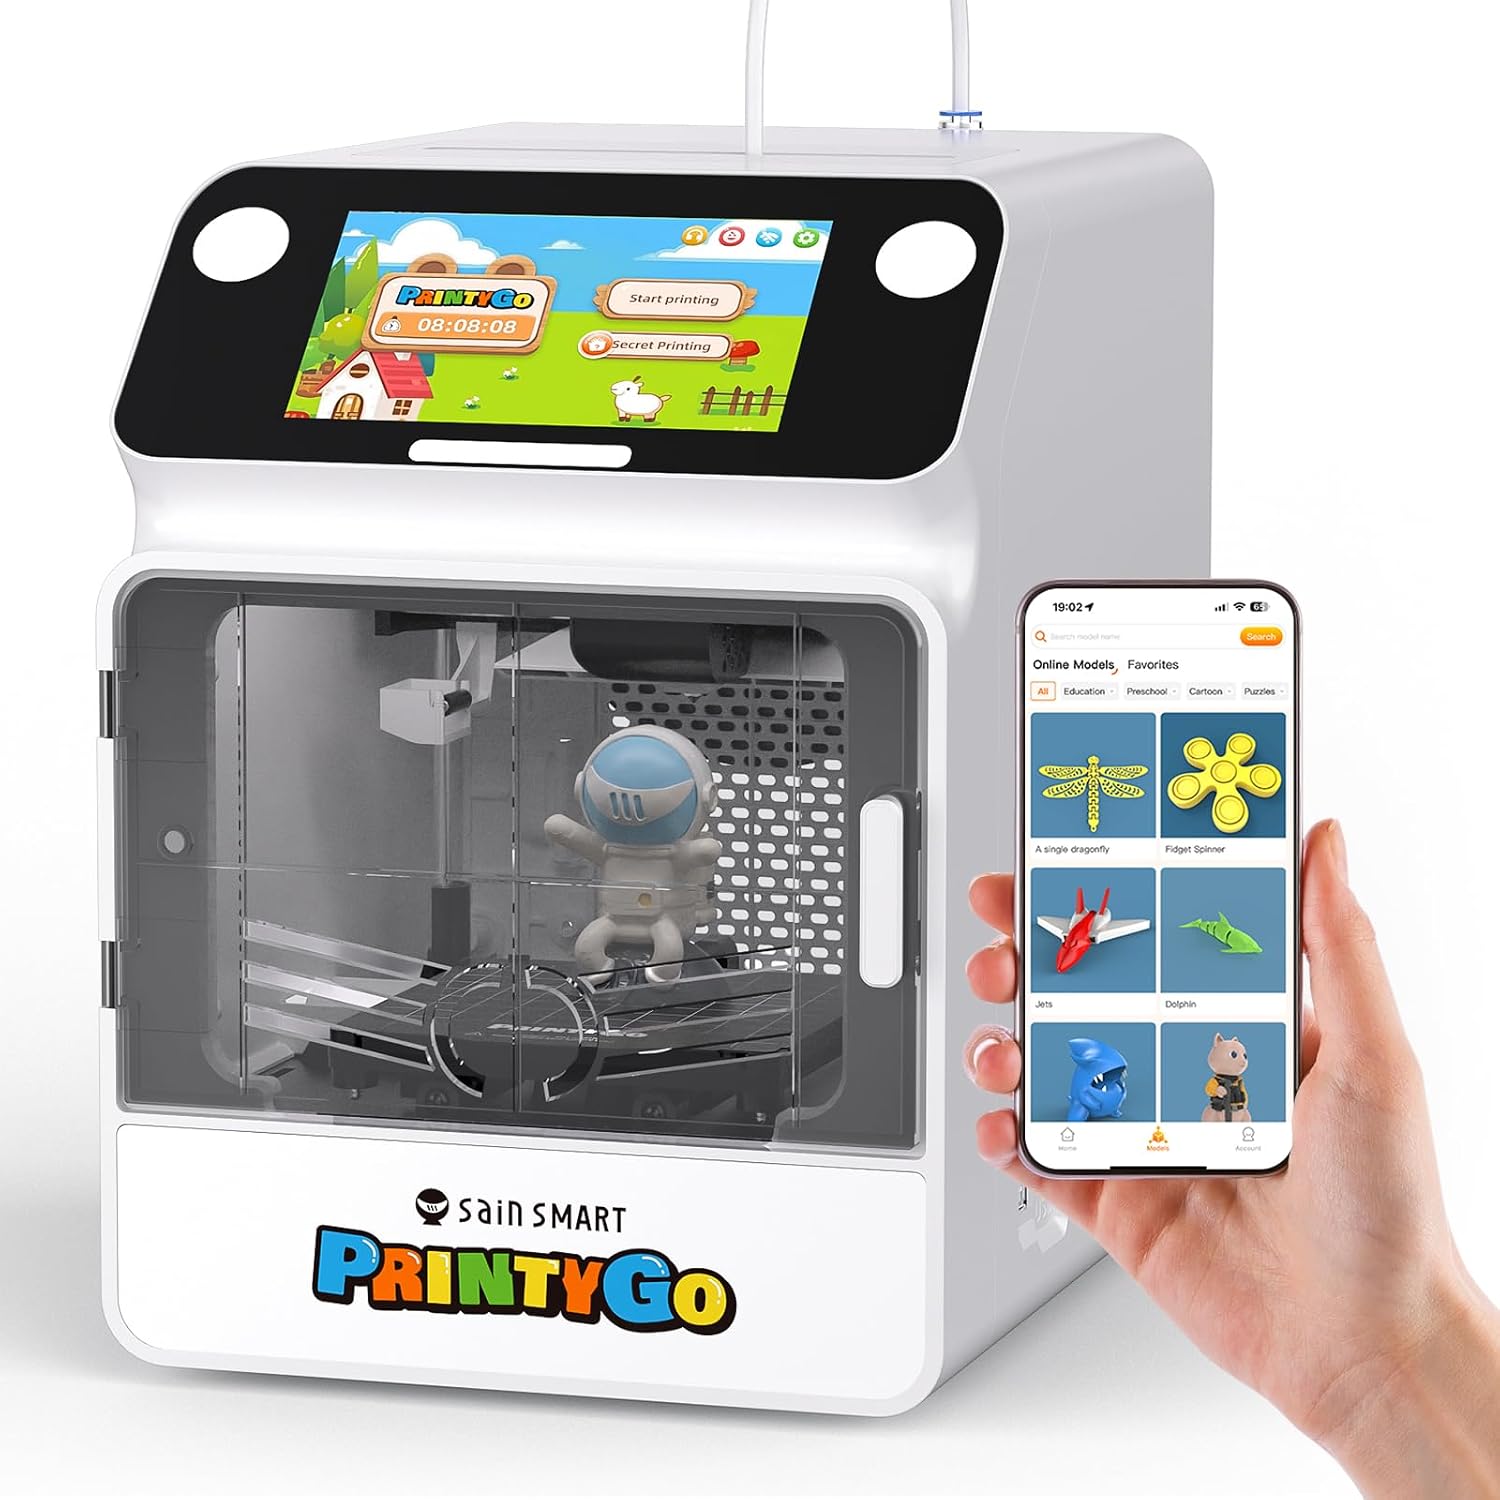
| Max build volume | 100×100×90mm |
|---|---|
| Filament compatibility | PLA, PLA+, PETG |
| Control | 5-inch touchscreen, Wi-Fi/app, USB drive |
| Included spool | 250g White PLA filament |
The SainSmart PrintyGo is a small, ready-to-run 3D printer aimed at kids and beginners that prioritizes safety and ease of use. It ships pre-assembled and offers a 5-inch touchscreen and optional Wi-Fi/app control so children can browse and start prints without a computer, and the companion app and USB support give parents flexible ways to load models. The fully enclosed design, child lock that pauses printing when the door opens, and non-toxic PLA compatibility make it suitable for supervised classrooms or home use. PrintyGo includes a library of 1,500+ models and a compact 100×100×90mm build volume that is fine for toys, STEM projects, and small figures, while a 600mm/s rated speed and auto-leveling aim to reduce setup fiddling. The unit is limited by its small build area and the recommendation to avoid TPU, so it is not for large prints or advanced flexible materials, and experienced hobbyists may find the feature set basic. For buyers focused on an inexpensive, safe entry point for kids, it delivers a low-barrier first experience.
Best for: Parents, teachers, or gift buyers seeking an affordable, low-effort introduction to 3D printing for children or classroom STEM activities who prioritize safety and simplicity over large-scale printing.
Less Ideal for: Hobbyists or makers who need a larger build volume, full material versatility, or advanced tuning and modification options.
- Pre-assembled and easy to use with a responsive 5-inch touchscreen for standalone printing
- Fully enclosed chassis with child lock and automatic pause for safer kid use
- Large built-in library of 1,500+ ready-to-print models for quick projects
- Supports PLA, PLA+, and PETG and includes necessary starter accessories in the box
- Very small maximum build volume limits print size
- Not recommended for TPU or advanced flexible filaments
Verdict: A budget-friendly, kid-safe starter 3D printer that lets children and classrooms print immediately with minimal setup.
Snapmaker U1 3D Printer

| Build volume | 270 × 270 × 270 mm |
|---|---|
| Max print speed | 500 mm/s |
| Toolheads | 4 independent toolheads with SnapSwap |
| Compatible materials | PLA, PVA, TPU, PETG, PCTG, ABS, ASA, PA, PC |
The Snapmaker U1 is a CoreXY desktop 3D printer built around a four-toolhead SnapSwap system that lets you change preloaded, preheated toolheads in about five seconds. It is designed for true multi-color and mixed-material prints without long purge cycles, so you can combine rigid plastics, flexible TPU blends, and water-soluble supports in a single job while cutting filament waste. The machine uses kinematic steel-ball couplings to lock heads precisely, automatic toolhead offset calibration and vibration compensation to reduce setup fiddling, and a carbon-fiber X-axis in a rigid frame to support speeds up to 500 mm/s across a 270 × 270 × 270 mm build volume. Snapmaker's Orca slicer, touchscreen, app control, and AI print monitoring simplify workflow for beginners and pros alike. The practical trade-offs are its 59 lb weight and desktop footprint that demand a stable workspace, and the multi-head architecture adds mechanical complexity that may require familiarity with routine maintenance in a high-use shop. For reliability-focused buyers seeking faster, lower-waste multi-material capability, the U1 targets production-style workflows rather than ultra-minimalist hobby setups.
Best for: Buyers who prioritize reliable, repeatable multi-color and mixed-material production and want to minimize material waste while increasing throughput in a small workshop or maker business.
Less Ideal for: Casual hobbyists who need a lightweight, ultra-simple printer for occasional single-material prints or users who prefer the lowest possible maintenance and smallest footprint.
- Four independent preloaded, preheated toolheads with a 5-second SnapSwap change for fast multi-color/multi-material runs
- Significant reduction in filament waste compared with purge-based filament changers
- Automatic toolhead offset calibration, vibration compensation, and extrusion tuning to reduce manual adjustments
- Rigid CoreXY chassis with carbon-fiber X-axis enabling high-speed printing up to 500 mm/s
- Heavier and larger desktop footprint that needs a stable, dedicated workspace
- More mechanical complexity than single-nozzle printers which may require regular maintenance
Verdict: Choose the U1 if you need fast, low-waste multi-color and multi-material printing with automated calibration for consistent, production-ready results.
Creality Ender 3 V3 SE

| Printing speed | up to 250 mm/s |
|---|---|
| Mainboard | 32-bit silent mainboard |
| Extruder type | Sprite direct extruder |
| Build plate | PC spring steel flexible plate |
The Creality Ender 3 V3 SE is an entry-level to midrange FDM printer built for quick setup and faster print turnaround. It ships partially assembled and Creality says it can be put together in about 20 minutes, with CR Touch auto bed leveling and a strain sensor for automatic Z-offset so first-layer tuning is much simpler for new users. The Sprite direct extruder handles PLA, PETG and flexible filaments more reliably than a remote Bowden feed and the auto filament load/unload makes filament changes straightforward. A dual Z-axis with timing belt and dual Y-axis linear shafts improves vertical stability for taller prints, and a 32-bit silent mainboard reduces operational noise. The PC spring steel build plate sticks well during printing and lets you pop parts off by flexing the sheet. Limitations include a modest build volume compared with larger machines and that advanced users may still upgrade hotend, firmware, or cooling for very high-detail or high-temperature materials. Still, it packages automated leveling, a reliable direct drive, and faster rated speeds into an easy-to-use platform.
Best for: Buyers who want a reliable, largely plug-and-play 3D printer that reduces setup friction and handles common filaments well while leaning on proven community-backed hardware.
Less Ideal for: Professionals needing very large build volume or users who require out-of-the-box high-temperature printing for advanced engineering plastics.
- Auto bed leveling with CR Touch and strain-sensor assisted Z-offset simplifies first-layer setup
- Sprite direct extruder supports PLA, PETG and TPU more reliably than Bowden systems
- Auto filament load and unload streamlines filament swaps
- 32-bit silent mainboard reduces noise during prints
- Spring steel build plate is flexible for easy part removal
- Build volume is relatively compact compared with larger desktop printers
- Advanced users may want to upgrade hotend or cooling for specialty filaments
Verdict: Choose the Ender 3 V3 SE if you want a compact, beginner-friendly printer that combines auto-leveling and a reliable direct extruder for faster, lower-friction printing.
Bambu Lab P1S 3D Printer
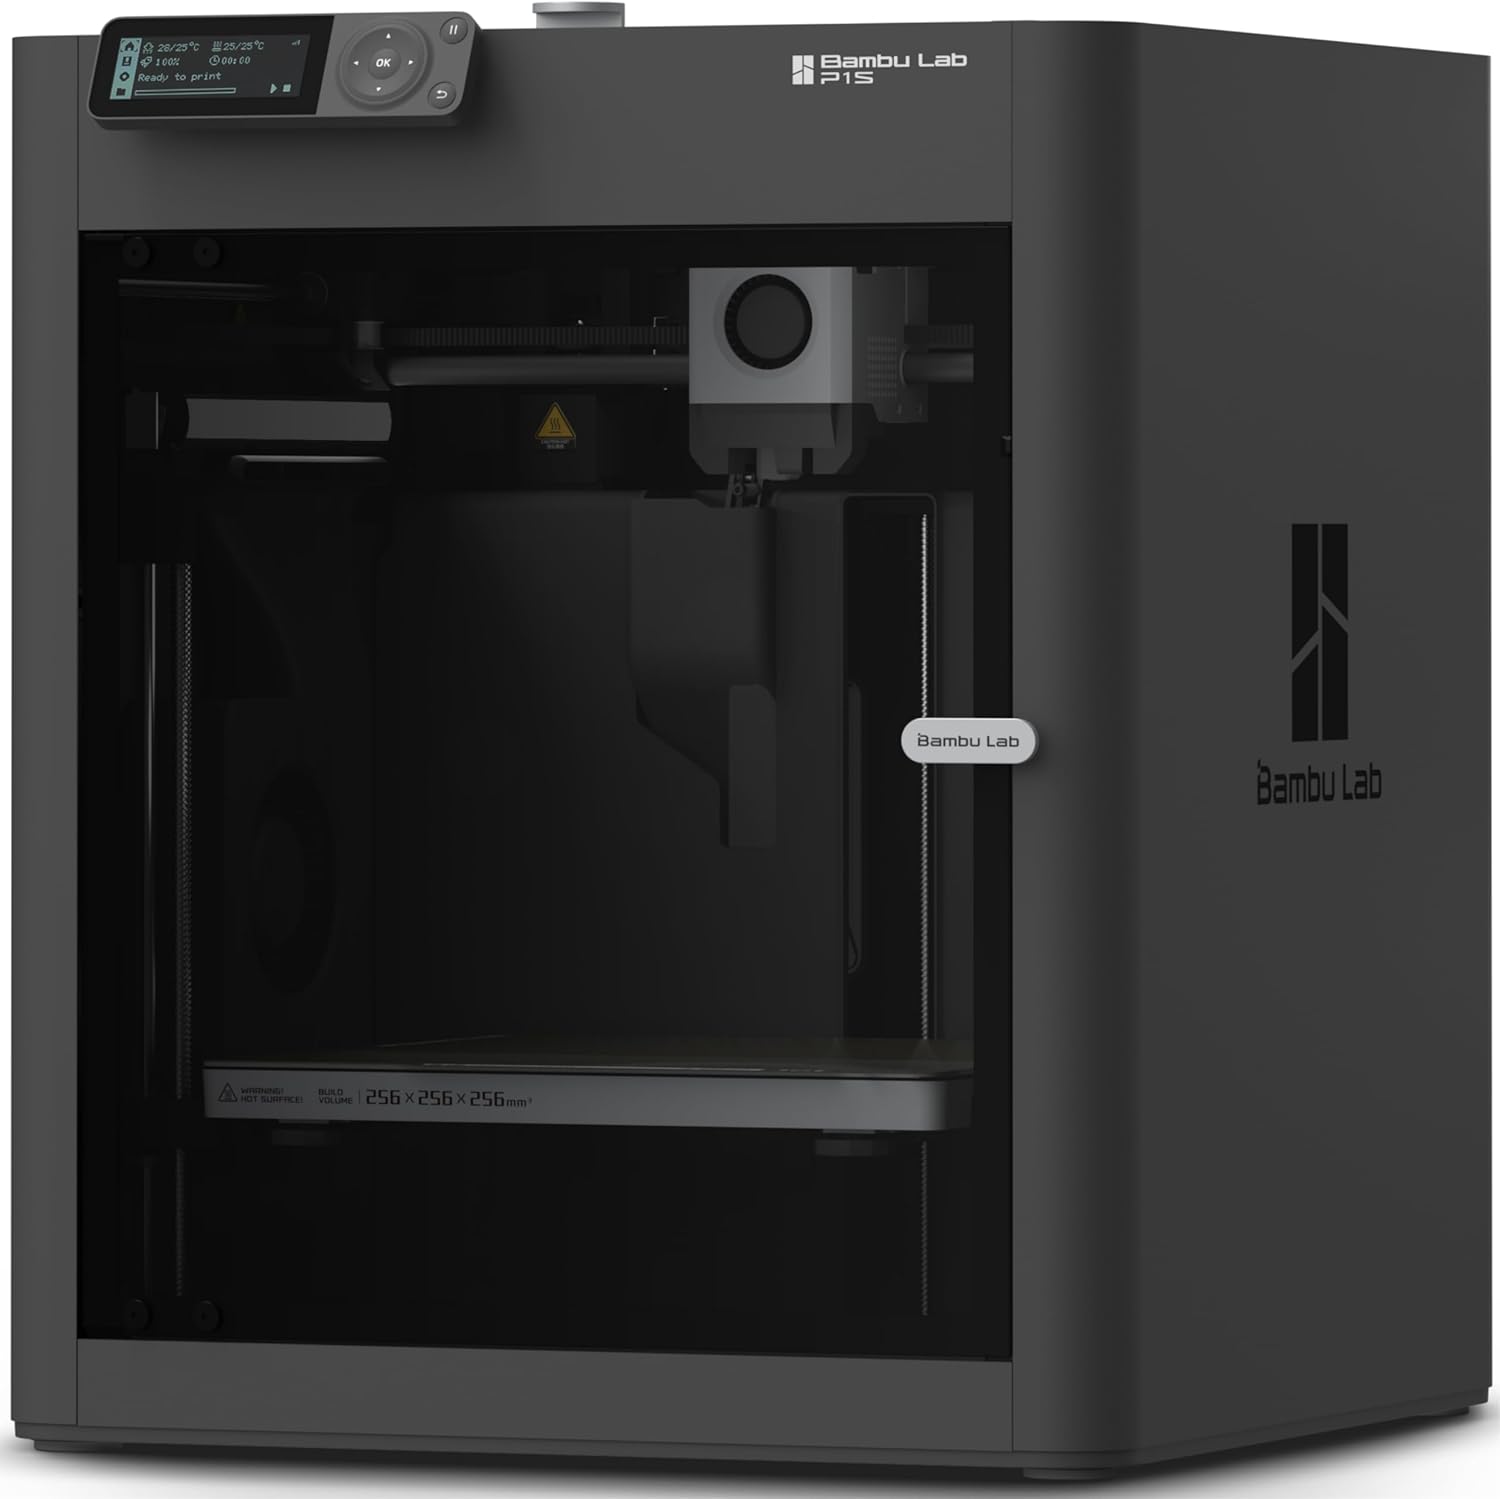
| Build Volume | 256×256×256 mm³ |
|---|---|
| Max Speed | 500 mm/s |
| Max Acceleration | 20 m/s² |
| Supported Filaments | PLA, PETG, TPU, PVA, PET, ABS, ASA |
The Bambu Lab P1S is a classroom- and workshop-friendly enclosed CoreXY FDM printer that aims to make high-speed, reliable printing accessible to nonexperts. It ships ready-to-use and pairs with Bambu Lab's MakerWorld model library and ecosystem for quick start and slice workflows, while features such as automatic bed leveling and a direct-drive extruder broaden filament compatibility beyond simple PLA. The machine is built for speed, with manufacturer-listed top speeds up to 500 mm/s and very high acceleration, which cuts print times dramatically on medium-size parts inside its 256×256×256 mm build volume. The enclosed body and support for more advanced filaments like PETG, TPU, ABS and ASA improve print stability and part quality. Practical limits include the learning curve for high-speed tuning and the note that highly filled filaments such as carbon- or glass-reinforced materials are not recommended, so power users who need those specialties should look elsewhere. For buyers who prefer a largely turn-key experience backed by automation and a contained build chamber, the P1S balances speed and quality well for general prototyping and hobby work.
Best for: Buyers who want a mostly turn-key, low-friction 3D printing experience that emphasizes speed and reliable results for prototyping, hobby parts, and small production runs.
Less Ideal for: Those who need to print heavily filled composites or who prefer open-frame experimental rigs for custom modifications should consider other systems.
- Enclosed CoreXY design improves thermal stability for advanced filaments
- Automatic bed leveling reduces setup time and failed first layers
- Direct-drive extruder increases compatibility with flexible and specialty filaments
- High top speed and acceleration significantly reduce print times
- 256×256×256 mm build volume supports medium-size functional parts
- Manufacturer advises against carbon or glass fiber reinforced filaments
- Very high-speed capability may require tuning to avoid artifacts on some prints
Verdict: If you want a fast, enclosed, largely ready-to-run 3D printer that reduces setup friction while supporting a broad range of common filaments, the Bambu Lab P1S is a smart choice.
Choosing the Right 3D Printer: Key Factors to Consider
Print Precision and Accuracy
Resolution specs and mechanical tolerances drive how well a printer reproduces fine details and critical dimensions. For parts that must fit together or maintain specific tolerances, look beyond nominal layer height to factors like frame rigidity, rail type, and stepper motor control. Consistent extrusion and stable temperature control also reduce layer shifting and dimensional variation.
A printer with tight tolerances will save time on finishing and iteration, so prioritize machines that demonstrate repeatable accuracy across multiple prints and geometries.
Materials Compatibility and Extruder Design
The range of supported materials determines what you can make: general-purpose PLA, tougher PETG and ABS, flexible TPU, or engineering-grade nylons and composites. Extruder architecture matters for abrasive or flexible filaments; hardened nozzles and direct-drive or high-torque feeders reduce feed issues. Heated enclosures and high-temperature hotends expand your material choices.
Consider whether you need multi-material capability or dry-box filament handling. Machines with modular hotend systems or easy nozzle swaps offer more future flexibility as your projects evolve.
Build Volume and Bed Stability
Build volume dictates maximum part size and how many parts you can batch in one run. However, a larger build area only helps if the bed and gantry remain stable; poor rigidity leads to inconsistent layer alignment across larger prints. Look for flat, well-supported beds, reliable leveling systems, and sturdy Z-axis designs to maintain uniformity.
If you plan to scale production, consider how the machine handles thermal expansion and long-duration prints that stress both the mechanics and the motion control system.
Reliability and Long-Term Maintenance
A machine that prints well on day one but fails frequently becomes a time sink. Evaluate common failure modes such as nozzle clogs, belt wear, and Z-wobble, and whether the design makes routine maintenance straightforward. Accessible replacement parts, clear service procedures, and conservative component selection improve uptime.
Also account for firmware stability and community or manufacturer support that helps diagnose issues quickly. Durable cooling fans, quality bearings, and well-routed wiring reduce failure risk over thousands of print hours.
Software Ecosystem and Workflow
Slicing and printer control software shape daily productivity. A stable slicer with reliable presets saves trial-and-error time, while advanced features like adaptive slicing, variable layer height, and integrated supports can improve final results. Compatibility with common file formats and networked printing options influences collaborative workflows.
Consider whether the machine supports third-party slicers, remote monitoring, or USB and network transfer methods that fit your workshop habits. A coherent software stack reduces setup friction and speeds iterations.
Safety Features and Enclosure Design
Safety matters for both home and small-shop environments. Enclosures help maintain consistent print temperatures, reduce warping for high-temp materials, and contain fumes. Look for machines with thermal protection, covered electronics, and clear ventilation strategies.
Good access panels and interlocks simplify part removal and maintenance while minimizing accidental contact with hot surfaces. For materials that emit odors or particulates, plan for filtration or external ventilation options.
Choosing the Right Build Volume
Think about the parts you will print most often. If you mainly produce small functional prototypes, a compact footprint with a precise motion system is usually better than a large but flexible bed that sacrifices rigidity. For batch runs or single large parts, prioritize a larger, well-supported bed and a motion system rated for extended prints.
Also consider whether you want to print multiple parts at once. Stacking small items across the bed increases throughput but requires consistent bed leveling and uniform adhesion across the surface.
- Match bed size to typical part dimensions to avoid wasted build volume.
- Look for reinforced frames and supported bed mounts on larger-format printers.
- Check whether the machine supports multiple independent print zones or partitions for parallel jobs.
Bed Adhesion Methods and Surface Choices
Proper first-layer adhesion is one of the most common determinants of print success. Different machines use textured PEI sheets, glass, removable magnetic plates, or specialized build surfaces. The ideal surface depends on filament type and whether you prefer to remove parts cold or after heating.
Consider how easy the surface is to replace and whether it requires periodic re-leveling or frequent cleaning. Some surfaces provide excellent adhesion for certain materials but can be difficult to release parts from without tools.
- PEI sheets are low-maintenance for many filaments but can wear over time.
- Glass beds give a flat reference plane and are easy to clean but may need adhesive aids for some filaments.
- Magnetic or removable build plates speed part removal and simplify surface swaps.
Heated Enclosures and High-Temperature Printing
An enclosed build chamber is important if you plan to print engineering plastics prone to warping, such as ABS or nylon blends. Enclosures keep ambient temperatures stable, reducing layer delamination and improving interlayer bonding for high-temp resins or filaments.
If high-temperature printing is a priority, check that the hotend and chamber temperatures meet the material specifications and that the enclosure design allows for safe ventilation or filtration when required.
- Ensure the enclosure is firm and retains heat evenly for consistent layer adhesion.
- Look for machines that allow controlled airflow or filter options for emissions.
- Verify hotend maximum temperature and compatibility with hardened nozzles for abrasive materials.
Calibration, Leveling, and First-Layer Reliability
Automatic bed leveling and mesh compensation tools save time, but the underlying mechanical trueness still matters. Systems that combine a reliable probe with rigid mechanics tend to require fewer manual re-calibrations. Also examine whether the printer provides live Z-offset adjustments during the first layer.
Good first-layer behavior stems from a combination of correct nozzle-to-bed distance, stable extrusion, and consistent bed temperature. Machines that make these adjustments intuitive reduce failed prints and material waste.
- Prefer printers with verified probe systems and accessible manual adjustment methods.
- Check for user-friendly Z-offset controls accessible from the interface during printing.
- Look for community or manufacturer-backed calibration guides and presets.
Workshop Integration and Footprint Considerations
Beyond the machine itself, factor in power requirements, noise levels, and where you will place the printer. Some high-performance machines need dedicated ventilation or a stable bench to minimize vibration. Noise can be an important consideration for home workshops or shared spaces.
Also think about how the printer connects to your workflow. Networked printers with remote monitoring or built-in cameras help supervise long prints, while machines that rely on physical media transfers may fit offline workshops better.
- Check electrical requirements and whether dedicated circuits are recommended for long prints.
- Measure the full machine footprint including clearance for doors and service access.
- Consider peripheral needs like filament storage, post-processing stations, and spare parts storage.
How We Chose the Best 3D Printer
We focused on factors that determine real-world performance for makers, designers, and small-shop users working with a budget cap of $3,000. Primary evaluation criteria included print resolution and dimensional accuracy, build volume and platform stability, material compatibility and extruder technology, and reliability for repeated production runs. We also weighed usability elements such as calibration workflows, software ecosystem, and availability of replacement parts. Excluded from consideration were hobbyist-only desktop toys that lacked the hardware robustness or material support expected in this price tier, and industrial systems priced well above the $3,000 ceiling. Our process prioritized machines with documented consistency across multiple filament and resin types, straightforward maintenance paths, and strong thermal and mechanical design that reduce print failures. We also favored systems with accessible firmware and active communities that simplify troubleshooting and upgrades. Editorial filters ensured each shortlisted printer offered measurable advantages in at least two core dimensions—precision, materials, repeatability, or uptime—rather than relying on a single standout spec. The final list balances practical day-to-day reliability with capability for demanding prototypes and functional parts.
Our full evaluation process is outlined in our review methodology.
FAQ
What difference does a direct-drive extruder make?
Direct-drive extruders place the filament drive close to the hotend, improving control over flexible and retraction-sensitive materials. They usually provide better performance with TPU and short retraction distances but can add moving mass to the carriage, which may limit top travel speeds compared with remote-drive setups.
How important is an enclosed build chamber for printing ABS or nylon?
An enclosure significantly improves results with ABS and many nylons by stabilizing ambient temperature and reducing warping. It is not strictly necessary for all projects but is recommended when printing larger or structural parts in high-temp materials.
Can I upgrade a machine later to support higher temperatures or different nozzle types?
Many machines in this price range are designed with modularity in mind and allow hotend or nozzle upgrades, but the ease of upgrade depends on the hardware and firmware. Verify whether the platform supports higher-temperature hotends and hardened nozzles before planning abrasive or high-temp material use.
How do I judge long-term reliability from specs and reviews?
Look for robust mechanical design, quality of bearings and rails, and well-managed cable routing in photos and teardown reports. User reports about uptime, common failure modes, and replacement-part availability provide practical insight beyond raw specs.
Is larger build volume always better for productivity?
Not always. Larger build volume lets you make bigger parts or batch multiple items, but only if the machine maintains dimensional stability across the bed. For many users, a moderate bed with strong rigidity yields higher usable throughput than a large but flexible platform.
Final Verdict
When choosing a 3D printer under $3,000, prioritize the dimensions that match how you work: accuracy and repeatability for precision parts, materials flexibility if you need engineering plastics, or a stable larger bed for batch production. Expect tradeoffs between speed, rigidity, and material range, and favor systems with straightforward maintenance and a solid software workflow. Ultimately, focus on the few factors that will most affect your projects and pick the machine that minimizes common failure modes while giving the capability you need. That approach helps you get consistent results and the most value from the under-$3,000 segment.