
Note: This article contains affiliate links. If you click on these links and make a purchase, we may earn a small commission at no extra cost to you. This helps support our research and content. Read our full affiliate disclosure here.
If you are starting with filament printing, choosing the right FDM 3D printer for beginners shapes how fast you learn and the quality of parts you can make. A good beginner machine reduces setup headaches, tames common failure modes, and leaves you time to explore design and finishing rather than troubleshooting. This guide shortlists seven accessible FDM 3D printers that prioritize straightforward assembly, reliable first-layer adhesion, and decent print surfaces. We focus on machines that get new users printing quickly while offering the core features that matter for learning and small projects. Below you will find our curated picks and the evaluation criteria we used to assess ease of use, print consistency, and upgrade paths.
Top Picks at a Glance
| Best Overall The best all-around choice for most situations | FLASHFORGE Adventurer 5M |  |
| Best Quality Built to a higher standard if you want something more solid | QIDI Max4 Combo 3D Printer |  |
| Best Value The sweet spot between price and what you get | ELEGOO Neptune 3 Pro |  |
| Best Budget The cheapest option that still gets the job done reliably | Entina Tina2 Basic 3D Printer |  |
| Top Rated A top-rated pick with lots of positive feedback | Bambu Lab A1 3D Printer |  |
| Most Popular A crowd favorite that many people choose with confidence | Creality K1C 3D Printer |  |
| Best Seller A high-volume bestseller chosen again and again | Bambu Lab P1S Combo |  |
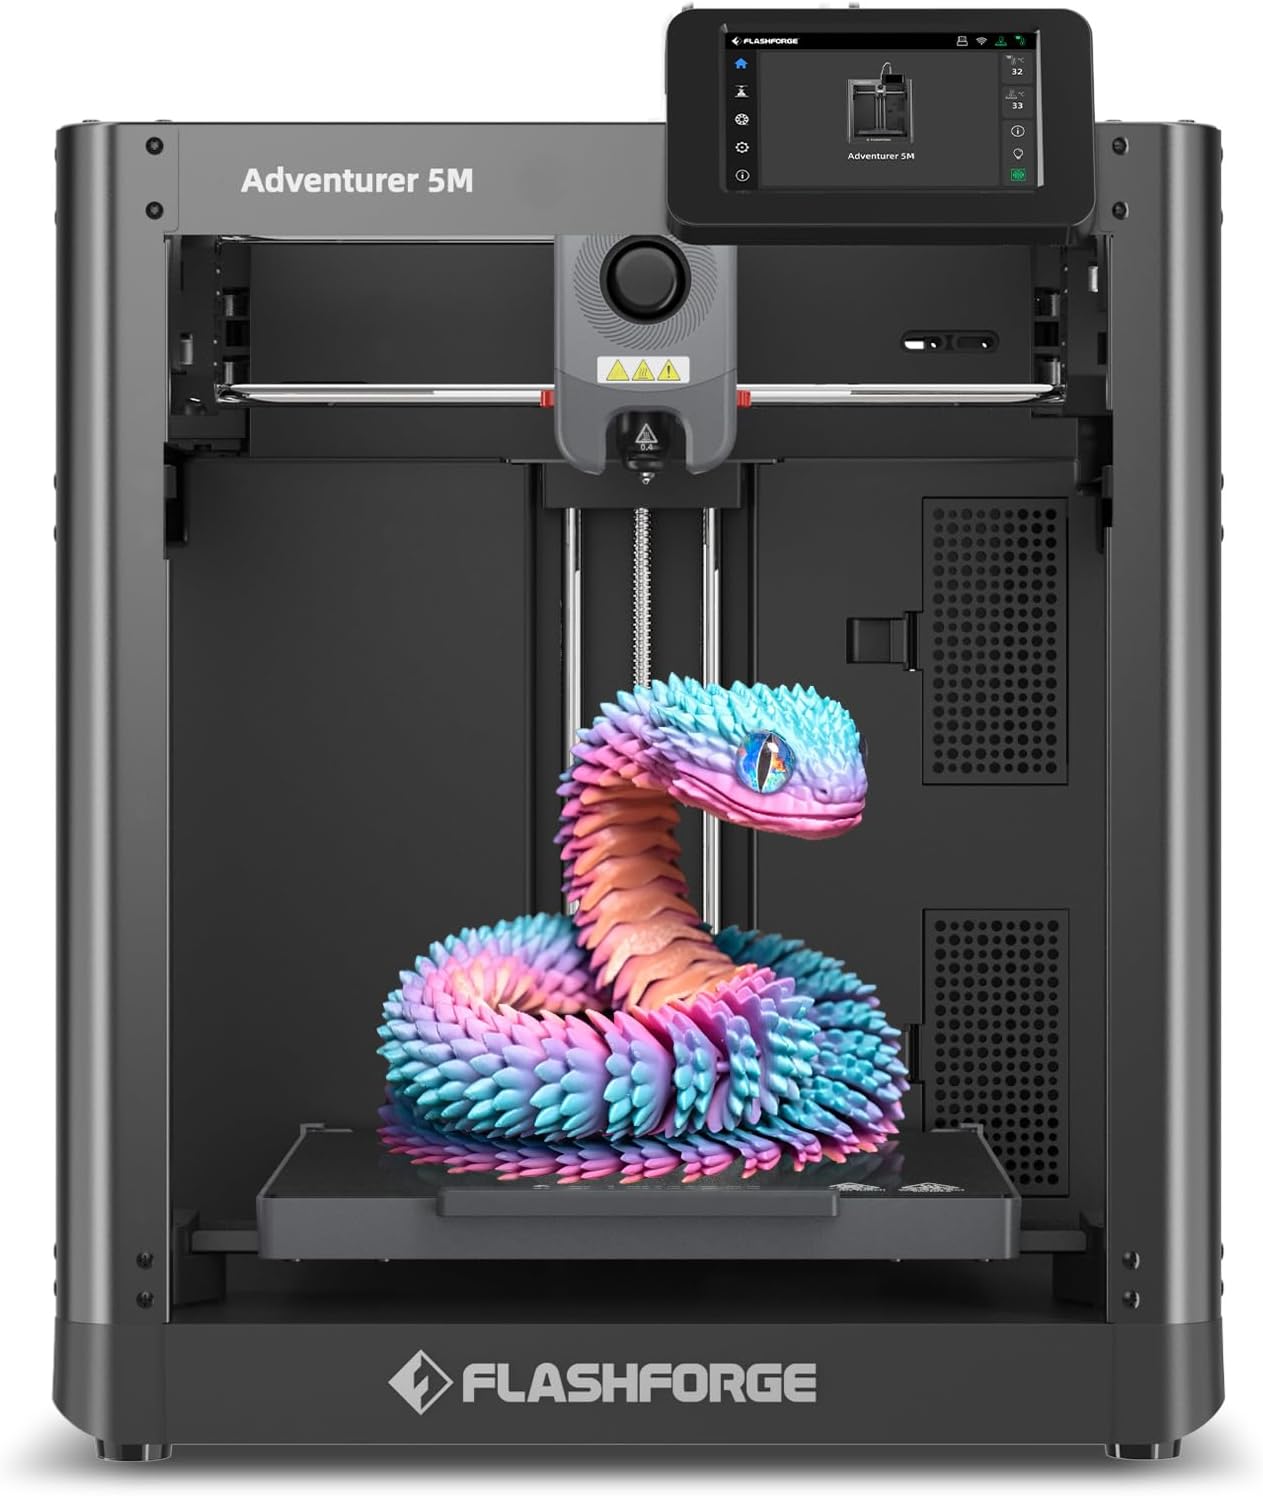
FLASHFORGE Adventurer 5M
| Build Volume | 220 x 220 x 220 mm |
|---|---|
| Extruder Max Temp | 280°C |
| Structure | All-metal Core XY |
| Platform Type | Double-Sided PEI Platform |
| Travel Speed | 600 mm/s |
The FLASHFORGE Adventurer 5M is a CoreXY FDM printer aimed at users who want a balance of speed, convenience, and respectable print quality. It automates bed leveling with a one-button system and uses a 280°C direct-drive extruder with quick 3-second nozzle swaps, which makes material changes and maintenance straightforward. The machine's 220 × 220 × 220 mm build volume and double-sided PEI platform suit common hobby and beginner projects, while a reported 600 mm/s travel speed and high acceleration target faster prototyping than typical entry-level machines. Practical features include a high-flow nozzle option, dual-fan nozzle cooling, mobile app monitoring, and vibration compensation to help with surface finish during quicker moves. Important limits are that achieving the highest speeds usually requires tuning and suitable filament, and more advanced materials or larger industrial parts will exceed its scope; occasional maintenance like nozzle cleaning remains necessary. For a first serious printer the Adventurer 5M strikes a useful middle ground between ease of use and performance.
Best for: Someone looking for a beginner-friendly but capable desktop 3D printer that balances ease of setup with faster prototyping capabilities and practical features for everyday hobby or educational projects.
Less Ideal for: Users who need large-format industrial printing, certified high-temperature polymer processing, or a no-tuning plug-and-play toy printer with minimal configurability.
- One-button automatic bed leveling removes manual calibration for easier first prints
- CoreXY all-metal structure with high travel speed and acceleration for faster prints
- 280°C direct-drive extruder and quick nozzle changes support a range of common filaments
- Double-sided PEI platform enables reliable adhesion and simple part removal
- Mobile app monitoring and vibration compensation help with remote oversight and print quality
- Max speed claims require tuning and ideal filament to reach without sacrificing print quality
- Not intended for very large industrial parts or specialized high-temperature materials
Verdict: A solid first serious FDM printer for beginners who want a balance of automated convenience and higher-speed prototyping capability.
QIDI Max4 Combo 3D Printer

| Build volume | 390×390×340 mm |
|---|---|
| Max hotend temp | 370°C |
| Chamber temp | ≤65°C |
| Max toolhead speed | ≤800 mm/s |
| Compatible materials | PLA, PETG, ABS, ASA, TPU, PA, PC, PPS-CF, CF composites |
The QIDI Max4 Combo is a fully enclosed FDM printer built around a very large 390×390×340 mm build volume and a high-temperature tool head capable of 370°C, which opens up engineering filaments like PC, Nylon, and carbon-fiber composites. It uses an actively heated chamber up to 65°C and a full-surface silicone heated bed to reduce warping on large parts, and closed-loop X/Y motors plus dual Z lead screws help keep prints dimensionally stable at higher speeds. Practical add-ons include an HD AI camera for automated failure detection, a 5-inch touch screen, and multiple networking options (Wi‑Fi, Ethernet, cloud, USB) for remote or offline printing. The printer targets heavy-duty prints and prototyping rather than simple desktop hobby tasks, so beginners will appreciate the hands-off features like auto-leveling and camera monitoring but should expect a learning curve when dialing in advanced materials and speed settings. The Polar Cooler for multi-material color work is optional and must be purchased separately, and the machine's size and power mean it is best suited to a dedicated workspace.
Best for: Buyers who prioritize performance and material flexibility and want a single machine capable of large, engineering-grade FDM prints while still offering useful automation for monitoring.
Less Ideal for: Casual hobbyists who need a compact, plug-and-play desktop printer for small PLA projects or users who lack space and ventilation for a large enclosed machine.
- Very large 390×390×340 mm build volume for single-piece large prints
- 370°C hotend and 65°C heated chamber enable printing engineering and abrasive composite filaments
- Closed-loop X/Y motors and dual Z lead screws improve dimensional accuracy and consistency at higher speeds
- Built-in AI camera and touch screen provide real-time monitoring and easier operation
- Multiple connectivity options including 2.4/5 GHz Wi‑Fi and Ethernet for remote or local control
- Polar Cooler and some accessories are sold separately
- Large footprint and weight require a dedicated, ventilated workspace
Verdict: Choose the QIDI Max4 Combo if you want a beginner-friendly entry into high-performance, large-format FDM printing with the capability to run engineering materials.
ELEGOO Neptune 3 Pro

| Build volume | 225×225×280 mm |
|---|---|
| Noise level | 47 dB |
| Extruder type | Dual-gear direct drive |
| Supported filament diameter | 1.75 mm |
The ELEGOO Neptune 3 Pro is a near-ready-to-print FDM machine that targets everyday hobby and beginner projects with a sensible build volume and simple setup. Main parts arrive pre-assembled and the included toolkit plus one-click 36-point auto bed leveling gets you to a usable first layer quickly. A dual-gear direct-drive extruder with stainless steel gears and a titanium throat reduces filament slips and clogs, while the widened heat sink and front cooling fan help with thermal control for PLA, TPU, PETG and ABS. Practical features like a filament runout sensor and power-loss resume lower failed-print risk on longer jobs, and dual Z lead screws with POM V-guide wheels give steady layer alignment. Noise levels around 47 dB and an STM32 board with silent steppers make operation unobtrusive. Limitations include a modest build area relative to larger hobby printers and a partially open frame that may need enclosure for temperature-sensitive materials, and power users may miss advanced connectivity options and full enclosure benefits. For newcomers who prioritize reliable first prints and low setup friction, it balances convenience and capability.
Best for: Buyers seeking a practical, low-friction entry into FDM printing who want reliable first prints and sensible safety features without spending on high-end enclosed systems.
Less Ideal for: Users who need large-format prints, strict temperature-controlled enclosures for advanced materials, or advanced networked printer features should consider different models.
- One-click 36-point auto bed leveling reduces manual fiddling for a good first layer
- Dual-gear direct-drive extruder with stainless steel gears improves filament feeding and lowers clogs
- Filament runout sensor and power-loss resume reduce failed prints on longer jobs
- Dual lead screws and POM V-guide wheels provide stable Z-axis movement and consistent layer registration
- Quiet operation around 47 dB suitable for home or small workshop use
- Open-frame design and modest build volume may limit printing large or temperature-sensitive parts
- No mention of advanced wireless connectivity or touchscreen ecosystem integration
Verdict: A beginner-focused FDM printer that prioritizes reliable first prints and low setup effort through auto leveling and a robust direct-drive extruder.
Entina Tina2 Basic 3D Printer

| Build volume | 100 x 105 x 100 mm |
|---|---|
| Display | 2.4" LCD |
| Print technology | FDM |
| Connectivity | MicroSD/TF card (offline) |
The Entina Tina2 Basic is a small, fully assembled FDM 3D printer aimed at first-time users and classroom use. It arrives ready to print with a 2.4" LCD, included TF card with test models and slicing software, and one-click features like auto bed leveling and a magnetic removable build plate for easy part removal. The machine uses a semi-enclosed mini frame, dual Z-axis rails for steadier, higher-detail movement, and a simple knob/button interface and one-button filament in/out that lower the learning curve. It supports resume-after-power-loss and is open source so you can try different slicers as you learn. Practical limits are the tiny 100 x 105 x 100 mm build volume and lack of Wi-Fi, so larger projects or remote printing workflows are not possible. Expect basic filament compatibility and occasional nozzle clogs typical of budget FDM printers, but the Tina2 is convenient for classroom demos, quick hobby prints, and learning fundamentals without a complex setup.
Best for: Buyers who want an inexpensive, turn-key first 3D printer for learning, classroom demos, or quick small hobby projects and prefer something that works without complex assembly.
Less Ideal for: Users who need to print large parts, run remote or networked print queues, or require professional-grade print speeds and advanced features.
- Fully assembled and easy out-of-the-box setup for beginners
- Auto bed leveling and magnetic removable build plate simplify printing and part removal
- Dual Z-axis rails improve stability and print detail for a mini printer
- Includes TF card with test models and slicer software and supports resume-after-power-loss
- Open-source compatibility lets users experiment with different slicers and settings
- Very small build volume limits project size
- No Wi‑Fi or network printing; prints must be loaded from a TF card
Verdict: A compact, beginner-friendly FDM printer that gets beginners printing quickly without assembly, making it an economical choice for learning and small projects.
Bambu Lab A1 3D Printer

| Build Volume | 256 × 256 × 256 mm³ |
|---|---|
| Max Speed | 500 mm/s |
| Max Acceleration | 10 m/s² |
| Supported Filaments | PLA, PETG, TPU, PVA |
The Bambu Lab A1 is a beginner-focused FDM 3D printer that automates much of the setup and monitoring so novices can get usable prints quickly. It performs full-auto calibration for Z-offset, bed level, vibration resonance and nozzle pressure, which reduces fiddly manual tuning between jobs. The printer is built for speed and consistency, using low-drag linear rails, an advanced motion control system, accelerometers and a nozzle pressure sensor together with active flow-rate compensation to keep extrusion stable at higher speeds. Optional AMS lite adds reliable multi-color printing and RFID-synced filament profiles for plug-and-play color jobs. Connectivity includes a cloud service plus a LAN-only mode for privacy-conscious users, and the touchscreen and 1-clip quick-swap nozzle make routine changes straightforward. Limits to note are the open-frame design and the need to add AMS lite separately for multi-color workflows; advanced users wanting an enclosed heated-chamber solution or broader material support may look elsewhere.
Best for: Buyers who prioritize a reliable, low-fuss first printer that consistently produces good prints with minimal manual tuning and easy day-to-day operation.
Less Ideal for: Users who need an enclosed, high-temperature chamber for engineering plastics or those who expect multi-color printing included out of the box.
- Full-auto calibration handles Z-offset, bed leveling and nozzle pressure for minimal setup.
- Active flow-rate compensation and sensors help produce consistent extrusion at higher speeds.
- Supports AMS lite for dependable multi-color printing with RFID-synced filament profiles.
- User-friendly touchscreen, 1-clip quick-swap nozzle and cloud or LAN control simplify everyday use.
- Open-frame design limits temperature control for ABS-style materials.
- AMS lite for multi-color printing must be purchased separately.
Verdict: If you want a beginner machine that minimizes setup and delivers consistent, high-speed FDM prints, the Bambu Lab A1 is a top practical choice.
Creality K1C 3D Printer

| Printing technology | CoreXY FDM |
|---|---|
| Maximum print speed | 600 mm/s |
| Acceleration | 20000 mm/s² |
| Nozzle | Tri-metal nozzle |
| Monitoring | Built-in AI camera |
The Creality K1C is a CoreXY FDM printer designed to prioritize speed and convenience for hobbyists and beginners moving beyond basic kits. It reaches very high nominal speeds (600 mm/s) with high acceleration for faster prints, while features like one-tap auto calibration and a clog-resistant direct extruder simplify setup and routine use. The integrated AI camera provides live monitoring and time-lapse capture, which is useful for catching issues early without standing over the machine, and the activated carbon filtration plus a silent mode help keep operation quieter and less odorous. The tri-metal nozzle and ability to handle carbon-fiber and other high-temperature filaments add material flexibility as skills grow. Expect that achieving the highest speeds will still require tuning and appropriate slicer profiles, and large-format or extremely detailed prints may benefit from slower settings to preserve surface quality. For a beginner who values faster iteration and safety features, the K1C balances automation with capable hardware.
Best for: Beginners who want a more capable, faster FDM printer with automated setup and safety monitoring so they can iterate quickly without constant supervision.
Less Ideal for: Users who need plug-and-play perfection for large-format professional parts or those who prefer a very low-speed machine tuned solely for ultra-fine surface finish.
- CoreXY motion system and high acceleration for much faster print turnaround
- One-tap auto calibration simplifies bed leveling for new users
- Built-in AI camera enables remote monitoring and time-lapse recording
- Clog-resistant direct extruder and tri-metal nozzle support high-temperature filaments
- Effective air filtration and a quiet mode reduce noise and odors during operation
- Real-world print quality at top speeds requires careful tuning and slicer settings
- Large or highly detailed prints may need slower speeds to avoid artifacts
Verdict: If you want a beginner-friendly FDM printer that speeds up iteration with automated leveling and real-time monitoring, the K1C is a strong choice.
Bambu Lab P1S Combo

| Build Volume | 256*256*256 mm³ |
|---|---|
| Max Speed | 500 mm/s |
| Max Acceleration | 20 m/s² |
| Supported Filaments | PLA, PETG, TPU, PVA, PET, ABS, ASA |
The P1S Combo pairs a fast CoreXY motion system with a factory-ready AMS feeder to deliver multi-color and multi-material FDM prints with minimal setup. It ships as an enclosed printer with automatic bed leveling, a direct-drive extruder that broadens usable filament types, and a camera for time-lapse capture, and Bambu Lab says setup can be completed in about 15 minutes. In practice the high top speed and acceleration shorten print times on moderate-sized parts while the enclosed build area helps with temperature-sensitive filaments. The AMS enables up to 16-color workflows when connected and simplifies multi-filament jobs compared with manual swaps. For cautious beginners the guided setup and automatic leveling reduce common failure modes, though high speeds may require some tuning to balance surface finish versus throughput. Also, advanced composite filaments are discouraged. If you want a ready-to-run, multi-color capable desktop FDM printer that emphasizes speed and ease of use, the P1S Combo is a solid choice.
Best for: Beginners who want a ready-to-use desktop printer with guided setup, automatic leveling, and an integrated multi-filament system to reduce frustration and speed up successful first projects.
Less Ideal for: Users who need to print abrasive composite filaments or those who prefer a slow, highly tuned low-speed workflow focused only on surface finish.
- Enclosed CoreXY design improves thermal stability and print consistency
- Automatic bed leveling simplifies first prints and reduces failed jobs
- Direct-drive extruder supports a wider range of flexible and standard filaments
- Built-in camera for time-lapse and remote print monitoring
- AMS multi-material system enables multi-color and multi-material prints without manual swaps
- High advertised speeds can require tuning to avoid surface artifacts
- Not recommended for carbon or glass fiber reinforced filaments
Verdict: The P1S Combo is a fast, beginner-friendly enclosed FDM printer with automatic leveling and an AMS that makes multi-color printing straightforward for risk-averse new users.
Choosing the Right FDM 3D Printer for Beginners: Key Factors to Consider
Ease of Setup and Assembly
How simple a printer is to assemble and configure determines how quickly you can produce usable parts. Beginners benefit from pre-assembled or partially assembled kits, clear step-by-step guides, and straightforward leveling procedures. A straightforward first-time setup means less time fighting hardware and more time learning slicing, filament choices, and print finishing.
Look for printers that include guided calibration wizards, intuitive menu systems, and easy-to-follow documentation. If the printer uses assisted bed leveling or a reliable manual leveling routine, early success rates rise and frustration drops, which improves the learning curve for new makers.
Out-of-Box Print Quality
Initial print quality is a large part of user satisfaction. A machine that produces clean first prints with proper adhesion and fine layer definition helps a beginner stay motivated and supports faster skill growth. Elements that influence out-of-box quality include a flat heated bed, stable motion hardware, and a well-tuned filament path.
Filament compatibility and the included slicer profiles also matter. When default profiles and hardware cooperate, users can focus on design iteration rather than constant trial-and-error with temperatures, speeds, or retractions.
Reliability and Consistency
Reliability reduces the time spent diagnosing intermittent failures. Consistent extrusion, a stable frame, and a smooth filament feed system lower the occurrence of layer shifts, clogs, and poor adhesion. For beginners, predictability is more valuable than peak speed or extreme resolution because it allows steady learning progress.
Consider the quality of motion components and the presence of features that prevent common failures, such as filament runout detection and thermal protection. A machine that prints the same part repeatedly with minimal intervention is a better teaching tool than one that needs constant tuning.
User Interface, Documentation, and Community
A clear, approachable interface shortens the time it takes to perform routine tasks like starting a print, adjusting temperatures, or loading filament. Well-written documentation and tutorial content are essential for troubleshooting and learning best practices. Additionally, an active user community or accessible support resources can make a big difference when beginners encounter issues.
Good documentation should include step-by-step assembly photos, recommended slicer settings, and a troubleshooting section for common problems like first-layer adhesion or stringing. Community forums, guides, and example prints help newcomers learn faster and more confidently.
Maintenance Needs and Parts Availability
Every FDM printer requires occasional maintenance, such as nozzle cleaning, bed surface replacement, and belt tensioning. Ease of performing these tasks and the availability of replacement parts affect long-term ownership satisfaction. Beginners should favor machines where wear parts are inexpensive, easy to swap, and well-documented.
Consider whether the printer uses standard-sized nozzles and belts, and whether consumables like build plates and filaments are easy to source. Printers that allow simple maintenance without specialized tools reduce downtime and keep learning momentum.
Safety Features and Workspace Considerations
Safety is often overlooked by newcomers but matters in home environments. Features such as thermal runaway protection, enclosed electronics, and secure filament paths reduce fire and injury risks. Ventilation needs and the printer's footprint influence where you can safely operate it.
Beginners should assess the recommended operating environment, required clearance, and whether the printer emits odors that need ventilation. Considering these factors up front prevents unsafe setups and helps maintain a comfortable workspace for learning.
Getting Started: First Prints and Quick Wins
Start with small, simple models that test adhesion and dimensional accuracy rather than ambitious multi-part designs. Calibration cubes, single-wall vases, and small functional clips reveal whether your machine and slicer settings are broadly correct.
Use the included sample filament and default slicer profile for initial prints. That reduces variables while you verify bed leveling, extrusion, and temperature settings. Once you achieve a clean first layer and consistent extrusion, gradually move to more complex parts.
- Print a single-layer adhesion test to verify bed level and surface contact
- Run a small calibration cube to check dimensional accuracy
- Try a temperature tower to dial in filament temperature if prints show stringing or poor layer bonding
Slicer Basics and Recommended Settings
Slicer software translates 3D models into toolpaths. Learn the most important settings first: layer height, print speed, print temperature, bed temperature, retraction settings, and cooling. Begin with broader layer heights and moderate speeds to improve success rates.
Save working profiles as starting points. When tweaking one variable, change only that parameter and run another test print so you can attribute improvements or regressions to a single change.
- Start with a 0.2 mm layer height for a balance of speed and detail
- Use moderate speeds (40 to 60 mm/s) for most prints to reduce mechanical issues
- Enable part cooling for PLA-like materials; limit cooling for ABS to reduce warping
Common Issues and Practical Fixes
Common early problems include poor first-layer adhesion, stringing, and extrusion inconsistency. Address adhesion with a leveled bed, correct nozzle distance, and a clean build surface. For stringing, modestly increase retraction distance or speed and adjust print temperature down in small steps.
For extrusion issues, inspect the filament path for snags, check that the nozzle is not partially clogged, and verify that the extruder gears are properly tensioned. Routine checks of belts and pulleys prevent layer shifts and mechanical artifacts.
- Clean the build surface and remove oils with isopropyl alcohol
- Re-level the bed after any transport or major maintenance
- Replace worn nozzles rather than trying to force prints from a compromised nozzle
Upgrade Paths That Matter for Beginners
Not all upgrades are worth pursuing early on. Focus on improvements that increase reliability or reduce maintenance time, such as better bed surfaces, an improved extruder mechanism, or a filament runout sensor. These changes can make printing more predictable without requiring advanced skills.
Avoid complex mods that introduce additional variables, like nonstandard hotends or fully custom motion systems, until you have a firm grasp of slicer behavior and mechanical tuning. Small, reversible upgrades that preserve the original hardware and profile ecosystems are best for learning.
- Add a wiggle-free build surface or magnetic spring steel sheet for easier part removal
- Consider a better parts cooling fan shroud if overhangs are a frequent issue
- Install a filament guide or simple spool holder to prevent tangle-related clogs
Setting Up a Practical Workspace
Create a dedicated area with stable, level furniture, adequate lighting, and airflow. Keep tools, spare nozzles, and common consumables nearby to reduce interruptions. If your printer emits odors with certain filaments, plan for ventilation or use odor-minimizing materials indoors.
Maintain good cable management and keep the build area clear of flammable clutter. A fire extinguisher rated for electrical fires and a smoke detector in the space are sensible precautions for any active workshop.
- Reserve a firm table or bench that does not vibrate
- Store filaments in sealed containers with desiccant to reduce moisture issues
- Label common tools and parts to streamline routine maintenance
How We Chose the Best FDM 3D Printer for Beginners
We focused on features and attributes that matter most to people stepping into filament-based 3D printing. Primary evaluation criteria included build reliability, ease of setup, and out-of-the-box print quality. We also assessed user-friendliness of the interface and documentation, how simple maintenance and filament handling are, and the presence of safety features appropriate for hobby and home workspaces. Hardware aspects such as heated bed performance, frame rigidity, and filament feed system were weighed because they directly affect first-layer success and print consistency. We favored machines with stable ecosystems for replacement parts and simple upgrade paths to extend learning without requiring immediate heavy modification. Exclusions: we did not include industrial machines, resin printers, or devices that require extensive technical tuning before producing acceptable prints. The resulting shortlist highlights printers that minimize early friction while still exposing beginners to the essential skills of slicing, bed leveling, and part finishing.
Our full evaluation process is outlined in our review methodology.
FAQ
How much assembly is typical for beginner FDM printers?
Many beginner FDM printers arrive partly assembled, requiring only frame attachment, electronics hookup, and a simple calibration routine. Fully assembled models reduce setup time, but basic assembly can be a helpful learning step when supported by clear instructions.
Which filament should I start with as a beginner?
PLA is usually the best starting filament because it prints at lower temperatures, adheres well, and produces minimal odors. It tolerates modest mistakes and helps you learn bed leveling, adhesion, and slicer basics before trying higher-temp materials.
How often should I level the bed?
Leveling frequency depends on how often you move the printer or perform maintenance. For a stationary setup, check the bed every few weeks or after any part replacement. If you transport the machine or notice first-layer problems, re-level before the next print.
Can I use smaller printers for functional parts?
Yes. Smaller-bed FDM printers can produce robust functional parts, but you may be limited by build volume. Print orientation, infill percentage, and layer bonding matter more than sheer size when part strength is the priority.
What basic maintenance should I expect?
Expect routine nozzle cleaning, belt tension checks, occasional bed surface replacement, and keeping the filament path free of debris. Regularly inspect moving parts and follow the manufacturer-recommended lubrication schedule if applicable.
Final Verdict
Beginners should prioritize machines that minimize initial setup friction and produce dependable first prints. Focus your decision on ease of setup, reliable first-layer adhesion, and clear documentation so you can develop skills without constant troubleshooting. Expect to trade off extreme print speed or advanced features for simplicity and predictable behavior. Choose a printer that fits your workspace, supports the filament types you intend to use, and offers a straightforward maintenance path so you can learn progressively and confidently.